The Shape Test

A paper cube that Oliver made after the paper experiment led to a discussion about 3-dimensional shapes.

The team wondered about the strength of paper shapes and decided to test their theories.

The team wondered:

  • if some paper shapes were stronger than others.
  • which shapes they could make to test their theories.

The team recalled a previous learning experience of going on a shape hunt and decided to refer back to the activity to choose the 3-dimensional shapes they wanted to make and test. When choosing the shapes Oliver stated, “Sphere is impossible for me cause how can you fold the paper round. I want to make a cylinder!”

Eli pointed at the pentagonal prism, “I want to make that one.”

Having thought about their options for paper, they decided to choose card stock instead of paper for their test as they believed it would be stronger than the A4 paper.

Oliver made his first paper cylinder by rolling up the paper and fastening it with tape. However, he quickly noticed that the edges weren’t flat and realised that this would impact the test. He decided to make a second cylinder, taking care to keep the edges of the shape levelled. During testing, Oliver discovered that the top and bottom edges of his first cylinder were not stable enough, so he decided to make a new cylinder.


Having looked at the pentagonal shape, Eli realised that to fold a pentagon, he needed to divide the paper into five equal parts. Eli initially used a ruler to draw lines but found that the width of one ruler was too narrow, which resulted in a lot of extra space at one end.

Then, decided to use the width of two rulers, but each section was too wide and there wasn’t enough space on the card for 5 equal sections.

Eli shared this challenge with the teacher, explaining that he wanted to divide the long edge of the paper into five equal parts.

Having heard Eli’s challenge, the teacher decided to bring Eli’s attention to the concept of measurement to think about what he already knows about the function of hash marks and numbers on a measuring tool.

Ms. Eileen “How long is that edge? How did you measure it?”

  • Eli thought about this and then pointed to the ruler and said, “Use ruler.”

Eli used the ruler to solve his measurement challenge, learning that the length of the paper was about 30 centimetres.

Ms. Eileen “How can we divide 30 into 5 equal parts?”

Eli found the unit cubes and counted out 30 unit cubes to represent the 30cms. Then, he divided them into 5 equal parts, with each part being 6cm.

Finally, Eli drew out the lines and folded his paper pentagonal shape for the test. The researchers were now ready to test their shapes!

The team decided to choose books that were of a similar size for their test. As they placed one book at a time on the shapes, they began to see that although the shapes were made with paper, they were extremely strong.

The team had enough books to reach a total of 19 books for each shape. Then, they ran out of books!

As they didn’t have enough of the same books in the classroom to support the progression of the experiment, they decided to test their shapes in the library.

The team’s paper and shape experiments have allowed them to think about the function of shapes and materials in design and engineering and the impact of forces like compression and tension that act on structures. Through their experimentation, they continue to explore how the design can impact the strength and stability of structures.


The Gift – Coming together to build and create. 

Ms. Eileen had placed an order for new crayons and markers. We were surprised to learn that the supplier also sent us a gift! The gift was a new easel. However, the easel needed to be assembled. We placed the materials and tools in the classroom for the children to decide what they wanted to do.

  • Wyatt “What is this?”
  • Oliver “It is for us. We have to fix it.”

The next day, we left the materials on the floor and invited the children to problem-solve.

3 children offered their expertise. They gathered the materials and began to look at the instructions. The team of furniture assemblers began their work, taking turns, sharing ideas and tools and working to assemble the new easel.

The bell rang for break time play, but one child decided that he wanted to continue his work. He worked on the task throughout playtime.

The rest of the team came in after play and continued their work.

They persevered, looking through the instructions to learn about the different parts and tools to know how the easel was put together. In the end, they were excited to test it out.

The other children celebrated their accomplishments and thanked them for their hard work and dedication to the task.

We noticed the interest the children had in assembling and building. We noticed how they paid close attention to the instructions, and skilfully worked to assemble the piece of furniture.

We wonder how they might use these skills in new situations.

Approaches to Learning (ATL’s) 

  • observe carefully
  • analyse and interpret information
  • listen actively and respectfully to others’ ideas and listen to information
  • negotiate ideas and knowledge with peers and teachers
  • play cooperatively in a group: sharing, taking turns, helping
  • be aware of own and others’ impact as a member of a learning group
  • choose and complete tasks independently
  • follow the directions of others
  • share responsibility for decision-making
  • demonstrate persistence in tasks
  • use strategies to problem-solve

The Pipes – How can we make the balls go faster?

We have noticed the children playing and experimenting with the PVC pipes.

  • Liz “This (the slide) is so long it goes to Ms. Hannah’s class.”
  • Eli “I was balancing the crystals. Looking which one is more heavier.

  • Because the side will fall down if it is more heavier.”
  • Howie “I made a tunnel, the balls can go inside.”
  • Morning “Me and Wyatt building the blocks.”
  • Eunbyul “It’s no heavy, it’s no long. If it’s not too low the ball goes faster. The slide is faster and the ball is faster.”
  • Motong “When the slide is tall, the ball will go fast. Next, I want to make a hotel with the slide. I want to make it alone.”
  • Eli “Next, I want to make a slide that goes straight, like a mountain, then the ball will go down and up and fall down. Then, I will put a stop there.”

A group of K1 children wanted to borrow the ramps during indoor playtime. The teachers paused to observe and document (video) a group of children from different classes building and testing new designs.

They collaborated with each other, sharing the materials and using their imagination to extend their play.

The next day, we watched the video and discussed their structure.

What did we notice?

What theories do we have?

  • Eunbyul “The ball jumped out of the pipe.”
  • Eli “Because there was something blocking it and it went over the side. The ball fly out. They can put nothing on the track.”
  • Lydia “The ball is come down from the house. Keira and Jacob and me.”
  • Eli “The ball will go faster if it is more uphill.”
  • Eunbyul “Very long is very fast and it will go up, down and out.”
  • Motong “Very tall is very fast.”
  • Eli “Because it has more time to go fast.”

The children shared their theories about speed, height, distance and obstacles.

How might they use their insights as they build and create their new structures?

Ramps: The Prototypes

The children have been using a range of materials and manipulatives in the construction area to consider the concepts of height, speed, forces, and energy.

As part of this investigation, a team of young designers have been planning, designing and creating prototypes of ramps in their design class. The team began by discussing their ideas and creating a plan for their slides.

They know that designers need to source and test materials for different purposes and make choices about the materials they use for projects.

After careful consideration, the teachers decided to offer the children ‘clay’ as a material for the structure. Clay is malleable and easy to use when creating structures yet offers many opportunities for challenge and problem-solving. The children tested the different tools, making careful decisions about the size, height, width, and foundation of their structure.

While creating, the young designers followed the natural cycles of design as they planned, created, reflected and improved their structures. Through trial and error, the children have reached the first stage of their design work.

Design

Through this experience, the children had opportunities to:

  • identify needs and opportunities for designing, through exploration
  • generate ideas from their experiences and interests
  • add to others’ ideas
  • choose an idea to pursue

Design Learning Outcomes:

  • choose tools and materials
  • make a product using known procedures or through modelling of others
  • use trial and error to make changes, solve problems, or incorporate new ideas from self or others
  • develop their skills and add new ones through play and collaborative work
  • explore the use of simple, available tools and technologies to extend their capabilities

The Egg Experiment – A Story of Research

A Story of Research

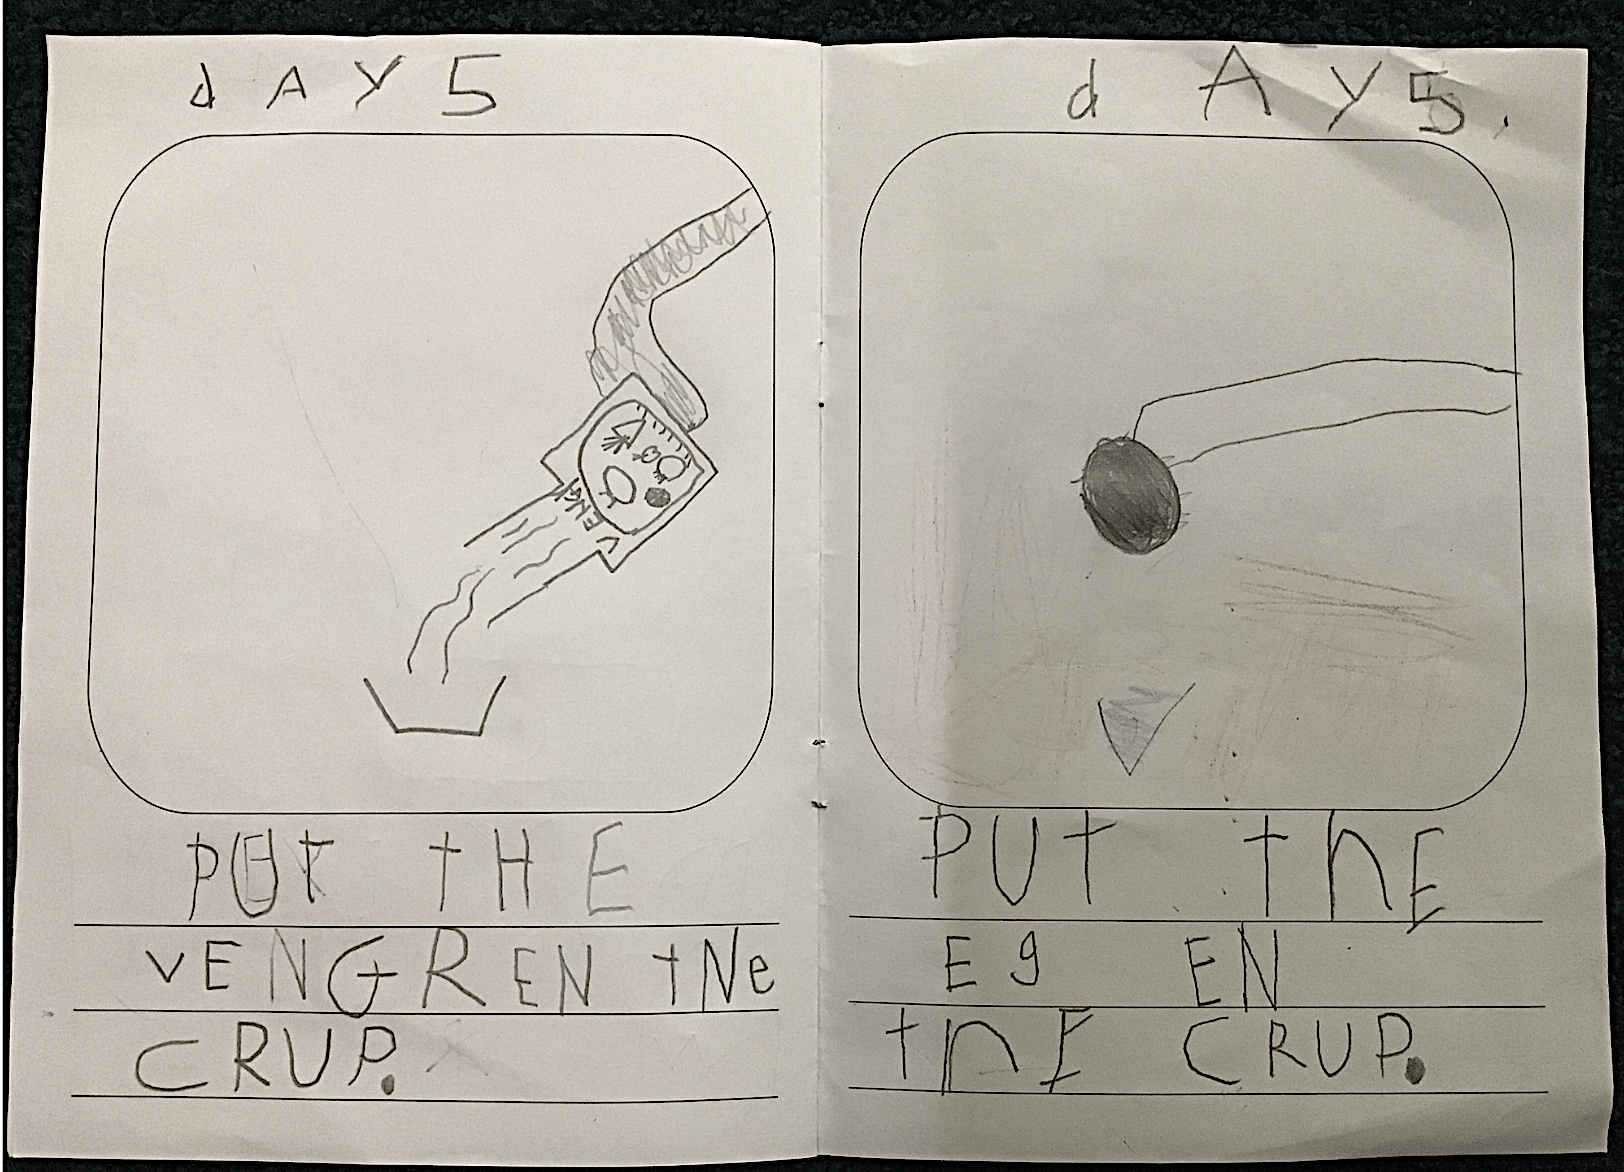
@O had a book full of experiments. He described one to the teacher explaining “The egg becomes soft when it is in the water for 3 days!

  • Teacher “Hmmm, is that so, well can you prove that?”
  • Child “Yes! I can show you!”

He began to make a plan, thinking about how he might share his theories and document the process and findings over time. He drew out his plan, made a list of needed materials, and shared the steps to be taken to complete the task.

At first, the child insisted that the egg needed to be submerged in water. He planned and experimented, even though he subsequently learned that the liquid should be vinegar for the experiment to work.

The teachers encouraged him to complete his first experiment, to observe and document his learning and the outcome of his experiment, to encourage the child to develop the ability to carry out tasks, and to learn through experience.

The child agreed, and documented his observations in his journal, learning new words, and referring to the sight words flash cards to help him spell unknown words.

He labelled his pictures and included details to share the process with others.

He learned how to revisit his journal post on Seesaw, editing and including his daily observations to document his experiment.

The child was excited to begin his second experiment, feeling confident that he knew the outcome.

Through this experience, he practised patience, resilience and learning through ‘trial and error‘.

He questioned to learn more, used observation to gather information and explored patterns and connections. The child used mark-making to share his observations and presented his findings to the community, all important skills, and processes that scientists need in their work. 

Exploring Patterns with @M

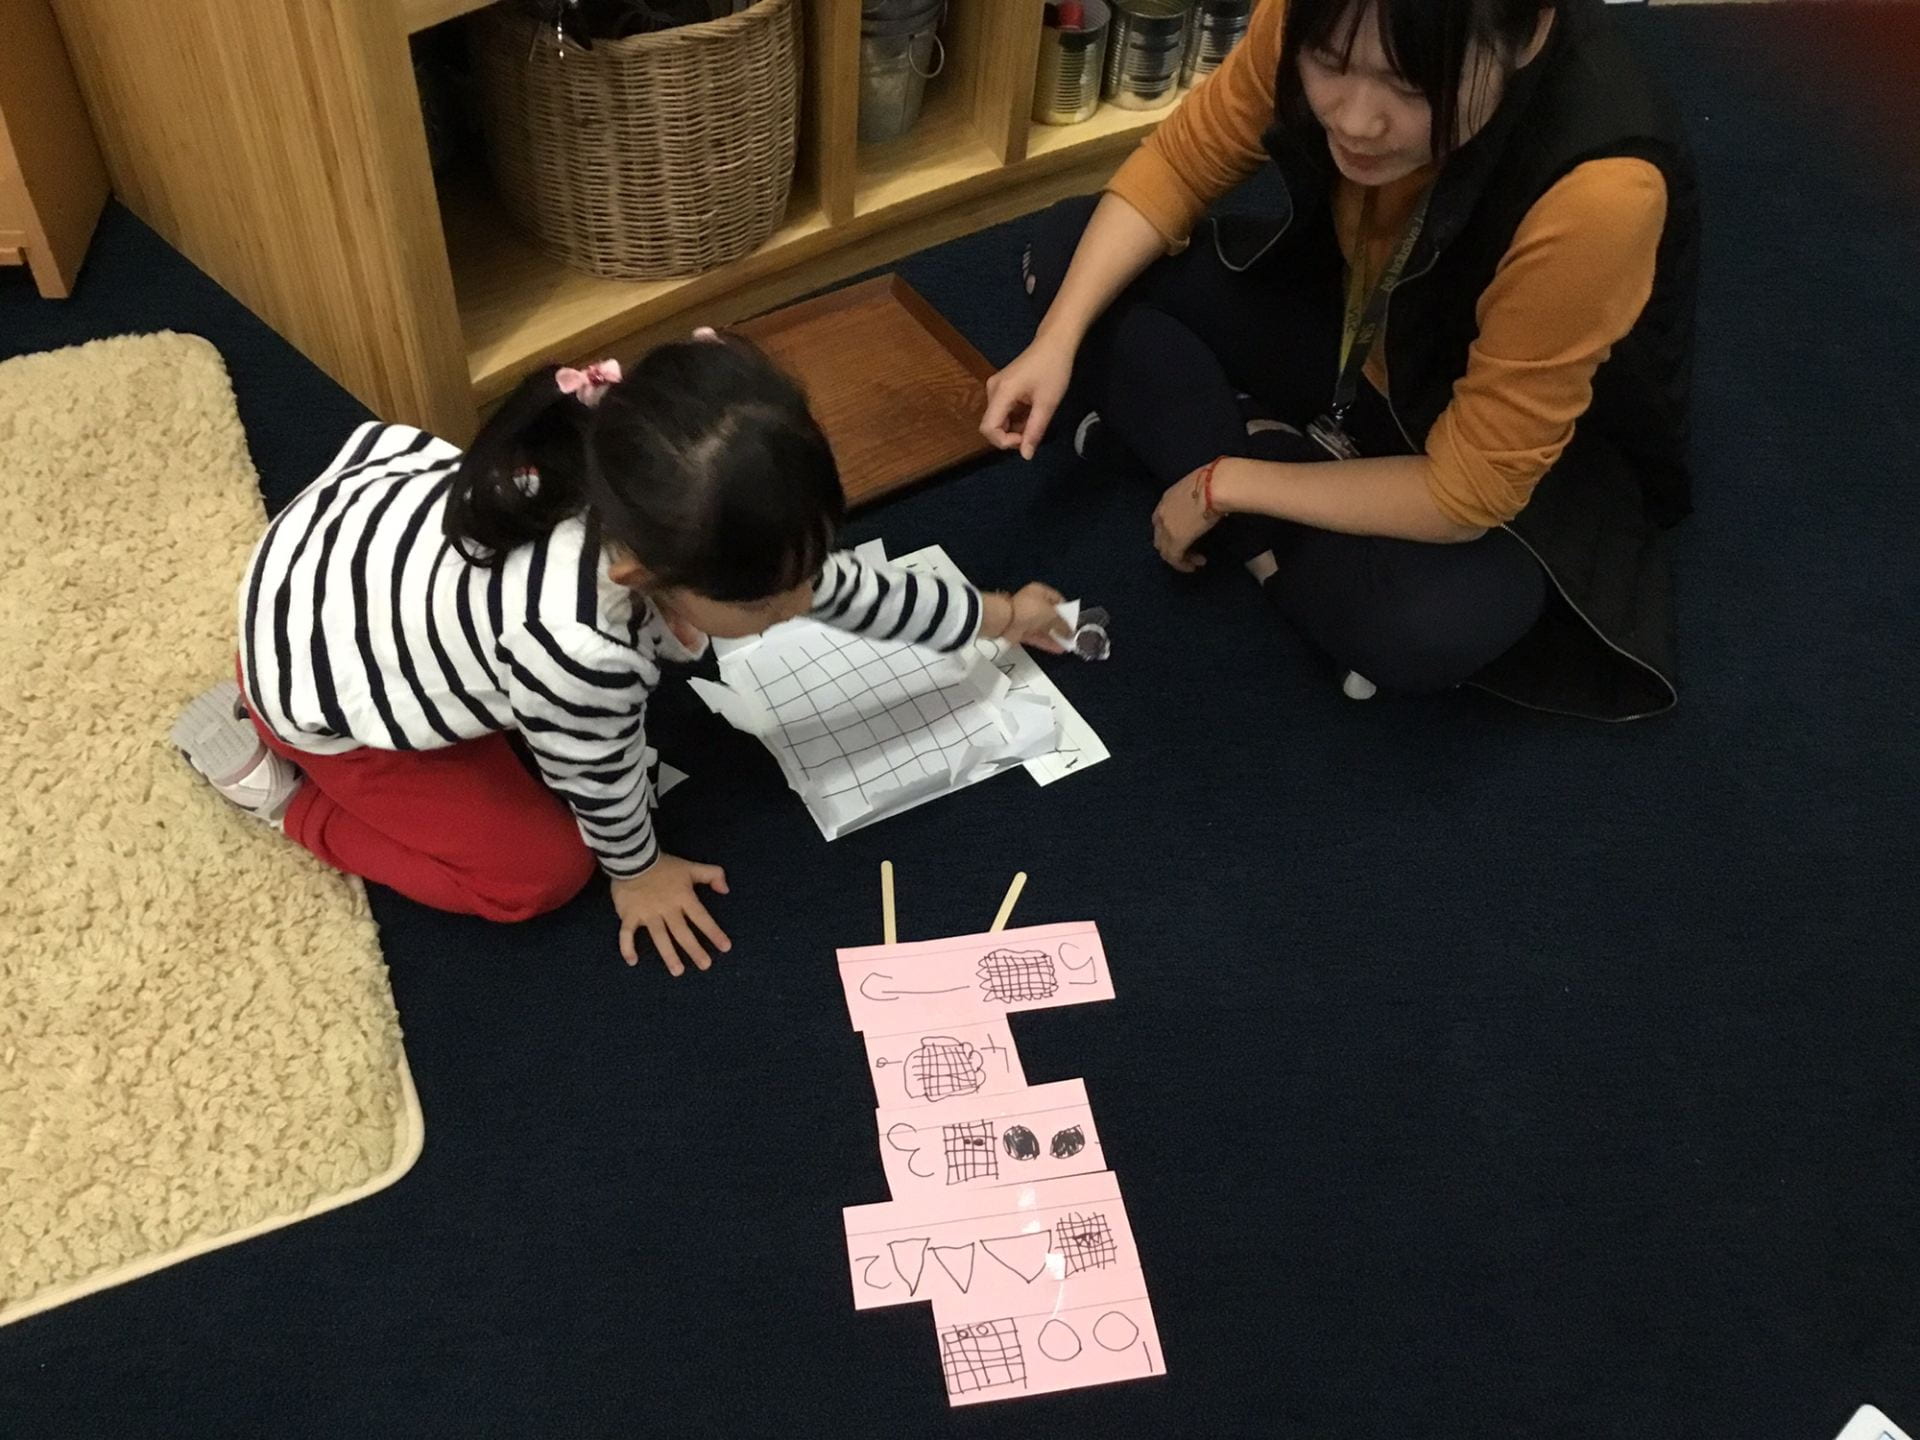
One morning during quiet exploration time, @M chose a piece of paper from the recycled basket to make a new creation. He began by (carefully) using a ruler to make straight lines to create a border. Then, he used markers to create pattern towers. This reminded the teachers of the pattern exploration the children had engaged in the day before, where they used Unifix cubes to create colour patterns.

We noticed how @M drew and labelled his ‘pattern unit’ for each new pattern. He had his own rules which were communicated using blocks with numbers and colours. @M tried to think of a unique pattern each time he drew a tower of cubes.

@M sat with his task till he filled his paper with different patterns. When he revisited the patterns and checked them for accuracy, he noticed some errors. He paused to think about the different ways he might correct the mistakes.       

@M first strategy was to cross out the mistake. The next was to add additional cubes to continue the pattern correctly.

As he progressed with his pattern work, he began by creating the pattern unit before making the patterns. His two final patterns were red, orange, yellow, and red, pink and yellow.

Finally, @M drew a column of colours and a second column with question marks. This was to ask others if they could name the colours.

He explained that it did not relate to the patterns that were on the paper.

As we explore patterns in the world around us, we wonder which ones will capture @M‘s interest.

We wonder how he might document patterns in nature…

Our exploration continues…

Block Play with Howie and Eli

A group of children worked on their block structures over a sustained period of time, creating plans, solving problems and making changes to the initial design to suit their story. The adults observed the interactions and documented their play over time. When the children saw the video, they reflected on their play, discussing their initial plans and process.

Howie “This is we building blocks. And Mo Mo is helping us to build. And I put my name on the house and I was playing with my house. And we is building and we use which car to drive on the tracks.”

Eli “The pictures help me of looking     how to build the hospital and the hotel and that is how I know which pieces is which pieces. I like the hospital and the hotel so I will build it the same as the picture. The building blocks and then putting racing car and then driving them around and then building the T Rex into the hospital and the T Rex mommy into the hospital and we build the all of the race cars and the race road and Mo Mo was helping.”

Howie “I was drawing because I want show us I build and someone comes and he sees my picture and then he can’t touch it. It’s the same make as my blocks because it’s hard to build but it has lots of blocks we can build.”

Eli “I have to remember to build the right pieces we have to write hospital and we have to write hotel. Writing help me learn how to write words. But they all look different (blocks). I think which block I need and then I know which blog I used.”

  • How do we make choices about the materials we use to create?
  • What skills do we need to create a story?
  • What skills do we need to work together?
  • How do we record our planning and thinking (making thinking visible)?
  • How can we share our creations and stories with others?

@M the Artist

Ms. Dora invited the children to create a self-portrait. They gathered their materials; cards, writing tools and a mirror, and sat around the classroom, ready to create their pictures.

@M looked at himself in the mirror. He carefully drew the shape of his face, being mindful of the space he had on the piece of card. He took his time, noticing details and drawing purposefully. Each stroke was a controlled line, curve or shape that was thought through.

@M had moved on to drawing his neck and hands. He looked at his hand in the mirror. He wanted to draw his right hand but he could not seem to position the mirror correctly. He thought about the problem for a while and then decided to move the mirror to the other side. He held up his right hand. He could now see his reflection clearly and was ready to continue his drawing.

After a few strokes on his paper, he would look back into the mirror, hold his hand in a particular position and then sketch what he could see. He continued this process until he was happy with his drawing.

@M carefully completed drawing his right hand. Then, he moved to draw his left hand. The position of this hand was different to the right. He moved his hands around, all the while looking into the mirror, till he was happy with the position. Then, he began to draw.

@M moved to draw the rest of his body. He chose not to take as much time with the parts of the body that were not visible in the mirror. Finally, @M used a thin line marker to trace his pencil lines. He carefully outlined his picture and held it away to check if he had drawn all the lines.  

As @M finished his drawing task and coloured his picture, the teachers observed his focus and attention to detail. @M was able to enjoy, learn and express himself through the arts. He was responsible for the care of tools and materials.

We wonder how @M will use his deep observational skills and passion for drawing and art to document his learning in K2.

The Bike Park Signs

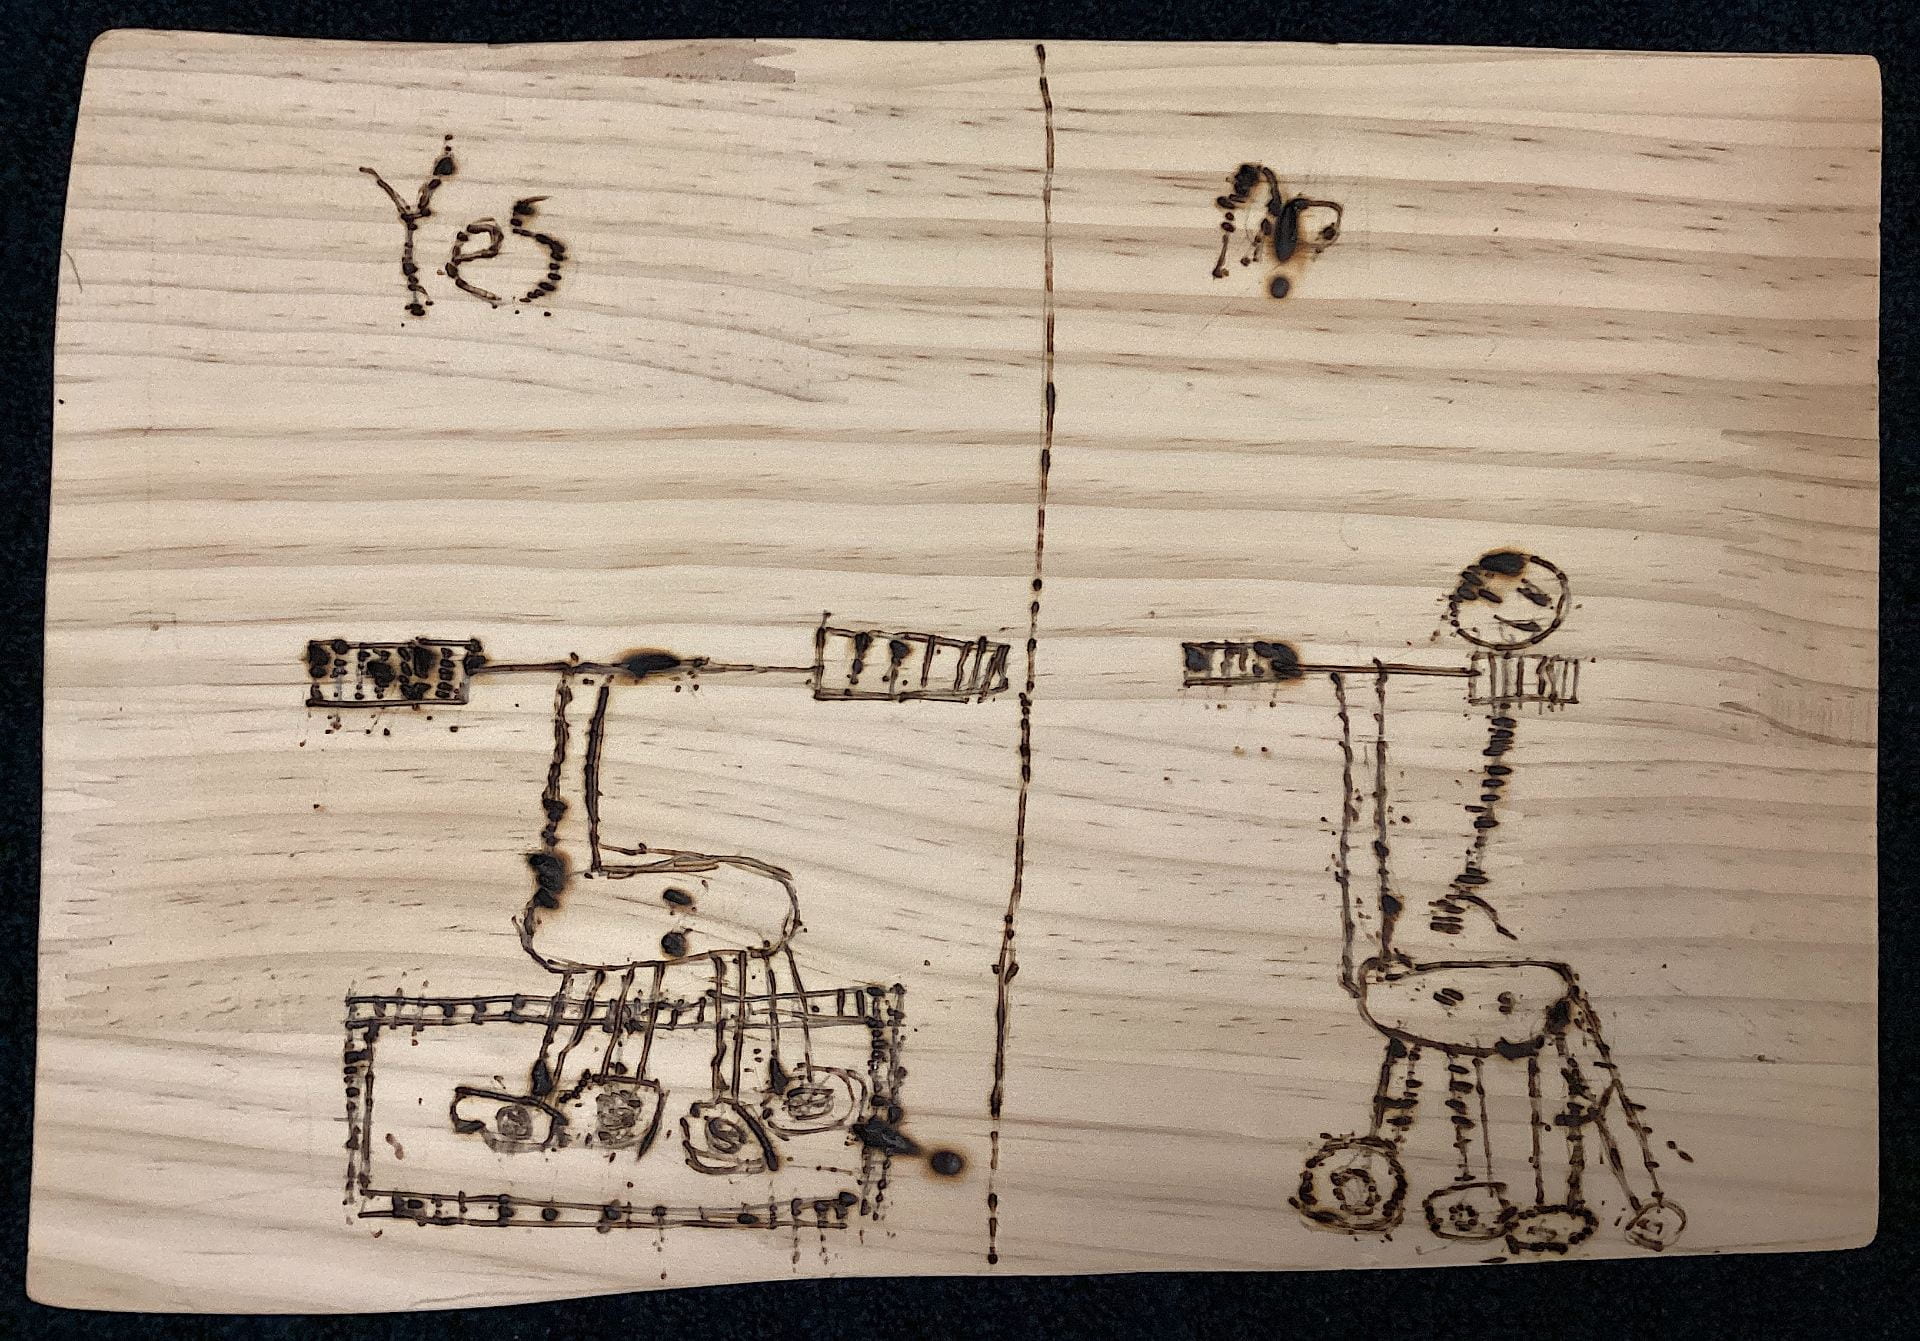
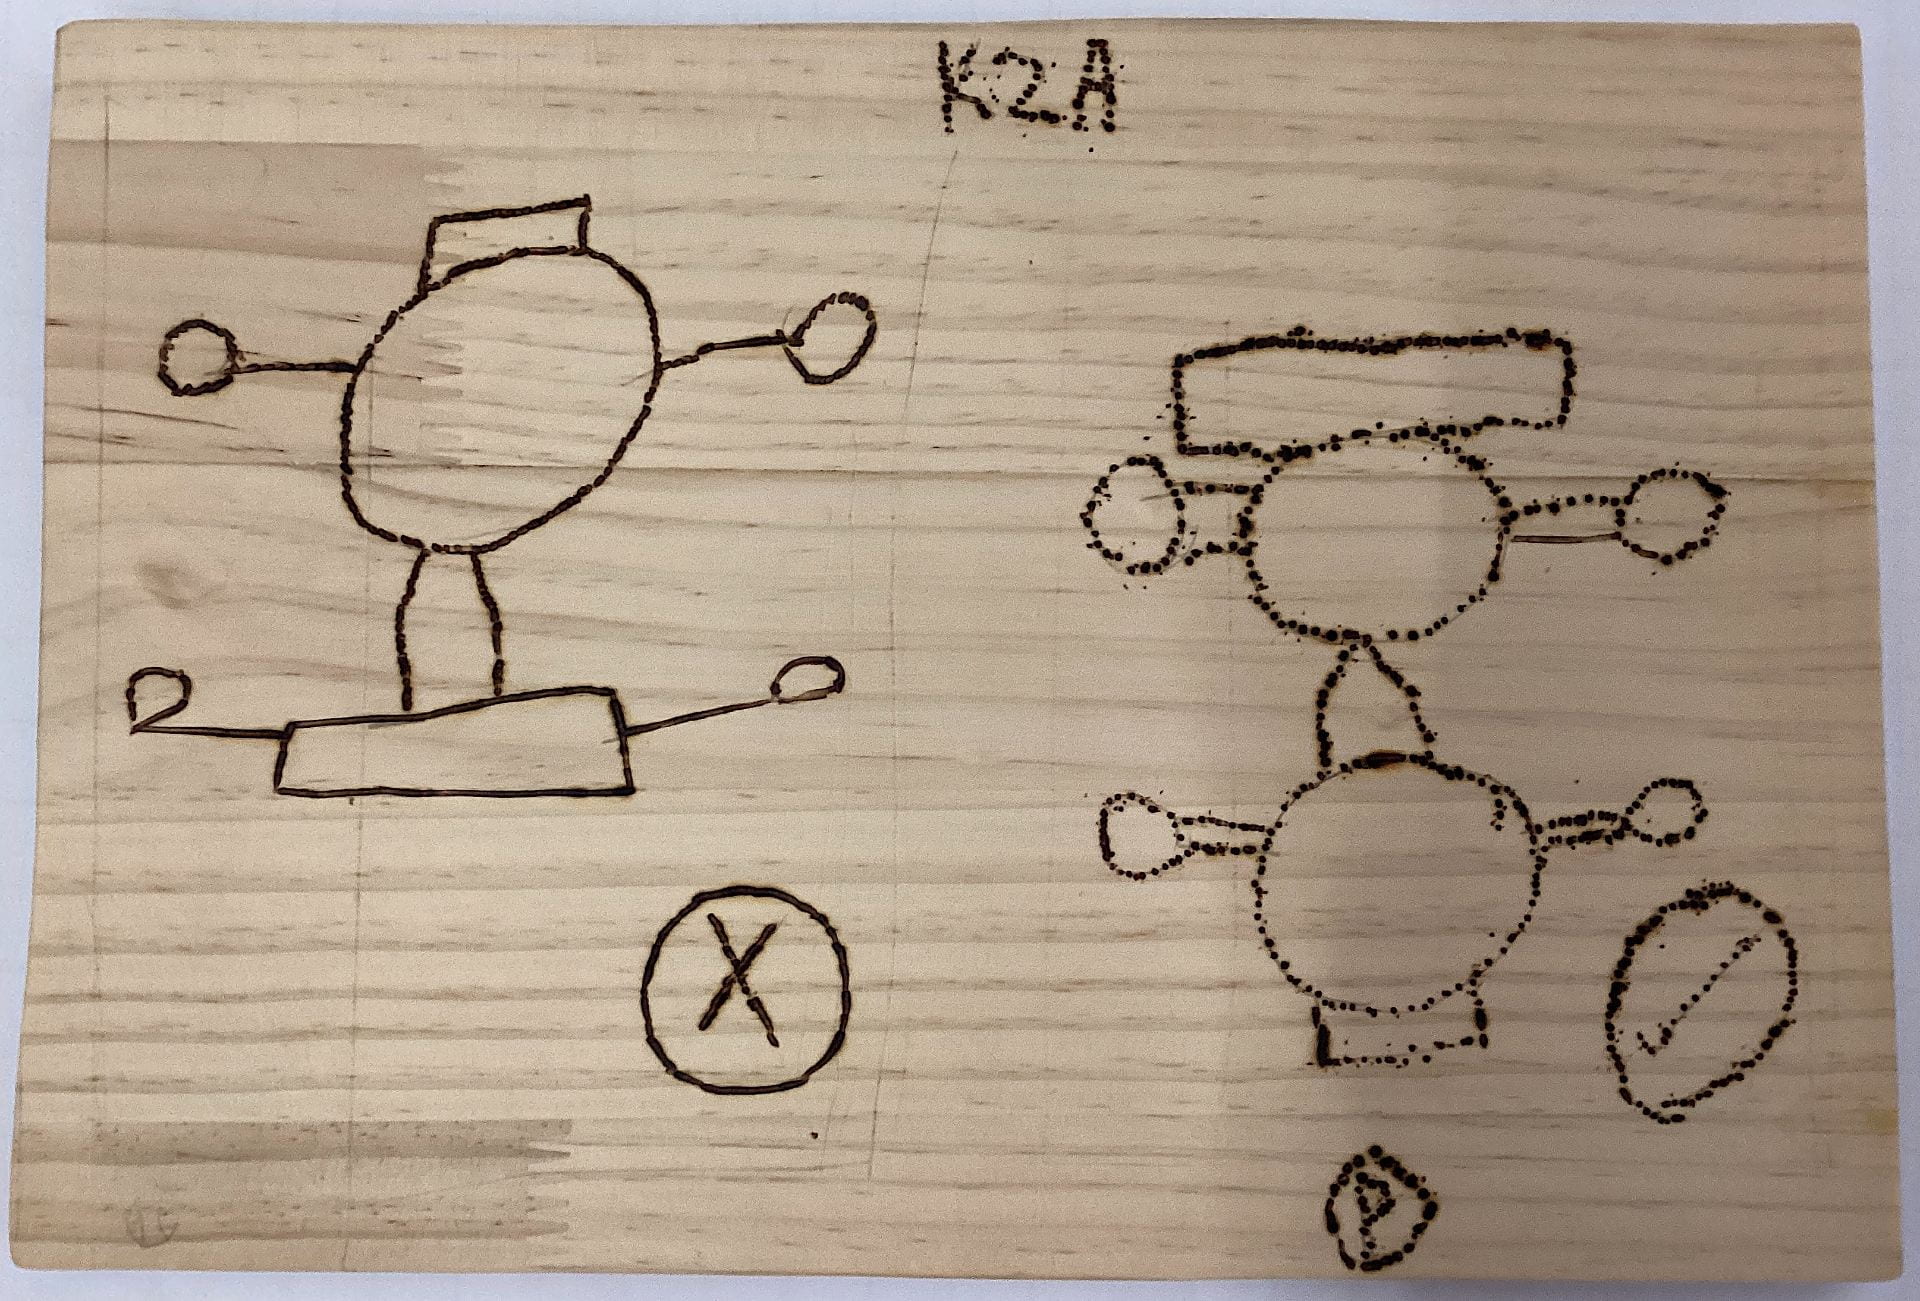
Over the last few weeks, a team of young designers worked together with Ms. Eileen and Ms. Jo, to create signs for the bike park. After conducting their research, they decided to create the signs using wood, as this was a material that could be used outdoors in all types of weather. After considering many options for the message, the team decided to use the wood-burning tool to burn the message onto the wood instead of using paint, markers or other writing tools. 

They began by planning their message out using pictures and words, to inform the early years community how to park the bikes safely in the bike park area. Their pictures served to remind the children where to park and in which direction the bikes needed to be stored at the end of playtime.

The team considered the type of wood and the size of the sign. Then, they used sandpaper to make sure the edges of the wood were smooth. 

They learned how to use the wood-burning tool to burn the messages on the pieces of wood. They had to think about staying safe and focused throughout the task.

Finally, their signs were ready to be mounted in the bike park area. They talked to each other about the best place to put up the signs and what materials they would use to attach the signs in the different spaces. Noah decided that his sign should be placed standing upright in the bike park. Mason, Sean and Eunice decided that their signs should be attached to the wooden fence dividing the play area. The team were proud of their hard work, and were excited to see that the Early Years community were now well informed about safe parking in the playground.

K2 students are aware of the impact they can have on the community. They understand how they can actively engage in various stages of learning: including thinking about, planning, modifying and creating for a purpose. Through active discussion and questioning, they were able to direct their own learning. The ‘Bike Park’ project helped them make connections to the real world. Through a range of experiences, they could consider perspectives, possibilities and outcomes that would benefit the community. They considered their own responsibility in shared spaces, and were able to use their voice and actions to bring a sense of purpose and belonging to these community spaces.

Props, Sets and Costumes

Over the last few days, the storytellers have been working on their props, costumes and set design.

Important choices needed to be made on the size of items, the choice of colours and the materials that would be used. During the process the children were:

  • actively engaged in various stages of learning, including: thinking about, planning, modifying and creating

  • involved in discussion and being self-directed in their creating (as opposed to passive receiving)

  • applying their understanding of concepts through the construction of their projects


  • solving problems and learning through trial and error or experimentation

  • reflecting on their actions and self-regulating in order to complete their tasks safely.

The Bike Project

An invitation to create and build.

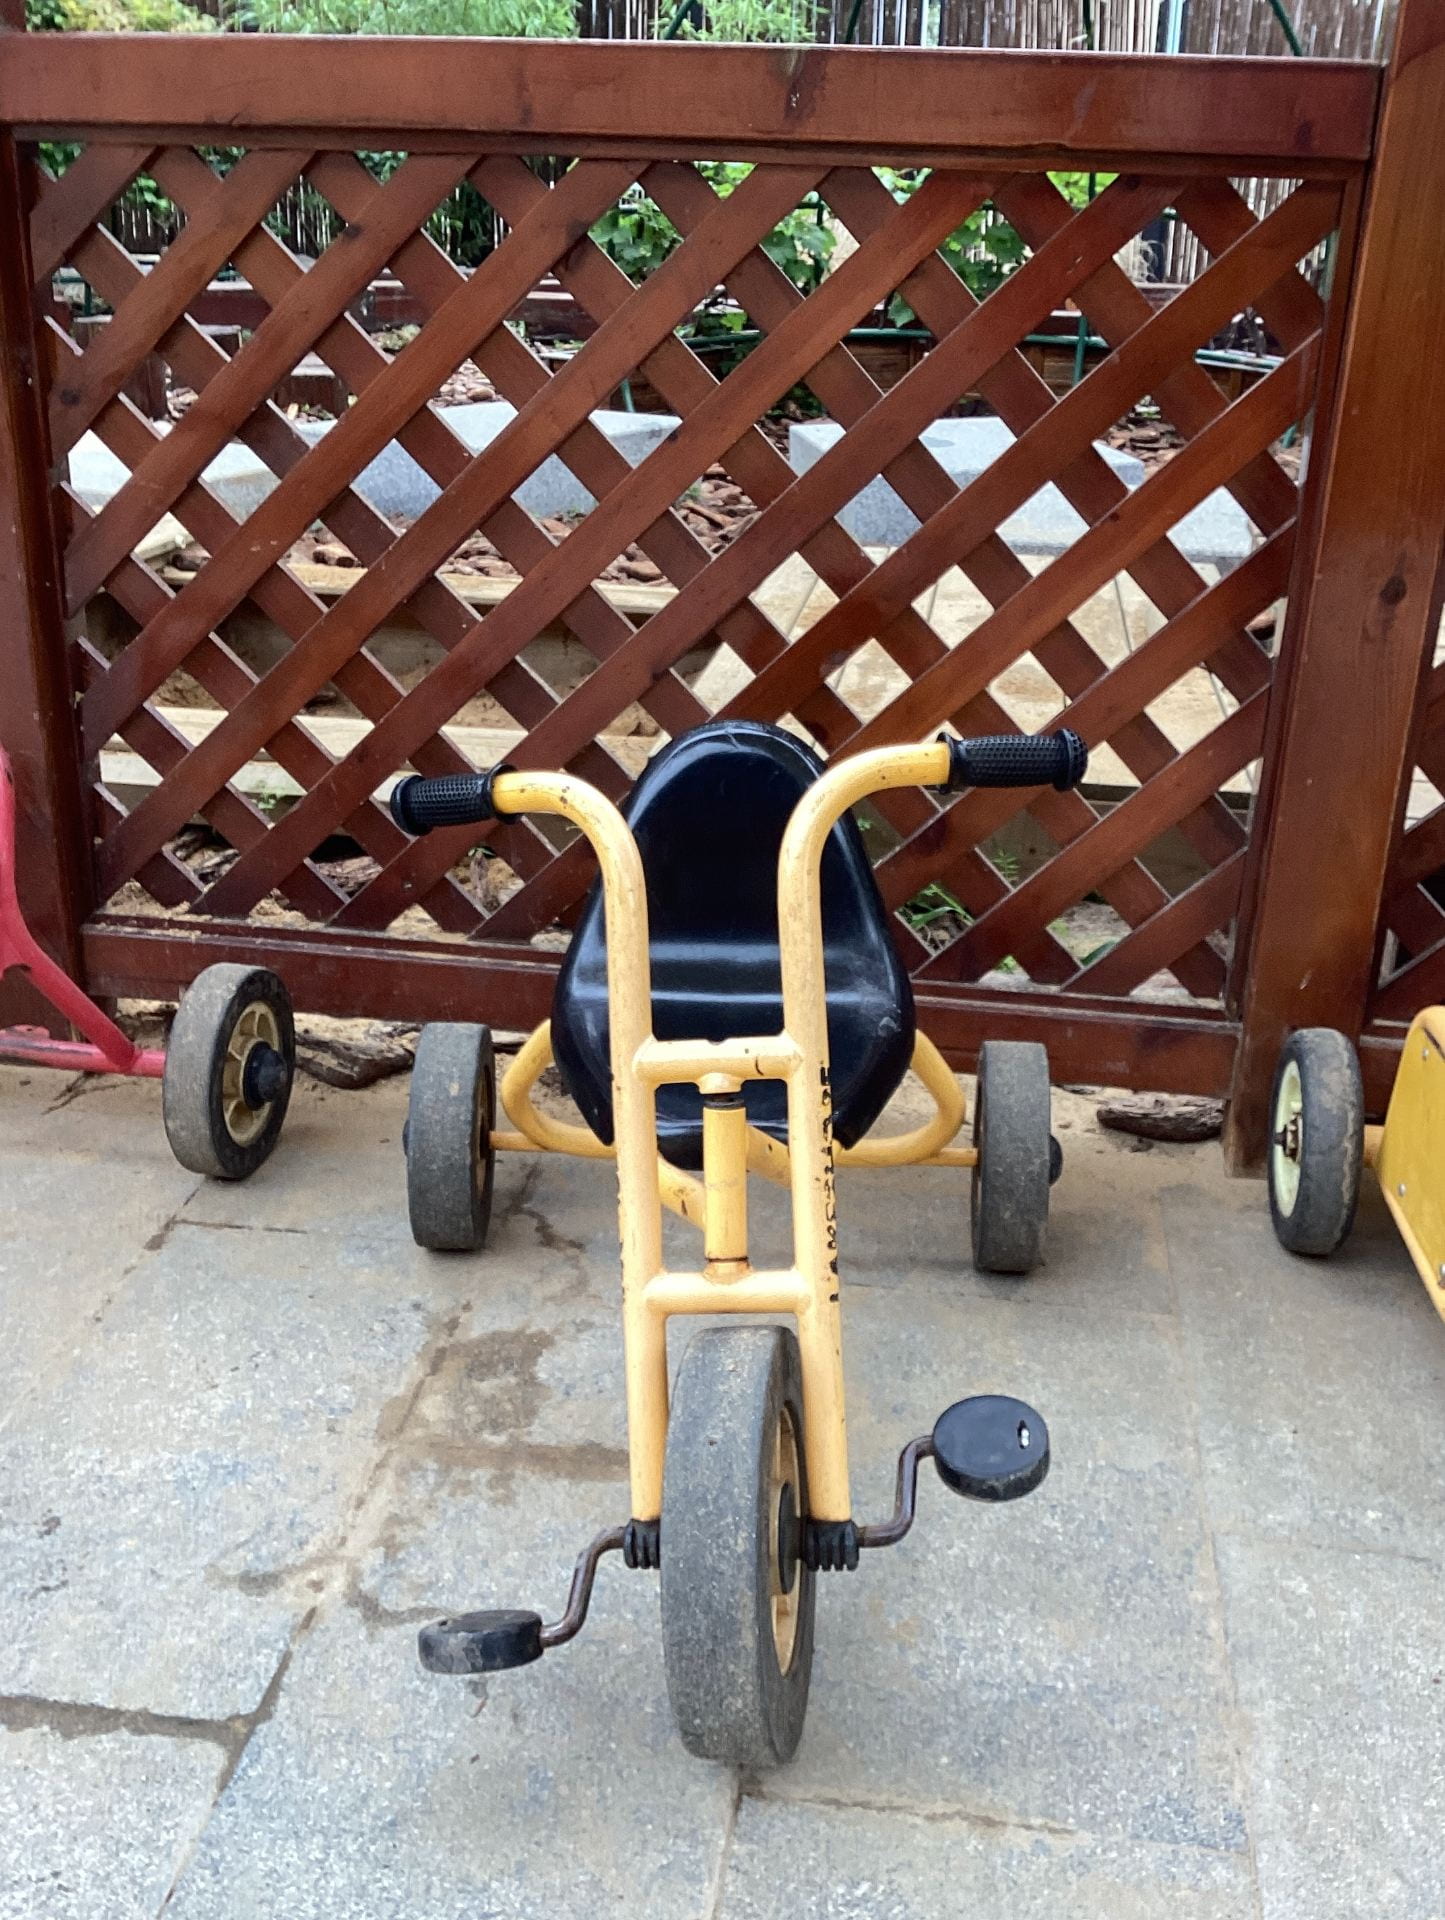
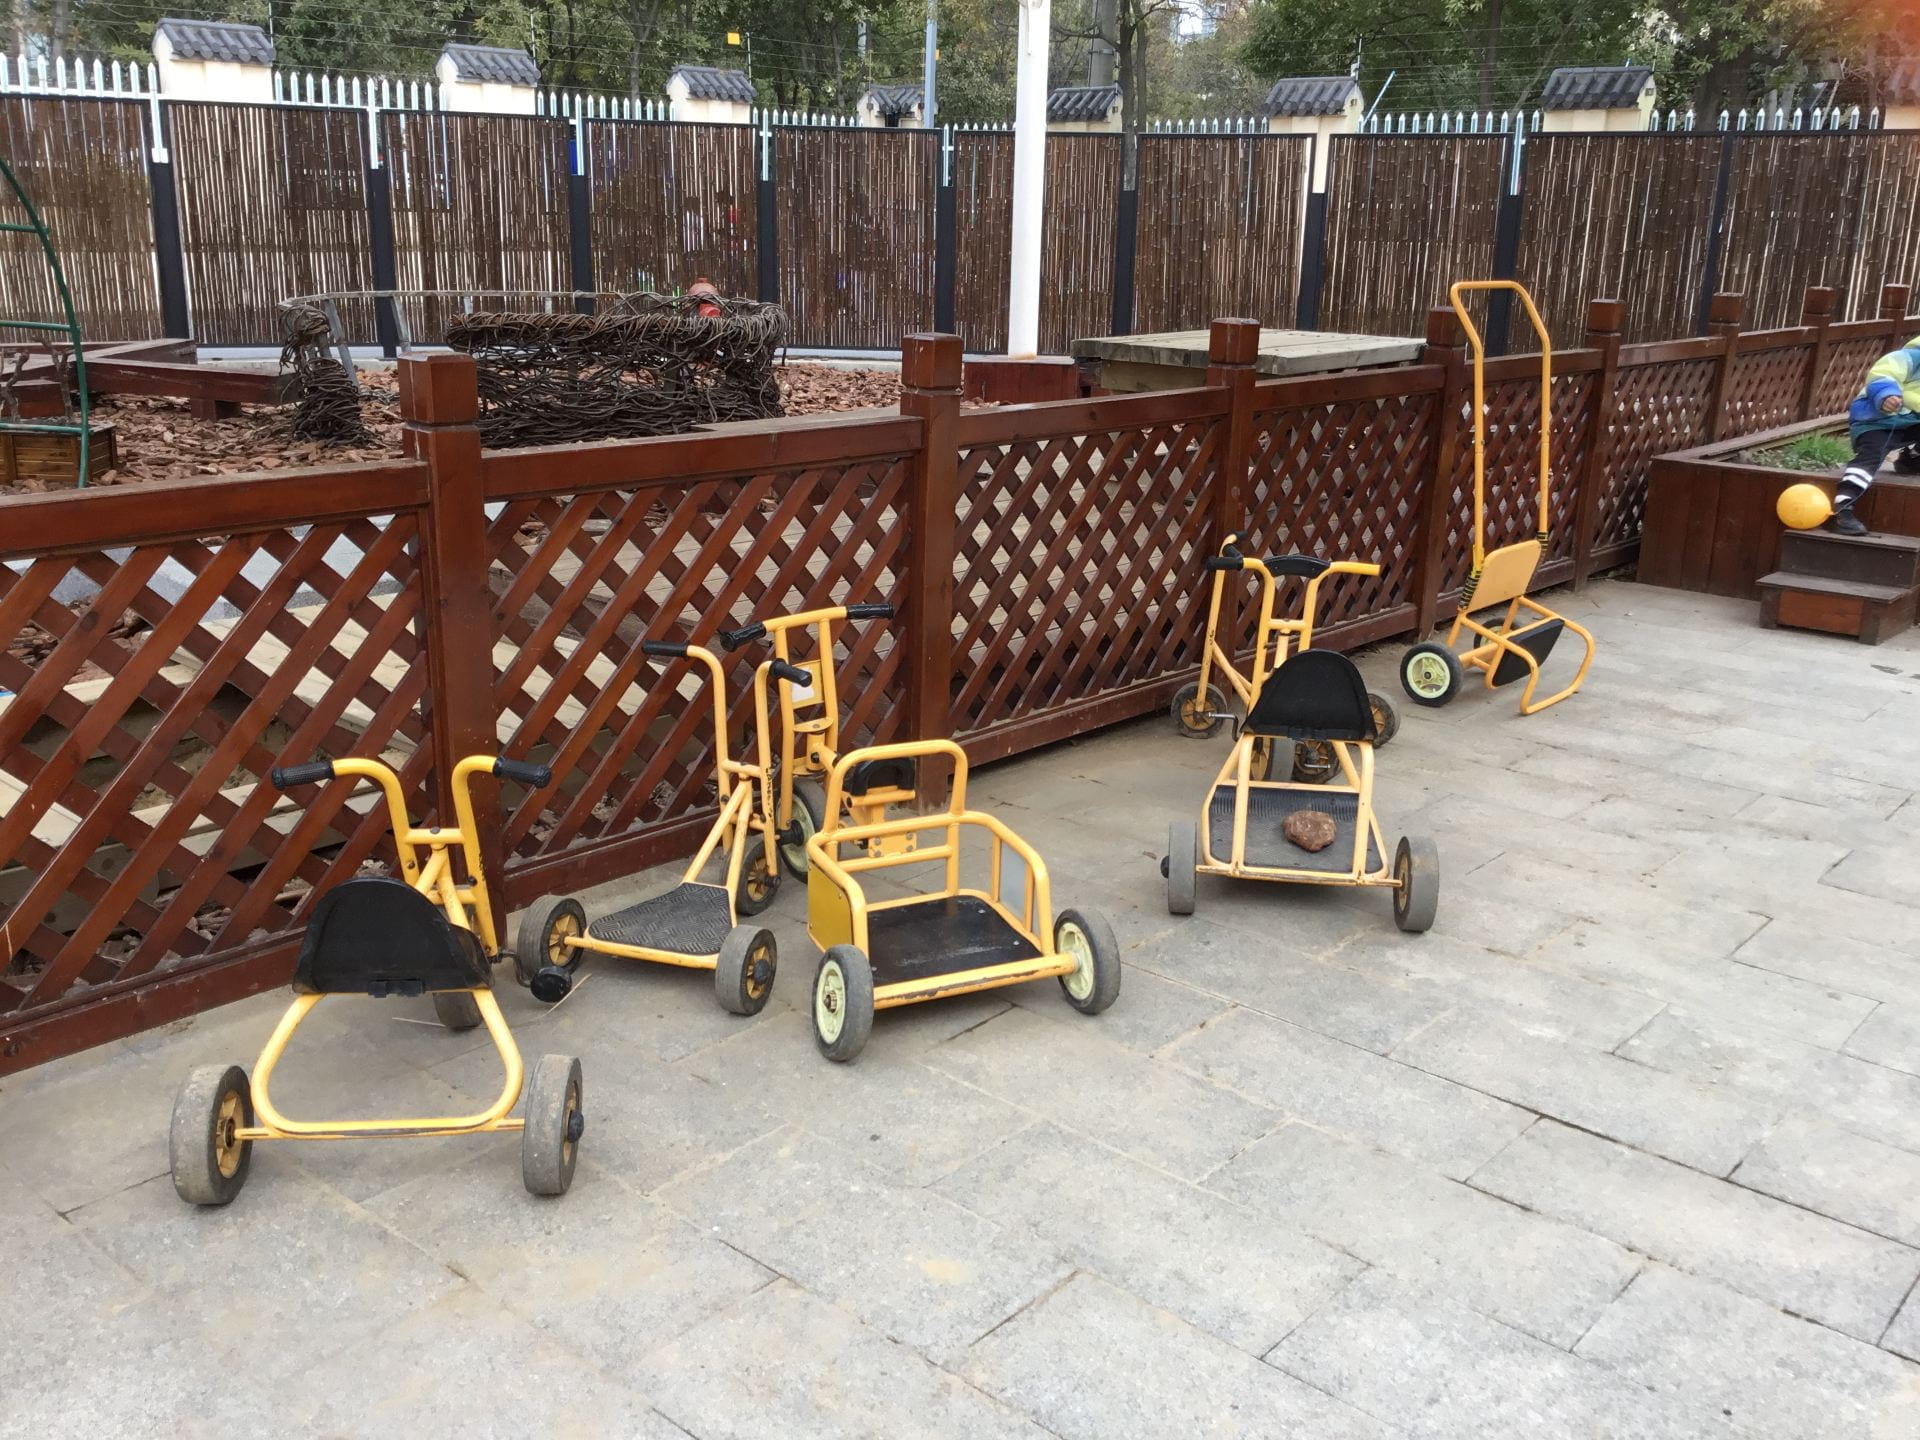
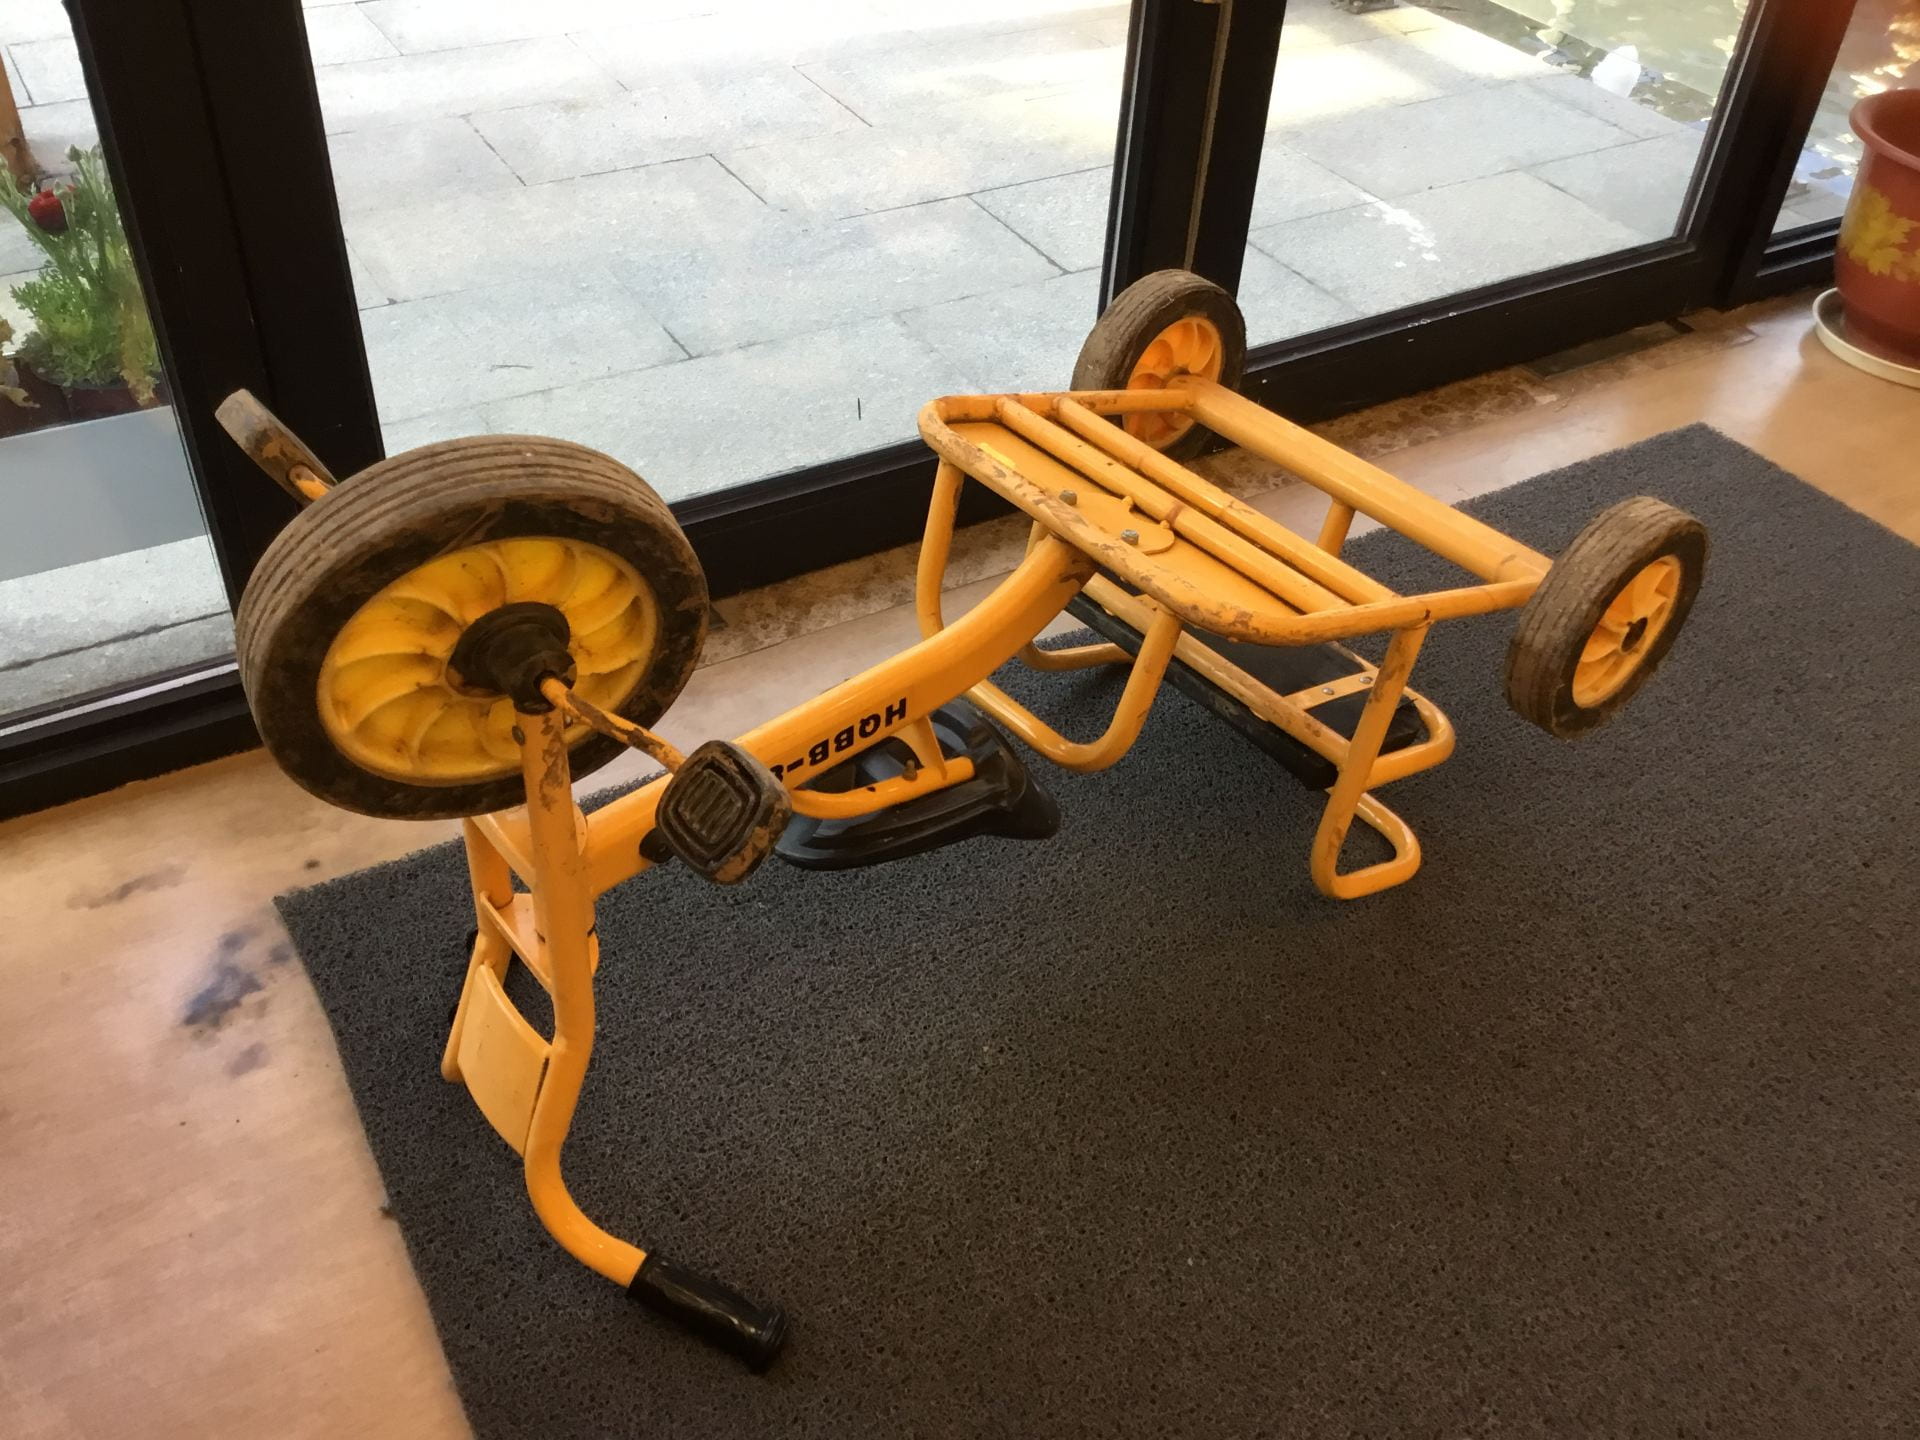
A group of young mechanics went to the Design centre to look for experts who can help them assemble the new tricycles.

Mr. Danny and Mr. B volunteered to help them with their project. Their task was to assemble a bike that was safe and worked well.

The bike mechanics began by looking closely at all the different components that were needed to assemble the tricycles.

The expert mechanics Mr. B and Mr. Danny worked alongside the children, helping them find the correct parts, the appropriate tools and the nuts and bolts that held the structure together.

The tricycles did not include instructions on how to assemble them, therefore, the mechanics had to work together to solve problems along the way. We noticed that the young mechanics asked the adults questions in order to learn more about the process.

They were deeply engaged in their inquiry, collaborating, testing, and thinking as they learned and applied new skills.

Volunteers from the Early Years classes have assembled all four of the tricycles.

They were excited and proud to ride them in the Early Years playground during their breaks.

The process of assembling the tricycles helped the children explore the concepts; structures, materials, mechanics, tools, safety, purpose, design and collaboration.

Action!

Following the project, the children have begun to notice some maintenance issues with some of the bikes and trikes in the playground.

Attention was also brought to how the bikes are parked each afternoon (systems and organisation). We wonder what steps they would take to help keep the bikes organised and maintained. We wonder what action the children may take as a result of their experience (initiative).

The Nest – Prototypes

The young designers made a list of the materials they needed to create their prototypes of ‘the NEST.

In Design, they looked for materials and collected them in paper bags. We noticed how the designers tested the materials to see if they suited their design plans.

Some of the designers arranged their materials on the tabletops, then reconsidered their choices based on the properties of the materials. These are important considerations that designers often reflect on as they create and manipulate materials for a purpose.

The designers began to work on their prototypes. They were encouraged to refer to the shape and design choices they had documented on their plans. As the designers worked with the materials, they talked about their own projects and provided suggestions to their peers. Some of the designers ran in and out of the classroom, revisiting ‘the nest’ to see if their prototypes were accurate replications and improvements to the current structure. The teachers noticed some of the designers reconsidering their initial choice of materials. Through trial and error, the young designers continued to make improvements to the prototypes.

Tracey and Patrick reassessed their designs, reconsidering the materials as well as the structure of their prototypes. Patrick ran to a brick wall to see ‘how’ the bricks were laid, deciding that the pattern was an important consideration.

Sean, Doho, Eunice and Tae Woo considered new materials that were available in the Atelier and in the classroom. Mason decided to combine natural and synthetic materials in his design. While creating, the young designers followed the natural cycles of design as they planned, created, reflected and improved their structures.

Design Learning Outcomes:

  • choose tools and materials
  • make a product using known procedures or through modelling of others
  • use trial and error to make changes, solve problems, or incorporate new ideas from self or others
  • develop their skills and add new ones through play and collaborative work
  • explore the use of simple, available tools and technologies to extend their capabilities


The Prototypes

The Stool – Ongoing Project

Ms. Shemo purchased a stool from one of the Eco-friendly projects at NIS. One morning the stool fell and broke. The children considered the problem for a while.

When Ms. Jo. Came in to class, Noah reminded Ms. Jo that the stool was broken.

Designers are also problem solvers. Ms. Jo asked the young designers if they could fix the stool. They thought this was a good project. The children went to the Primary School Design Pit to find materials to fix the stool.

The designers agreed that they should use “some sticky things” to fix the stool. Glue sticks, masking tape, duct tape, transparent tape, glue tack, a hot glue gun, and white glue were the “sticky things” they could find in Design. They thought that the hot glue gun, duct tape, clear tape, glue tack, and white glue were good fixing materials for wood, and were good materials for fixing the stool, but they couldn’t decide which would work the best. Designers sometimes test materials and then decide on the most suitable ones.

After picking the materials for fixing the stool, our young designers started to test these materials. The first one was the Glu Tack.

The young designers brainstormed different ways to apply the Glu Tack either on the seat or stool legs. Whilst testing the Glu Tack they found some other problems, for example, the seat wasn’t put evenly on the stool legs.

They didn’t forget to fix these problems as well. Finally, the young designers got the seat back on the stool. They will leave the stool in K2A until the next lesson to test and see if the Glu Tack worked well.


Test two…

The second material the young designers decided to test was the duct tape. The children used the green tape and pasted the sides down to fix the stool.

Right away they could see that the plastic top moved around. It did not look like a safe choice.

They decided to add a sign to let people know that it was not safe to sit on. The designers will need to reflect on their choice and decide what they need to do next.


Test three…

We reviewed our last test and decided that duct tape wasn’t a good solution. Next, we used hot glue to fix the stool.

Before gluing, the designers brainstormed the advantages and disadvantages of using hot glue.

Mason and Patrick thought the hot glue would make cracks in the seat because the glue was hot. What do you think?

Let’s give the hot glue a bit of time and see if it will make cracks in the plastic seat.

Our problem-solving continues…

Documentation by Ms. Jo and Ms. Eileen

The Seeds

A few weeks ago, a few children were exploring in the Early Years Playground. The teacher documented the children’s explorations. Then, we presented the piece of documentation to the children. We read it together and noticed the details in the photographs.

The children involved in the inquiry began to share their ideas. The other children listened with interest, making suggestions along the way.

  • Olivia “I want to find more seeds. Help Ethan find more seeds. I want to help Tracey and Noah.”
  • Tracey “Me too!”
  • Kenan “ME TOO!”
  • Noah “We want to plant them to make another tree.”
  • Tracey “The black seeds put in the mud will grow up, into a big tree.”
  • Noah “The black one is the hardest one to find.”
  • Tracey “We need to find a lot. Its not like the green seed. We need to plant them in the mud.

Teacher “How will people know where you have planted the seeds?”

  • Tracey “We can draw and put it so we can know where it grows.”
  • Patrick “Can I help you Tracey and Noah?”
  • Noah “Everyone can help us!”
     

When the children went outdoors, they ran straight to the tree with the seeds.

They looked on the floor and around the play equipment see if they could find any black seeds.

They saw some on the tree, but the branches were out of reach. Noah tried to jump high, hoping that he can reach the branches.

Two children went off to look for a solution. They came back with some spades. They used the spades to reach some of the seeds. One child threw the spade at the tree, hoping that some will fall off.

 He realised that this was not the best idea. Then, the group of children continued to look for the seeds on the ground. They found some black seeds and shouted with excitement.

They kept them safely in the wheelbarrow. We look forward to their next steps as they decide what to do with the seeds.

Approaches to Learning (ATL’s)

Research Skills

  • Ask or express through play questions that can be researched.
  • Use all senses to observe and notice details.

Communication Skills

  • Listen actively and respectfully to others’ ideas.
  • Participate in conversations.
  • Negotiate ideas and knowledge with peers and teachers.

Living things

Students understand that living things have basic needs, including food and water.

A Research Story: The Paper Airplane

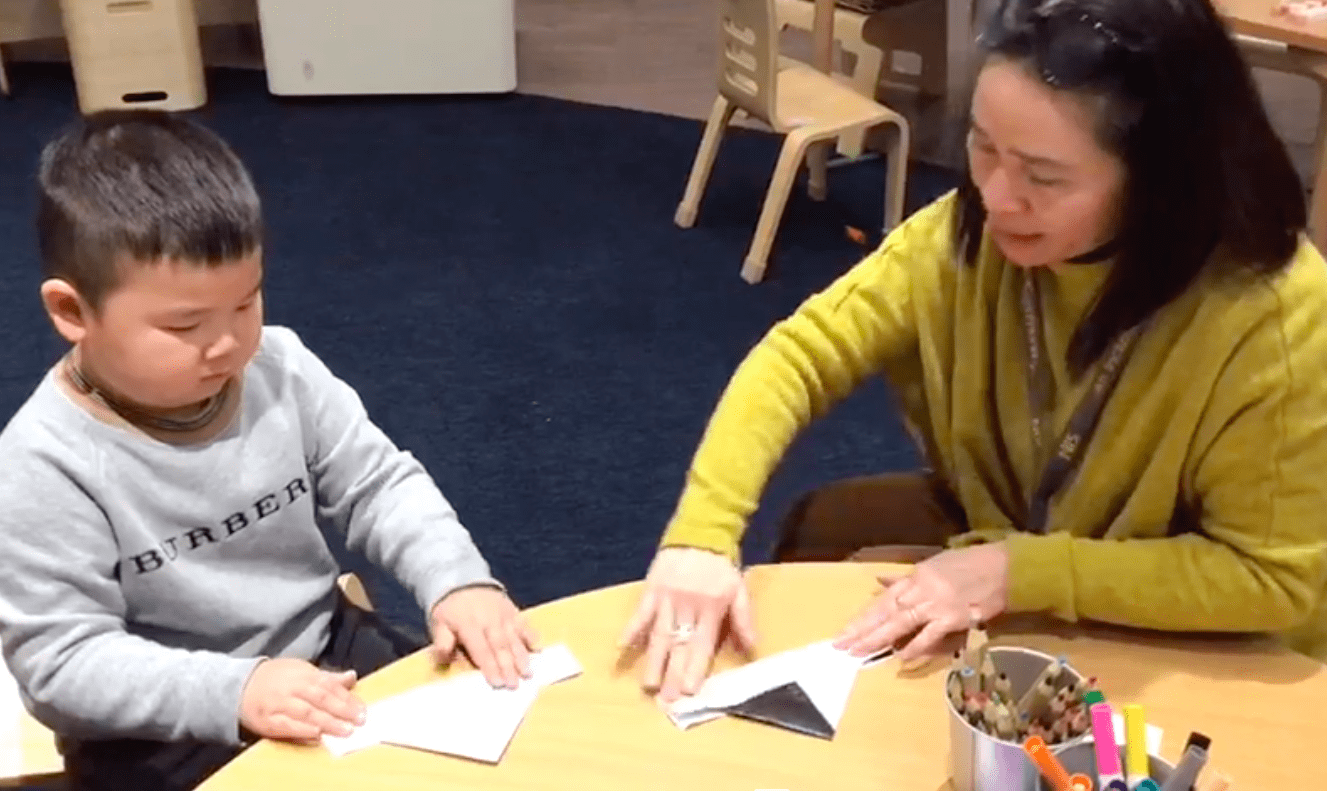
@N has been trying to make a paper airplane using a piece of A4 paper. He approached the teacher and said, “Can you show me how to make a paper airplane?” The teacher noticed several creases on the paper, showing his many attempts at making the paper airplane. After some thought and discussion, @N decided to visit the library to see if there were any books that could give him more information on how to make paper airplanes. He met Ms. Tina in the library and asked if she could help. Ms. Tina showed @N where the books on craft and origami were in the library. Together, they began to look for the books they needed.

The first book on paper crafts and origami did not include directions on how to make a paper airplane. Ms. Tina looked for another book. She looked through the contents section of some books to see if she could find information about paper planes.

@N and Ms. Tina were excited to see that there was a book about paper planes!

@N checked out the book and brought it back to class. He quickly browsed through the pages. He was trying to decide on the type of paper airplane he wanted to make. Others came to see what @N was doing as they were curious about the paper airplane craft book.

@N first tried to follow the instructions to make a plane. He was not sure if he was following the directions correctly. He approached the teacher for help. @N and the teacher worked together to follow the instructions to make a paper plane. When they were both happy with the paper airplane, @N took his airplane outside to test it. A few friends gathered to see what he was doing. They also wanted to make the paper planes.   

@N took the book home to try a few different models. We look forward to his paper plane creation.

  • We wonder which paper airplanes Noah might make.
  • We wonder how far his paper airplanes will travel.

Our story continues…

Community Helpers

The classroom space belongs to the community. As in other community spaces, everyone needs to do their part. In K2, we all have a responsibility to keep the spaces safe, clean and organised so that we can learn and have fun together. We have agreements and routines that help us work together.

The teacher had placed an order for new cushions for our reading corner. These new cushions were delivered to the class last morning. Three children helped the teacher put the new cases on.

This was not an easy task as you had to hold on to the cover and push the cushion into the case. It called for coordination, and large muscle movement. The three children worked hard to get all the cushions ready. The team persevered till the task was completed!

Structural Engineering

“We ask ourselves what materials we could introduce that would take the children’s research further.” Anna Rainieri #reggiochildren

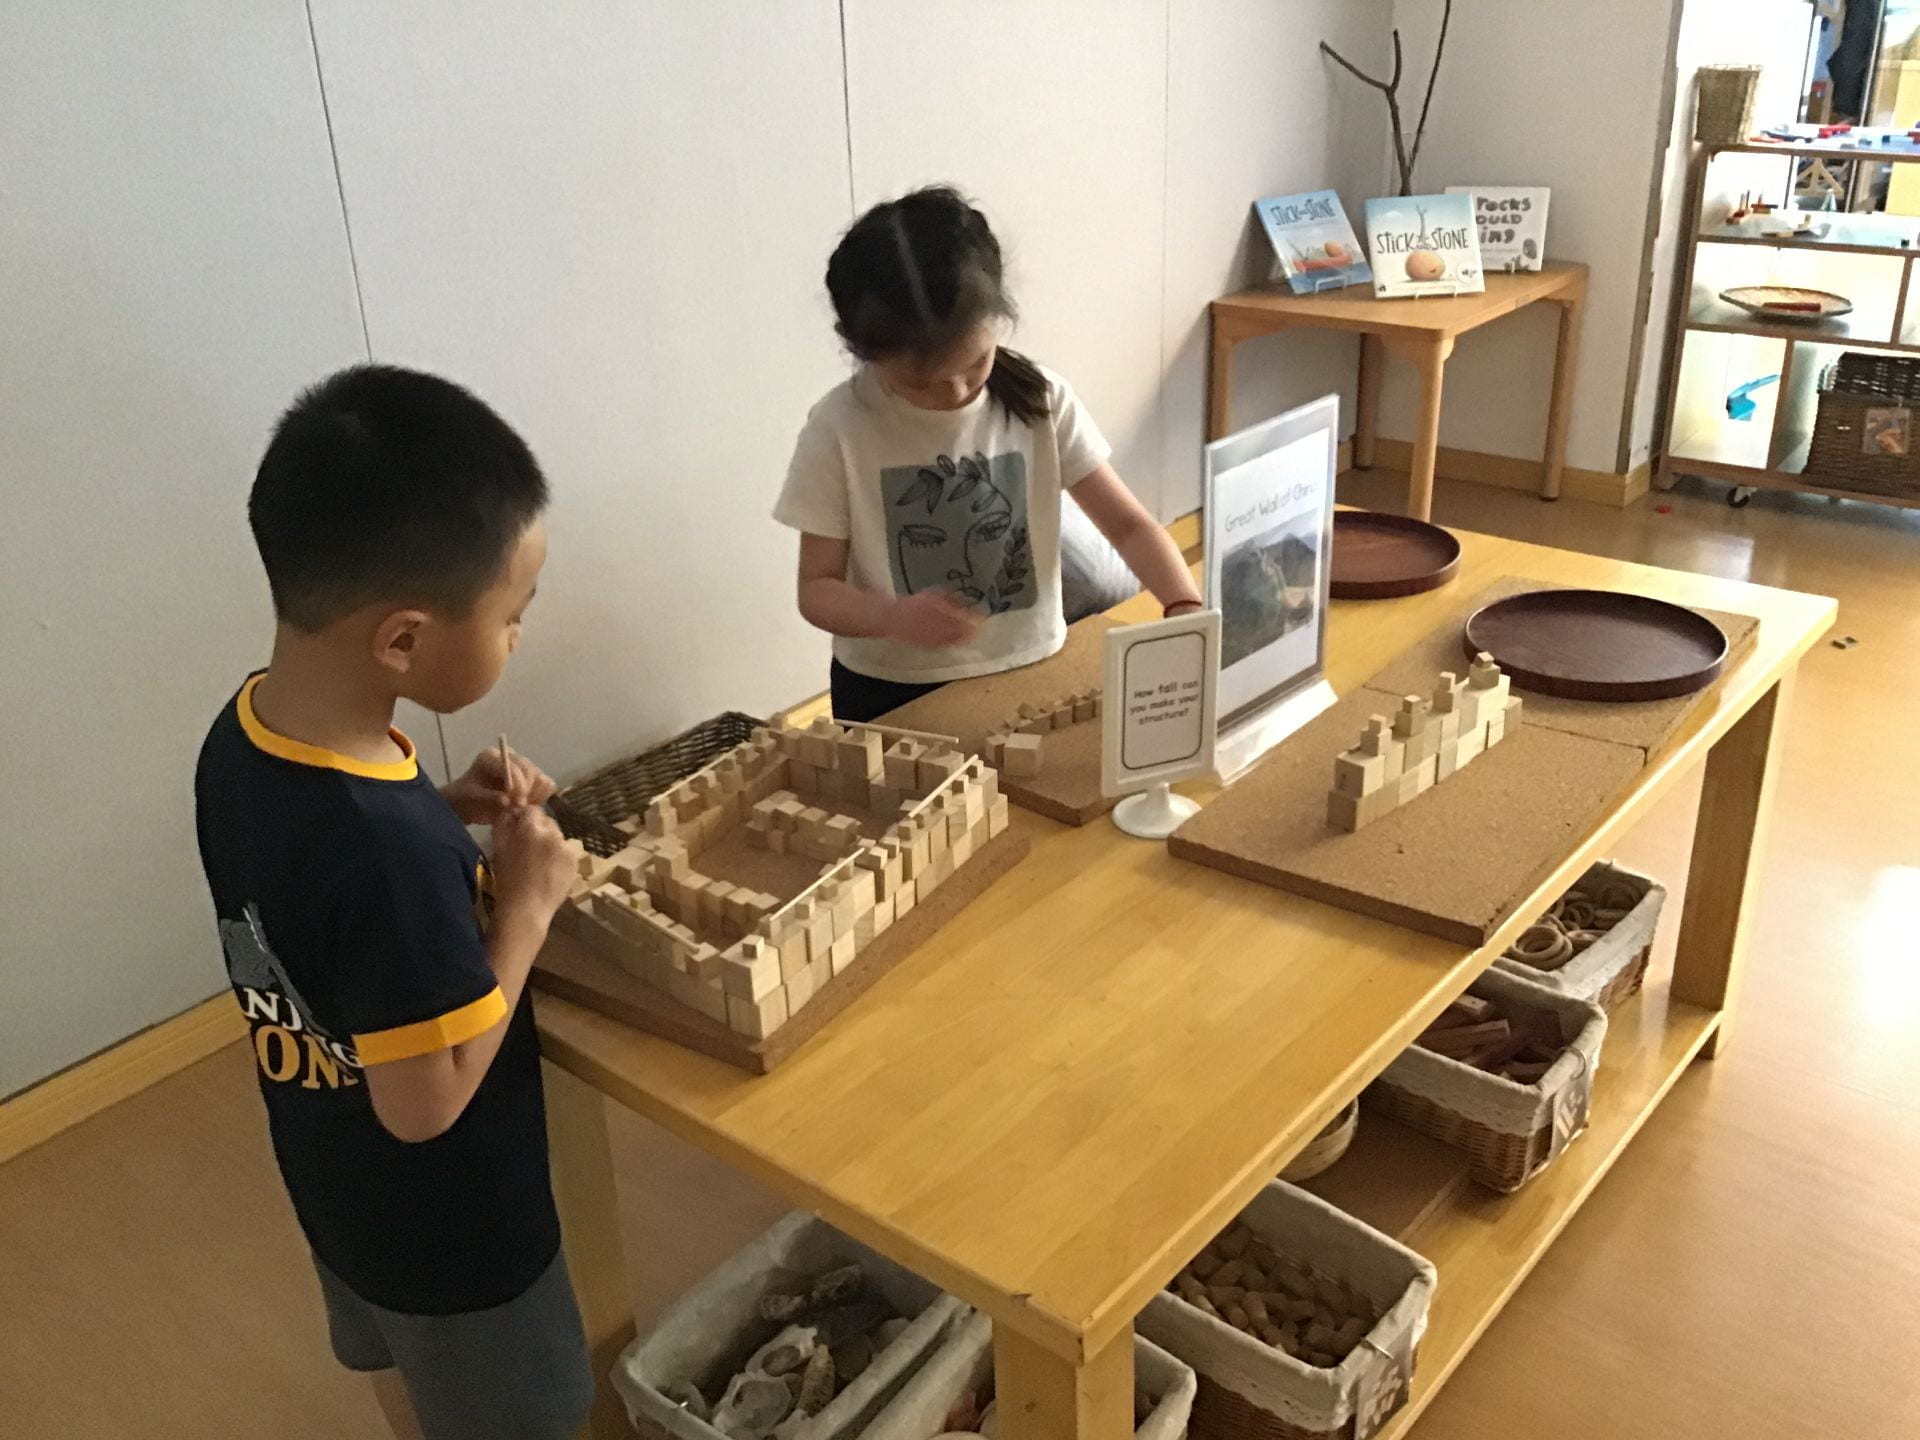
The loose parts table was set up as a structural design space. The provocation invited the children to create tall structures.  

As the children moved through the space, they began to add blocks on the cork-boards. On the second day, a group of children began to design and build with purpose. They engaged in conversation as they created their models. @O was inspired by the image of the Great Wall of China. She looked closely at the image, noticing the different shapes and sizes of cubes as she carefully placed the blocks on her structure. She explored concepts of balance, size, space and beauty.

Two other children joined in to explore the materials. @A used his imagination to create his own structure, using a range of loose parts for his design. He first placed the cubes on the outer edges of the cork-board.

Then, @A began to add the walls within. He chose several loose parts with intention, placing them carefully on his structure. He continued to talk to his friends as he worked on his structure. Finally, he included a label with his name to communicate ownership.@T worked carefully and intently. She asked if she could add shells to her design. She balanced small cubes and shells on her structure. Every addition was included thoughtfully. She then used a piece of recycled paper to write her name and placed it next to her structure. She beamed with pride at her engineering.

The different creations presented were unique and revealed each child’s creativity and research. Together, they explored concepts of shape, measurement, balance, size, structure, design, architecture and aesthetic beauty. Their work together called for focus, care and collaboration. We wonder how the children might continue to explore these concepts and skills further.

Design- Making: Through this experience, the children were:

  • Choosing and using materials with intention
  • Using trial and error to make changes, solving problems, and incorporating new ideas from self or others

Presenting the Prototypes!

The students have been working on their prototypes over the last few weeks. They were ready to present their prototypes to the class. 

Success Criteria

Then, the students reflected on their learning journey.

Design Challenge – Obstacles and Prototypes

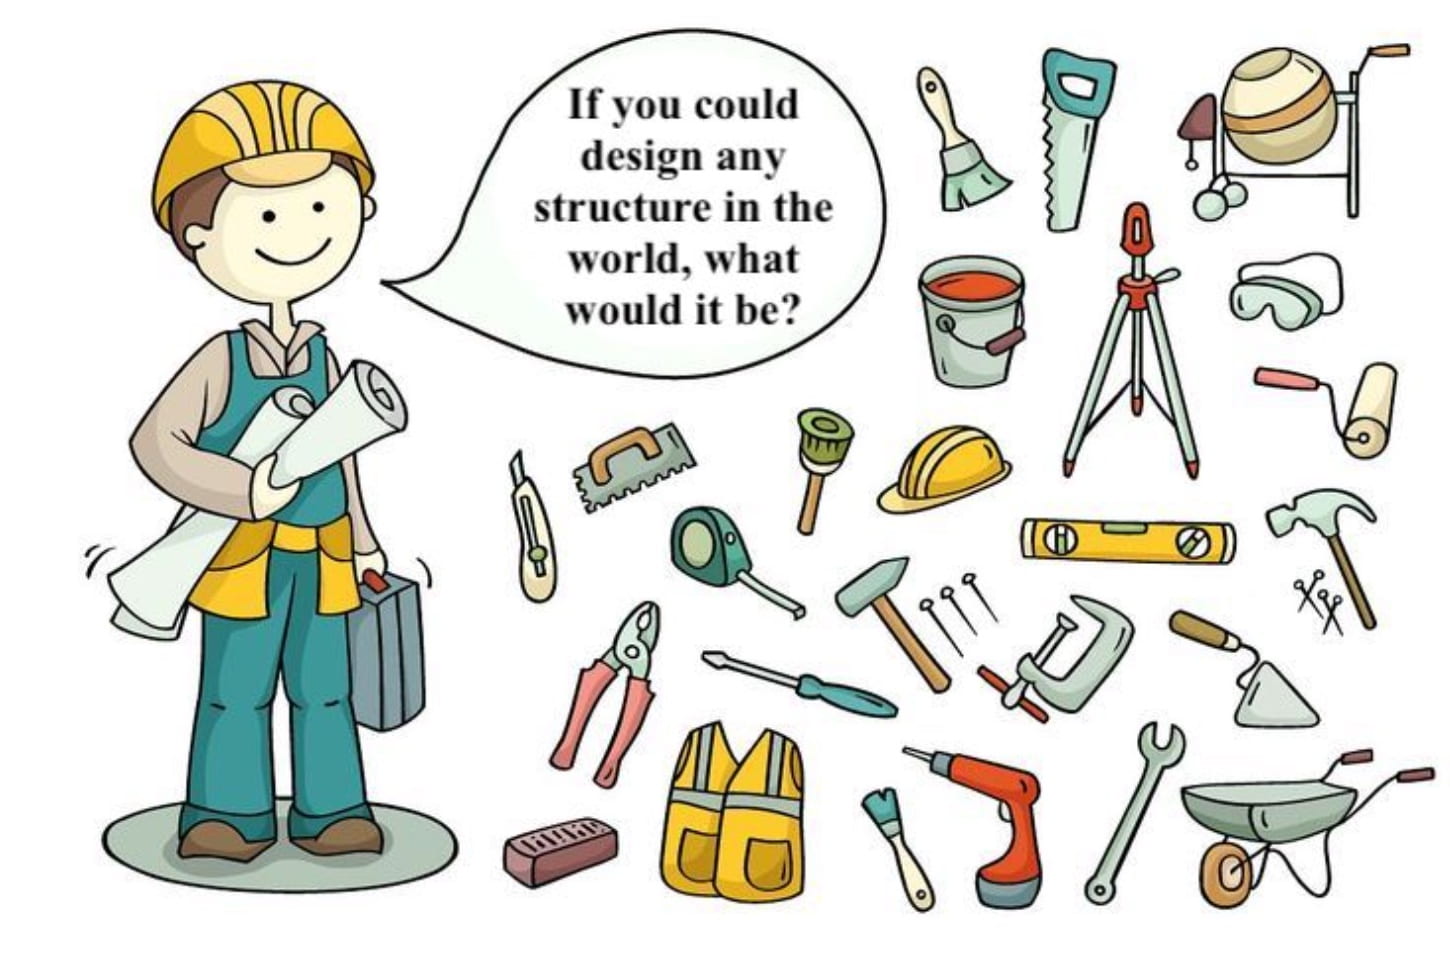
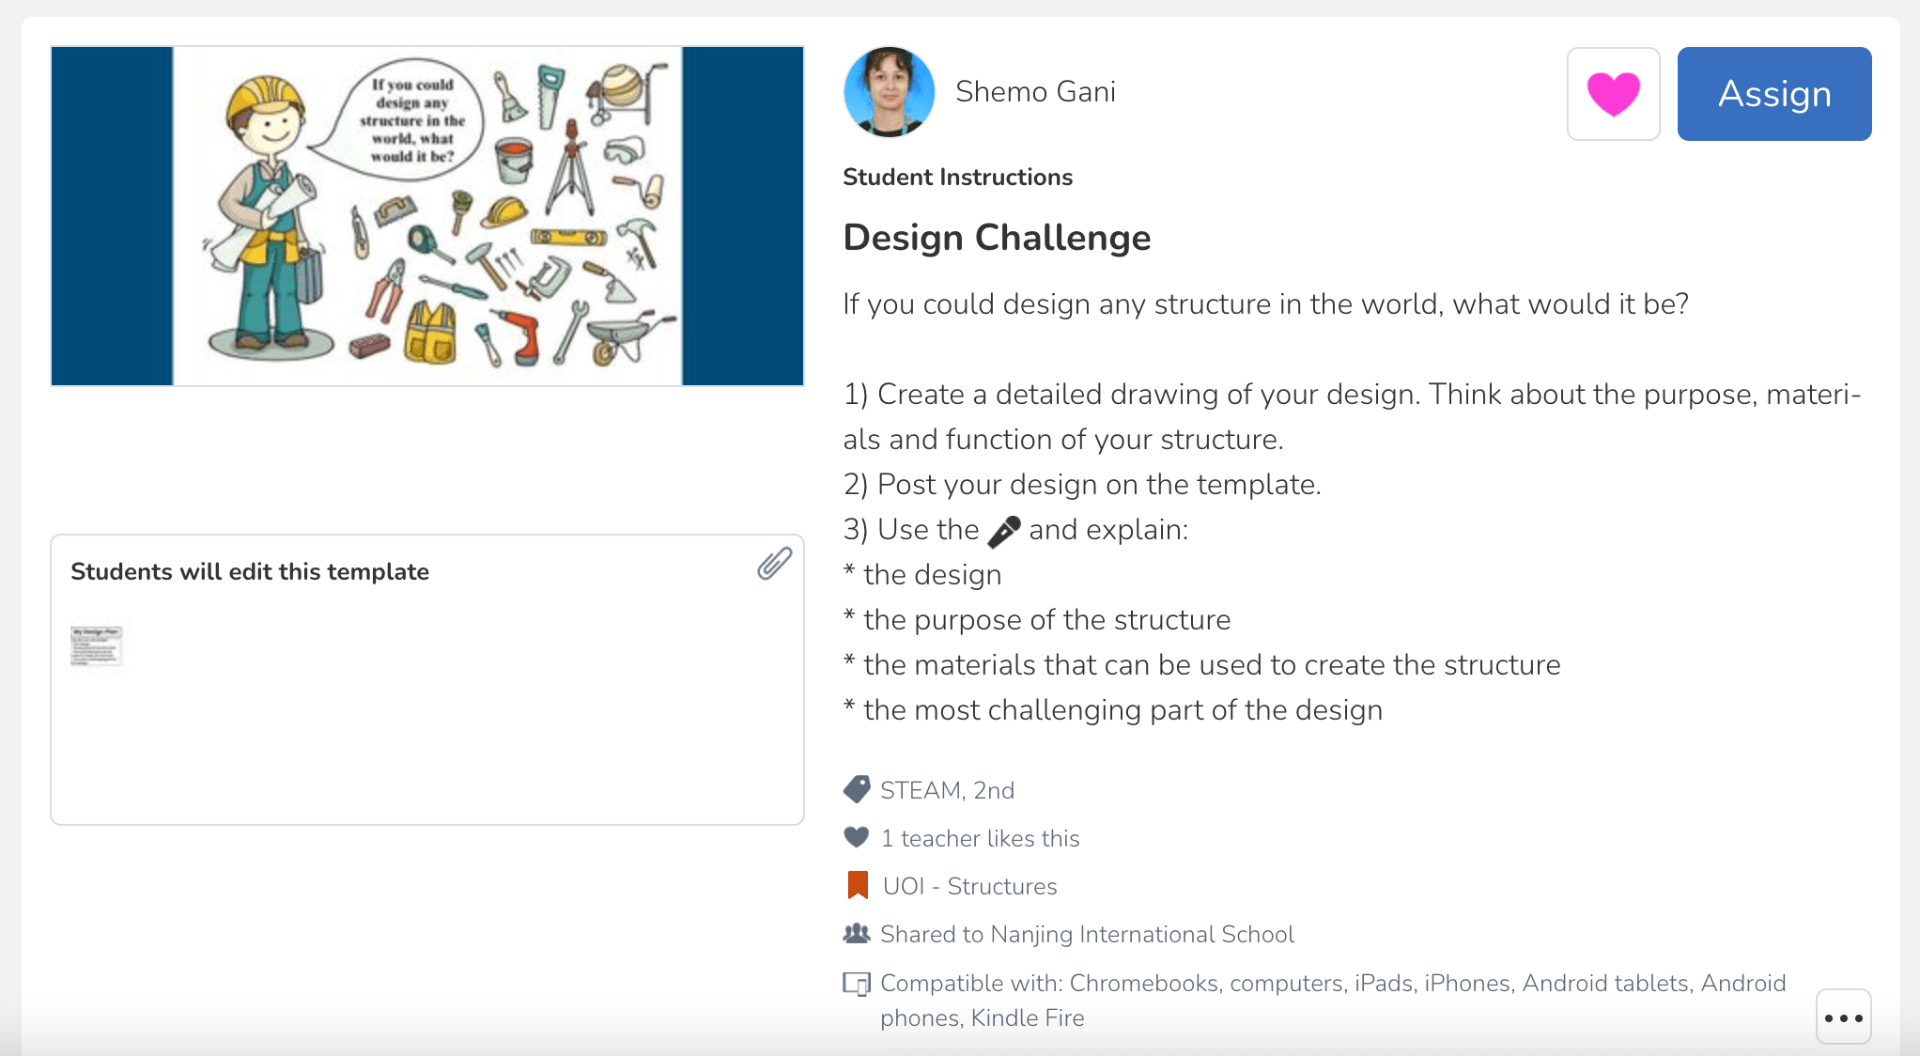
If you could design any structure in the world, what would it be?

The students began to create their design plans, labelling and providing important information about the ‘purpose’ of their structure.

Challenges and Obstacles:

The students shared their first plans with a learning buddy. They interviewed each other, asking challenging and thought-provoking questions about the design, materials and its purpose.

Then, they were encouraged to think about the ‘challenges’ or obstacles they foresee in their own design. They identified this using a red sticker. The students presented their challenges to the class.

Their next step would be to create a prototype of their design. They would need to apply the knowledge they have about materials, and use the skills they have gained through the different design challenges they have experienced during the unit, to complete the task.

Conceptual Understandings:

– we solve problems during the creative process by thinking critically and imaginatively

– designs grow out of natural curiosity 

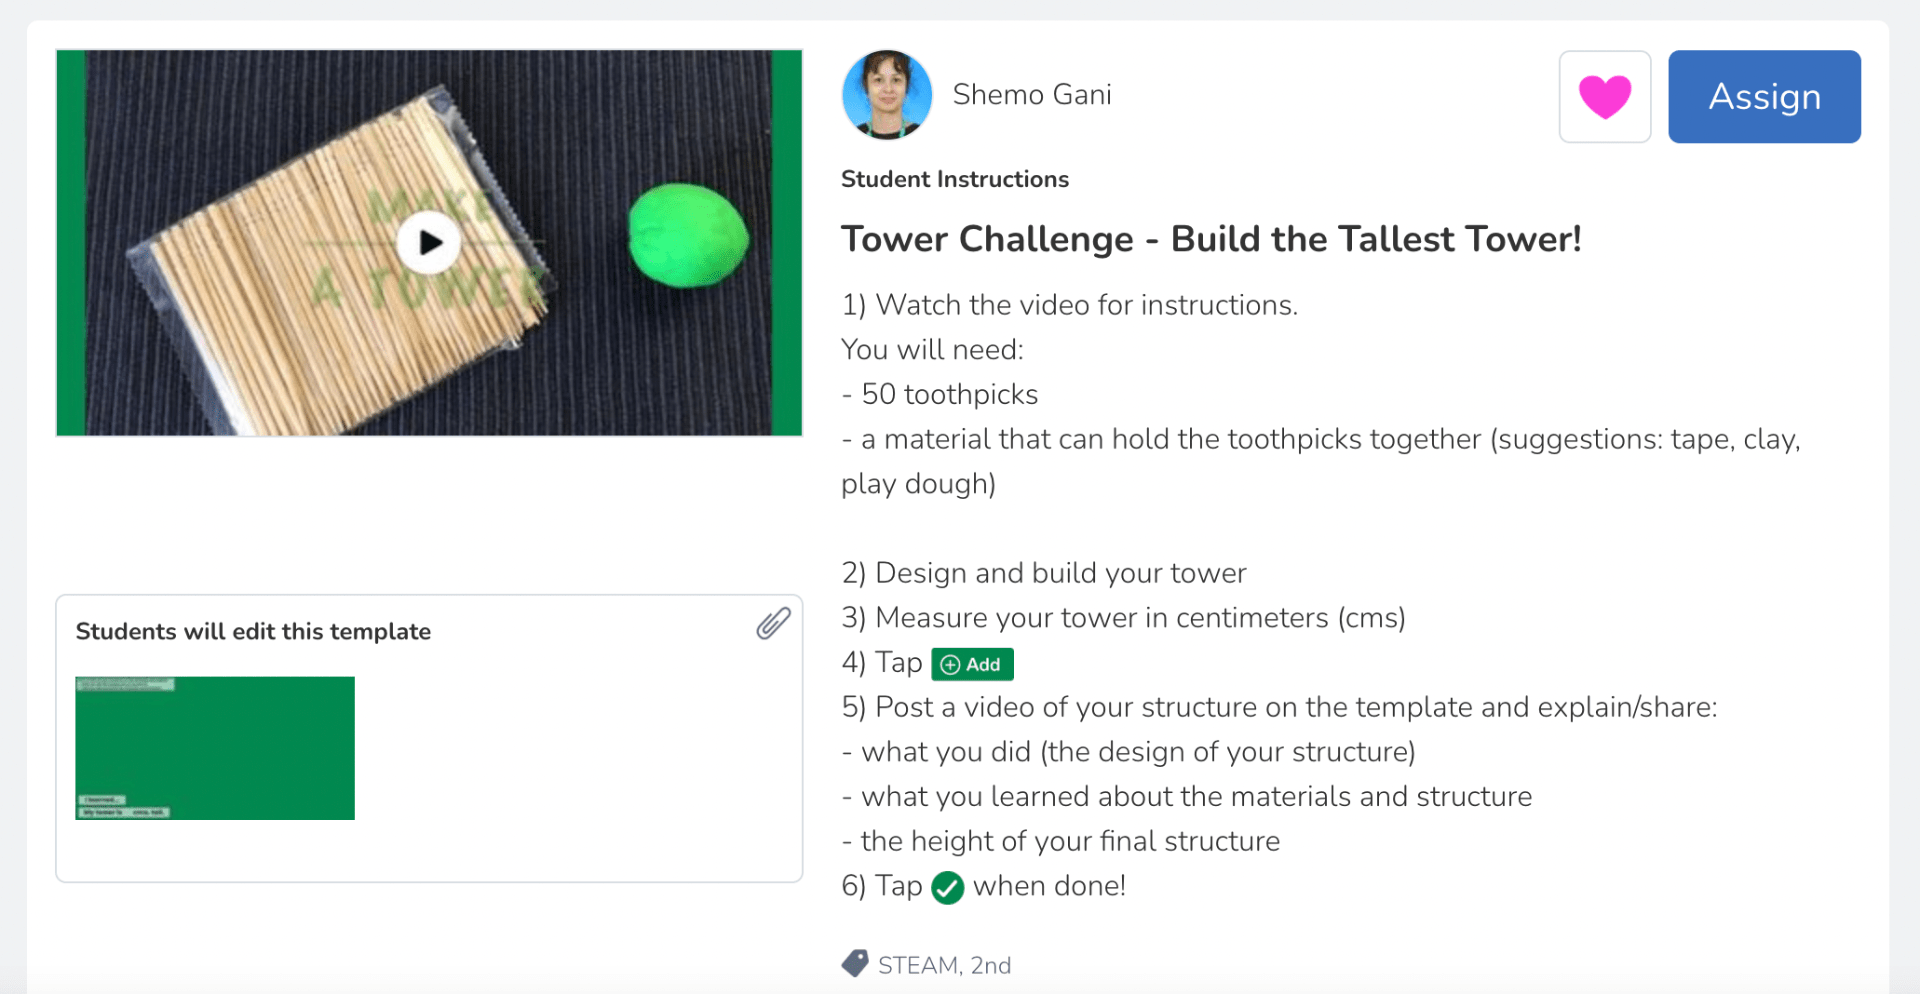
Tower Challenge!

Explore materials and their properties to build the Tallest Tower!

TASK:

1. Watch the video for instructions.

You will need:

  • 50 toothpicks
  • a material that can hold the toothpicks together (suggestions: tape, clay, play dough)

2. Design and build your tower

3. Measure your tower in centimeters (cms)

4. Reflect:

  • on what you did (the design of your structure)
  • on what you learned about the materials and structure


What we learned…

Agency and Learning

We have been discussing the sketchnote by John Spencer (@spencerideas) “What happens when students own their learning?” and documenting some of the ideas shared.

We wondered what it means to have a ‘Growth Mindset’.

“In a growth mindset, people believe that their most basic abilities can be developed through dedication and hard work—brains and talent are just the starting point. This view creates a love of learning and a resilience that is essential for great accomplishment.” ( Dweck, 2015)

To explore this further, we watched a short video. 


Then, each student was given a statement on a yellow or white speech bubble. Each fixed mindset statement in white had a corresponding growth mindset statement in yellow. The students had to work out which statements could be paired.


Finally, we created a poster including all the statements. We discussed the ideas, statements and situations where we could use ‘self talk’ and and take action, to help us develop a growth mindset.

We continue to wonder how we can stretch our thinking, and explore and take more ownership over our own learning. We continue to remind ourselves that when we are actively engaged in various stages of learning (Including: thinking about, planning, modifying and creating) we develop AGENCY.

The Ramp

We gathered to think about a MATH provocation.

  • How might we solve this problem?
  • What strategies can we use?
  • What tools would we need?
  • What would be the first step?
  • How can we use pictures, numbers or models to solve math problems?

We worked through the task together and recorded our thinking in our Math Journals.

We thought about the different tools we would need to solve our problem. The students discussed their thinking and worked through their task using math vocabulary related to number, measurement and data-handling.

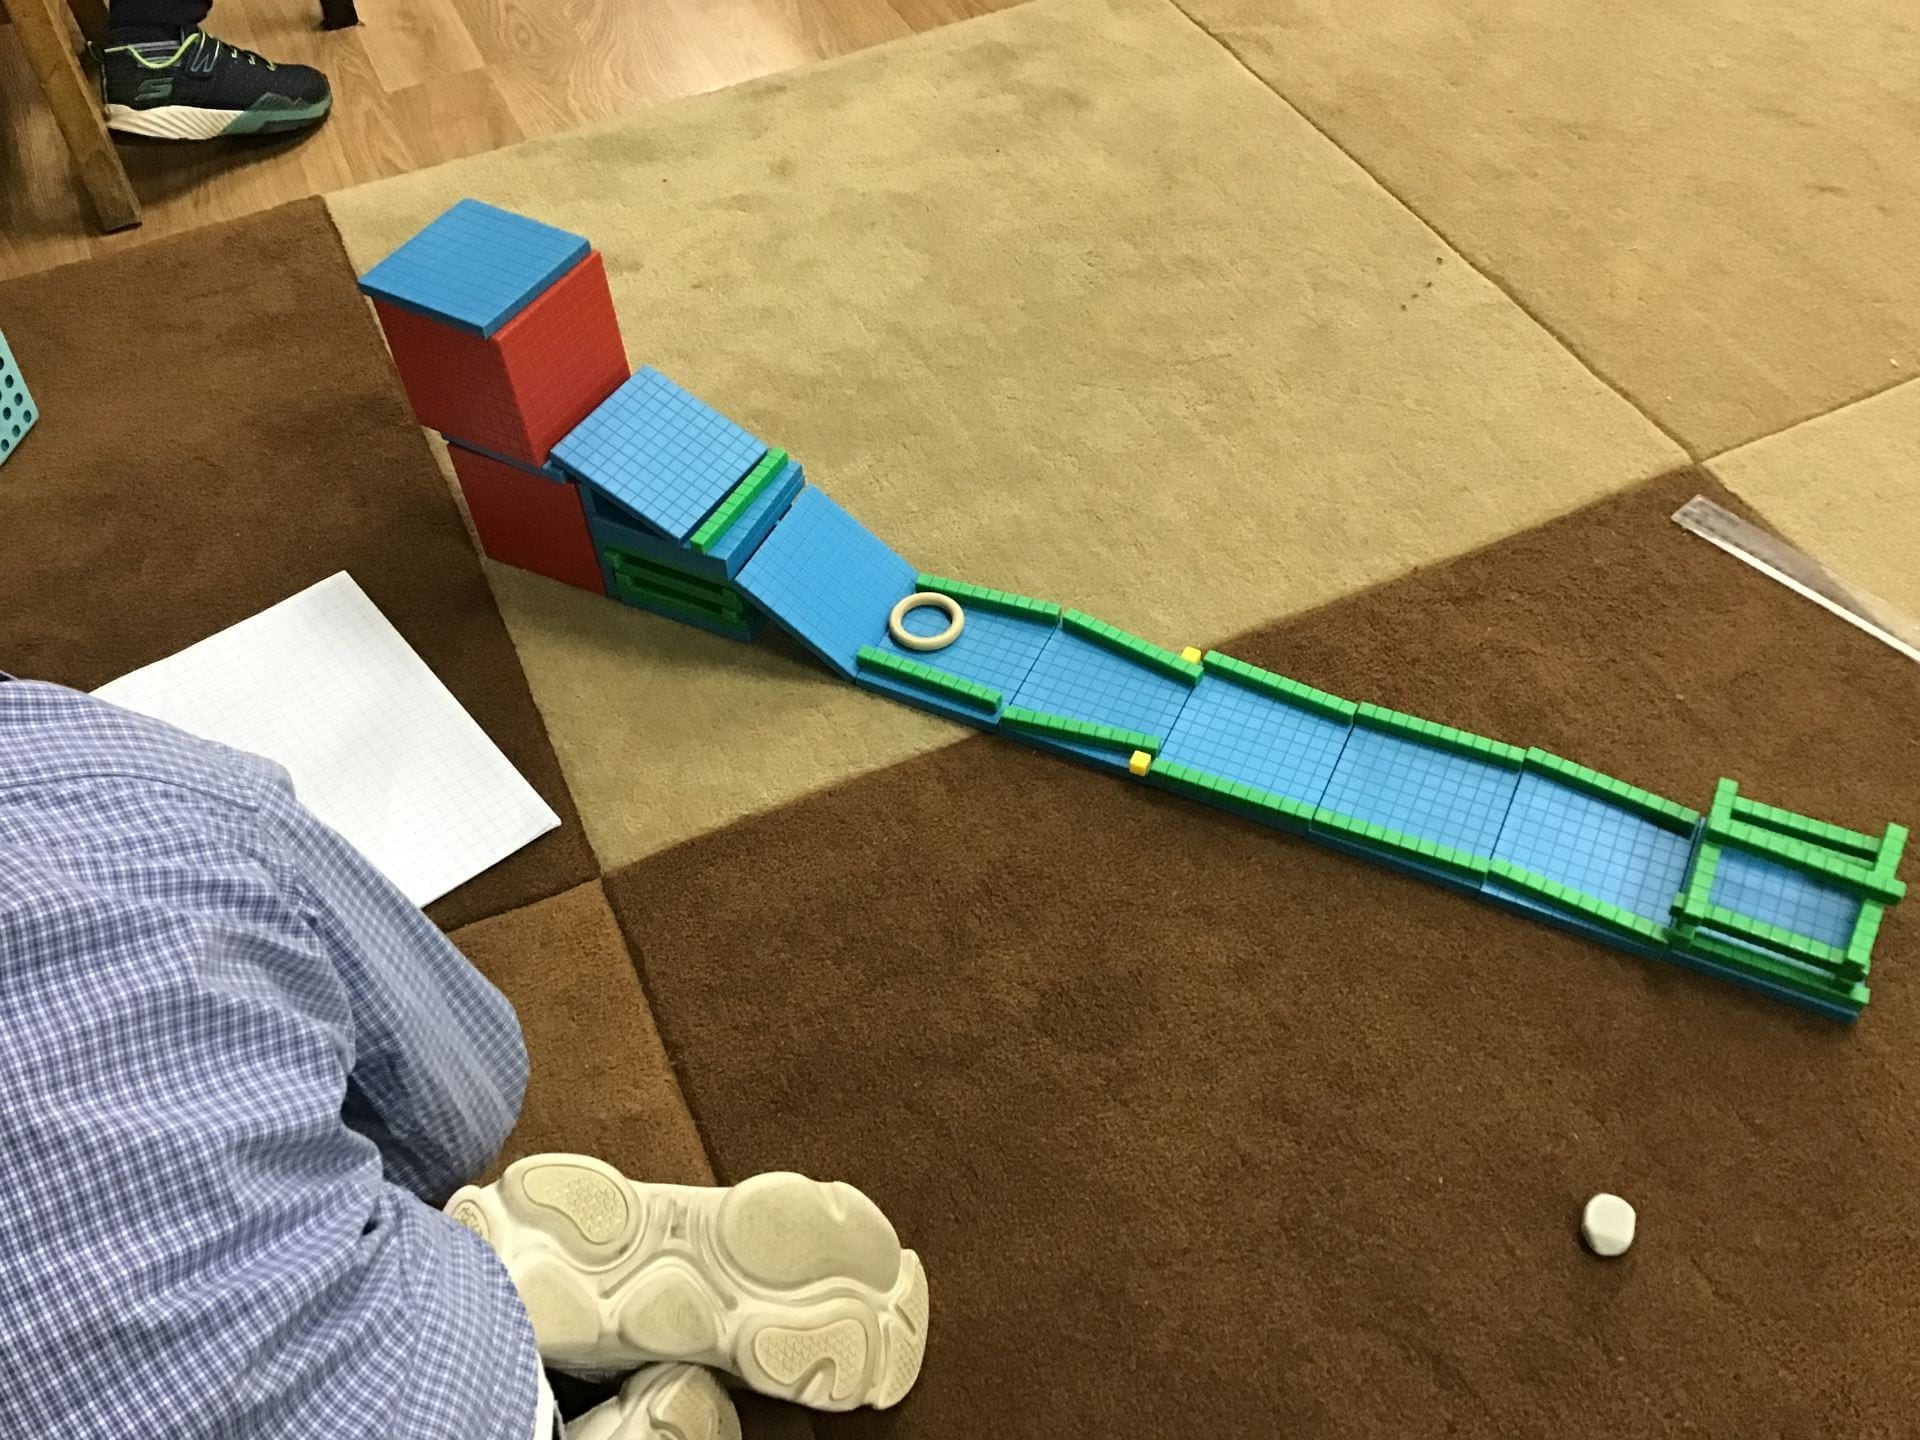
Next, they worked on creating and testing their own ramp. They needed to work in teams, solving problems and negotiating ideas.

The students thought about the materials they would need, the height and placement of the ramps as well as the objects they would test.

Then, they recorded their data on a table and discussed and shared a question they could ask about the data they collected.

Through this experience the students had opportunities to:

  • conduct research
  • work as a team
  • think
  • cooperate
  • listen
  • persevere
  • problem solve
  • have fun and celebrate learning together!

The Prototypes

Over the last few weeks, the students have been creating their prototypes based on their design plans and related research. They have continued to add more details and descriptions to their initial plans, thinking deeply about the different materials that are available and how they might use them to create the ‘MOST CHALLENGING‘ part of their design. The task would need to meet the following criteria. 

Design Plans and Prototypes

The House with a Pool (Challenge: The waterfall)

The Hotel on the Water (Challenge: The Slide with 2 loops)

The Prototypes

The students have been moving between the design rooms and the classroom, testing and choosing from a range of materials to fit a purpose. The students persevered, working at their own pace, talking to others about the challenges and how they were learning through trial and error. 

Personal Reflections  

The students have been documenting their learning journey, reflecting on challenges and how they have found solutions through the design process. 

We consider reflection an import part of the learning process. Therefore, students were encouraged to document their own learning journey while reflecting on the following:

  • what has been done (process)
  • the materials (What materials did you use? Why?)
  • the challenges (difficult parts/jobs)
  • the solutions (What did you do? What made it work?)
  • the skills (research, thinking, self-management, social and communication skills)
  • what has been learned (What have you learned from/through the steps/tasks?)
  • feelings and emotions 

The students are working on putting together a Design Journal to share their individual learning story. These will be presented at their final presentation to the community. 

Conceptual Understandings: Students understand that:

  • a push or a pull affects how an object moves or changes shape (Physics).
  • different materials can be combined for a particular purpose (Chemistry).
  • science involves observing, asking questions about, and describing changes in, objects and events.
  • we solve problems during the creative process by thinking critically and imaginatively.
  • designs grow out of natural curiosity.
  • skills can be developed through play.
  • technologies are tools that extend human capabilities

Students were able to:

  • demonstrate control of tools, materials and processes.
  • identify, plan and make specific choices of materials, tools and processes.
  • to identify the stages of their own and others’ creative processes.
  • make predictions, experiment, and anticipate possible outcomes.

The Newspaper Challenge

The students worked in groups to create a structure with newspaper. They first planned and tested the materials and then reviewed their plan before building the structure. They had to built the newspaper structure within 30 minutes. 

  • Let’s make a triangle. (Sky)
  • It’s tilting. (Carlotta)
  • Let’s stick this together. (Sky)
  • Everybody working so good so fast. (Carlotta)
  • Don’t stick here because…(Hannah)
  • This is so hard. We can do this! Come on team! (Reggie)
  • If we don’t do win this, it’s ok. At least we do this. (Elena)
  • The small one or big one? (Kavel)
  • We can make a hole then put more stick in. (Sky)
  • This is smart! (*responding to Sky’s idea) (Reggie)
  • I know why it’s always falling. Let’s tape this first. (Carlotta)
  • That’s good. (Elena)
  • We need to cut this smaller. (Carlotta)
  • I got 16 tape out. (Stella)
  • We are not ready. It’s still tilting! (Carlotta)
  • It keeps on falling. (Elena)
  • No more cylinder! (Kavel)
  • Can someone hold this area? (Reggie)
  • Good job! You make more to have stable bottom. (Carlotta)
  • More stand under here.
  • We are changing ideas. (Reggie)

The next day, the students were tasked with discussing and documenting their learning during the activity.

They needed to: –

  • introduce the team
  • share what was done (process)
  • reflect on the problems and solutions
  • explain what was learned
  • develop plans for next time

We wonder what we might do next…

Creating Sets and Groups

We have been exploring multiplication and division in Second Grade. The students began with a warm up activity to discuss what they noticed and wondered about this image.

The students used whiteboards to document and share their thinking.

We watched a short video on Multiplication as groups of objects to help us create sets and groups using materials in the classroom.

The students worked together in teams to create different sets of 2’s, 3’s, 4’s 5’s and 10’s.

They included multiplication equations to explain their groupings. 

Our research with number helped us complete a multiplication chart.

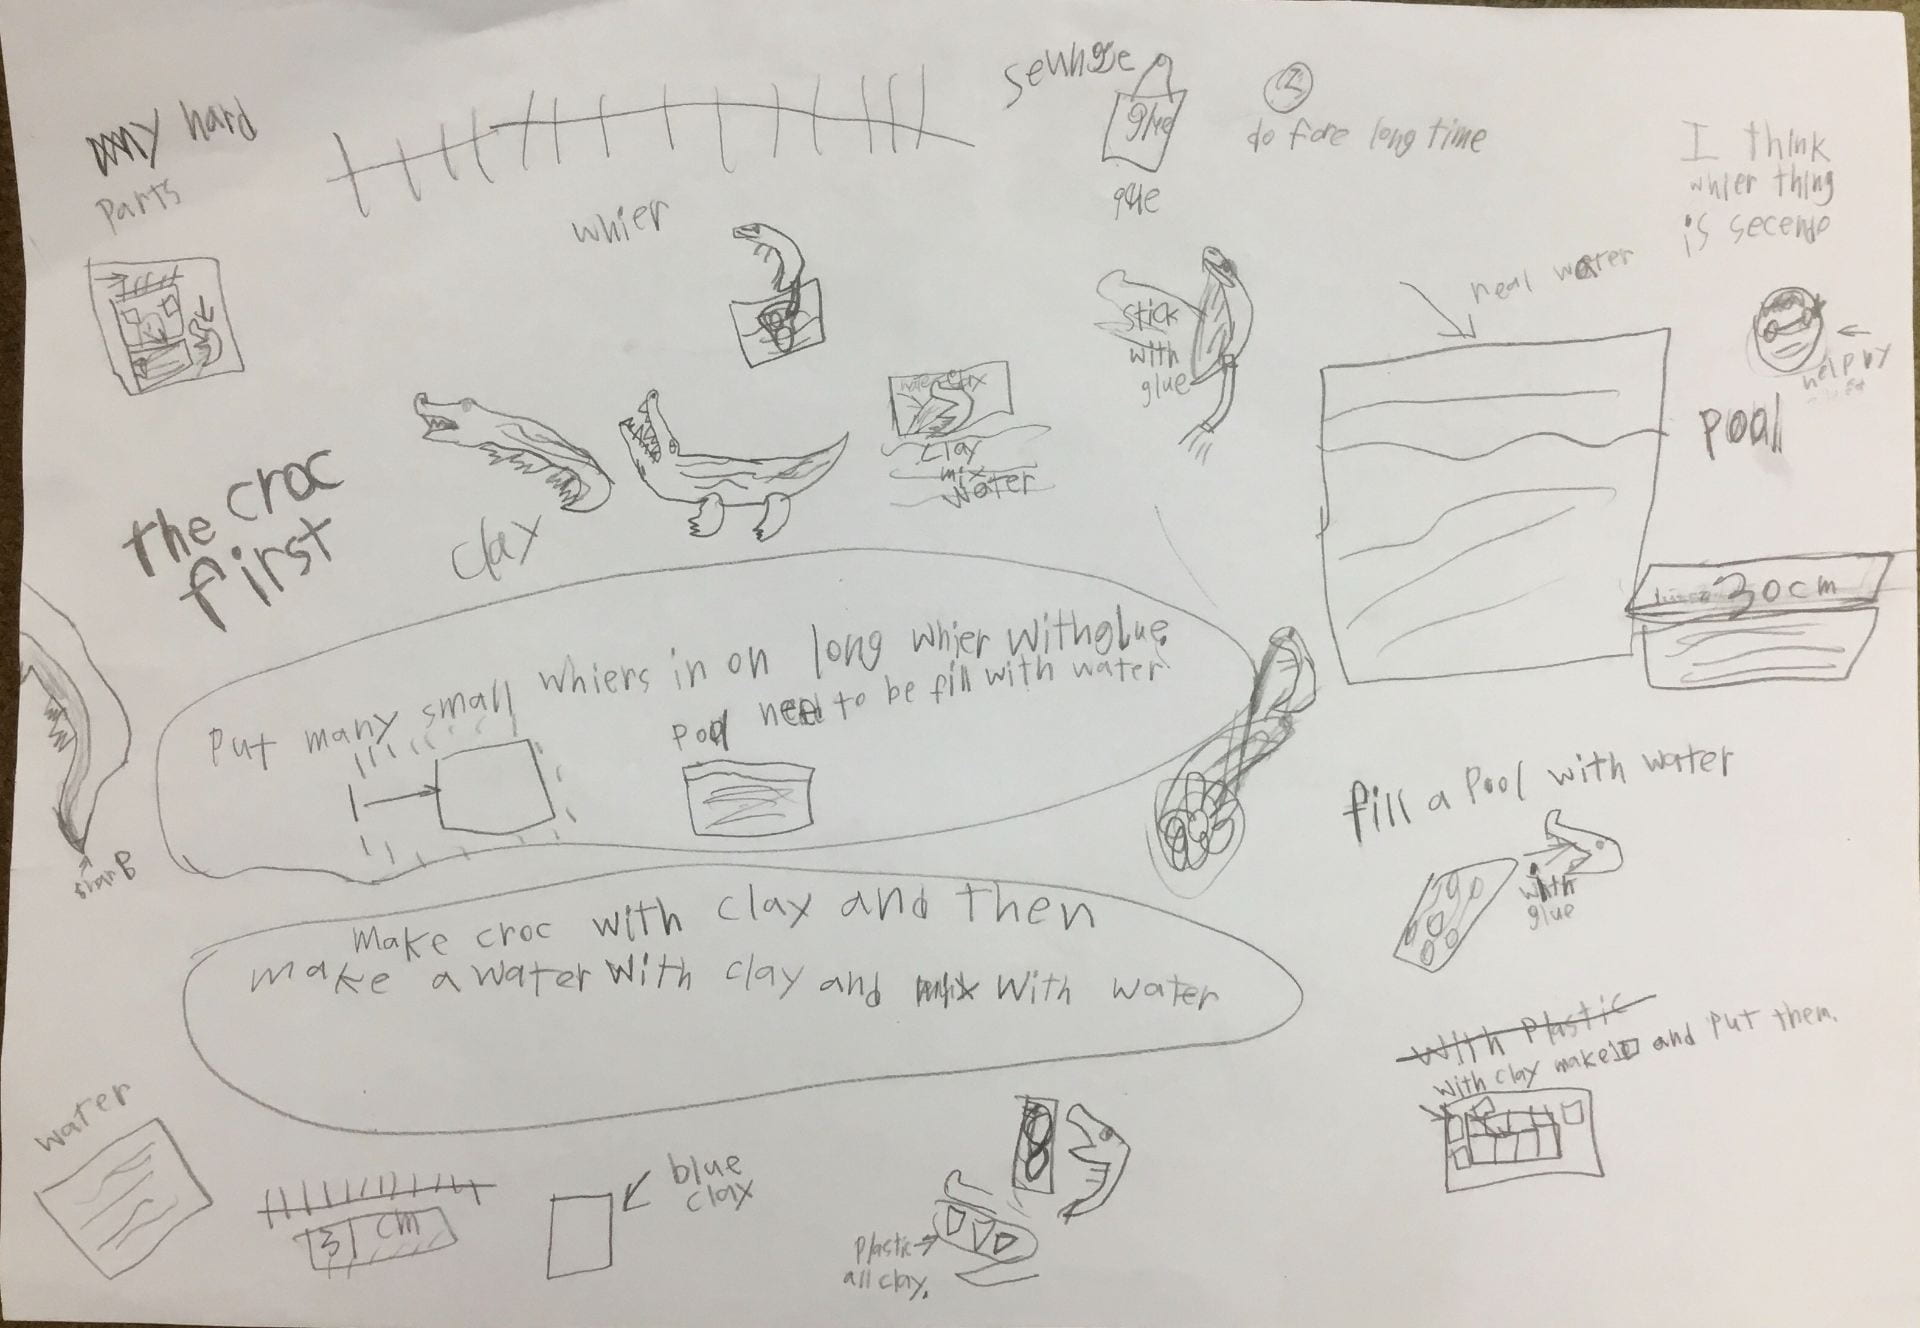
Maths Provocation: Jimmy’s Ramp

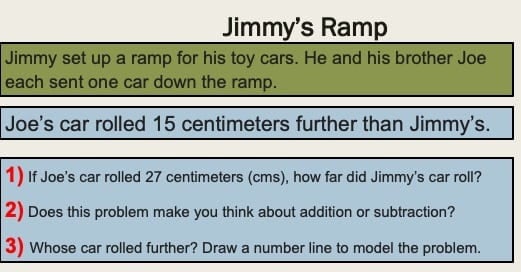
Jimmy set up a ramp for his toy cars. He and his brother Joe each sent one car down the ramp. 

We gathered to think about the provocation. Here are some of our initial wonderings.

I wonder…

  • … whose car is faster.
  • … whose car goes straight
  • … if the car falls down
  • … how the ramp is made
  • … if the cars fall down from the side of the ramp
  • … what Jimmy used for the ramp
  • … who pushed it down first
  • … whose car is slower

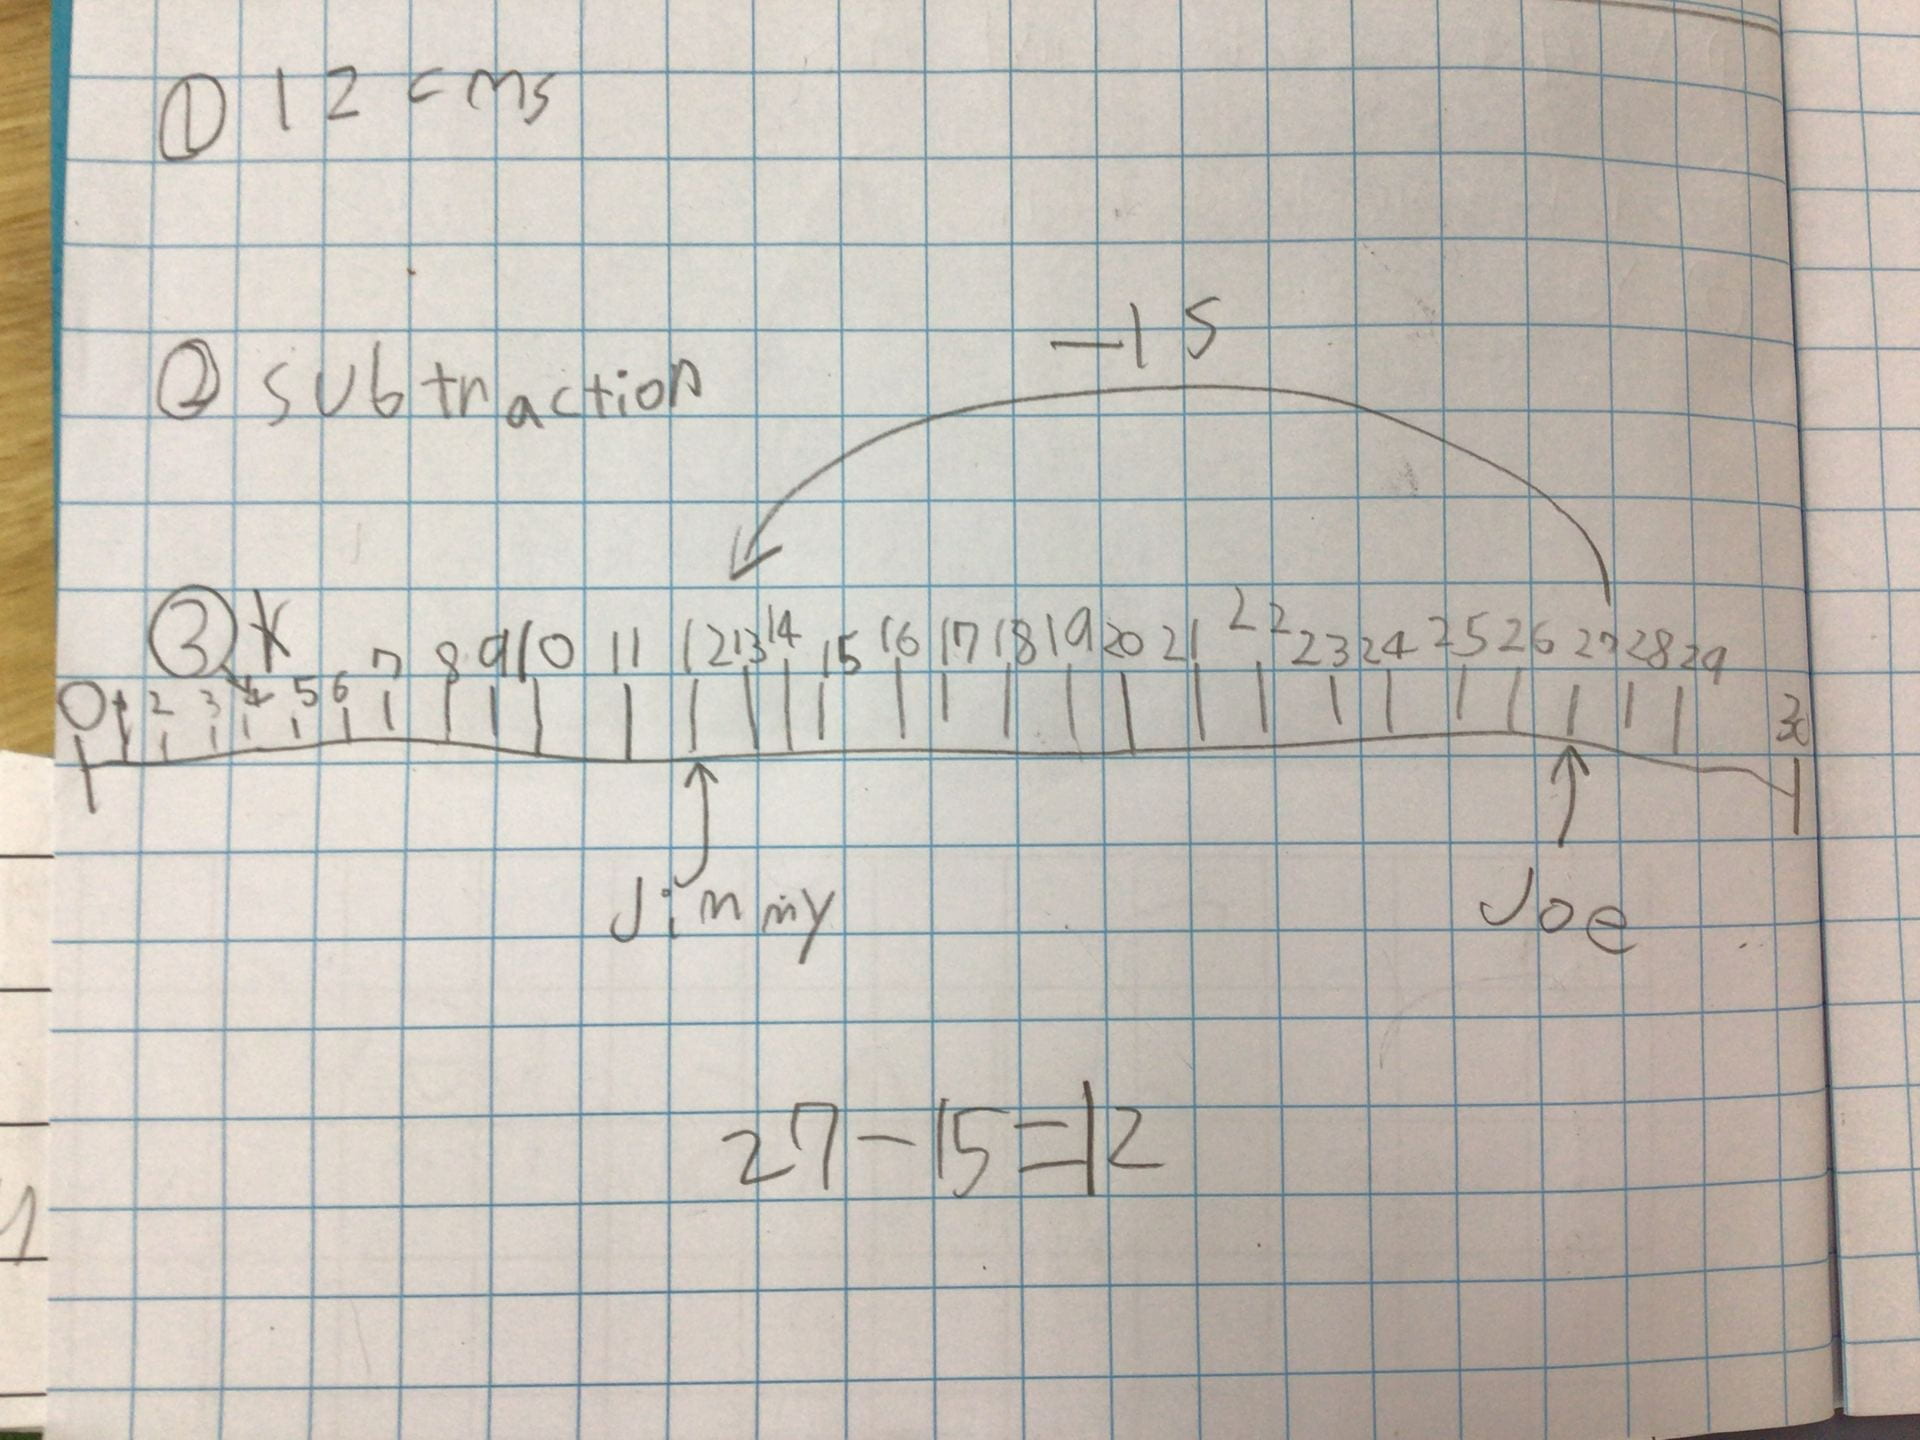
Joe’s car rolled 15 centimetres farther than Jimmy’s.

1) If Joe’s car rolled 27 centimetres (cms), how far did Jimmy’s car roll?

How could you get started?

2) Does this problem make you think about addition or subtraction?

3) Whose car rolled farther? Draw a number line to model the problem.

4) Follow Up:

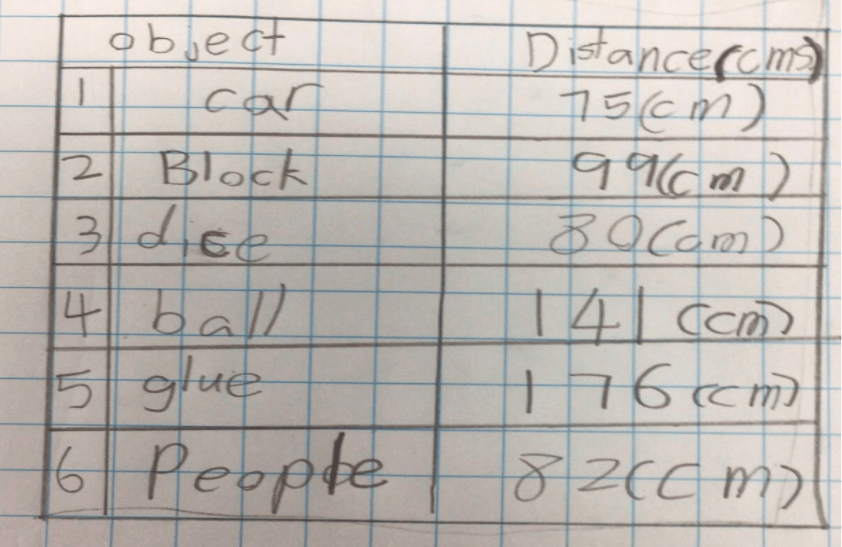
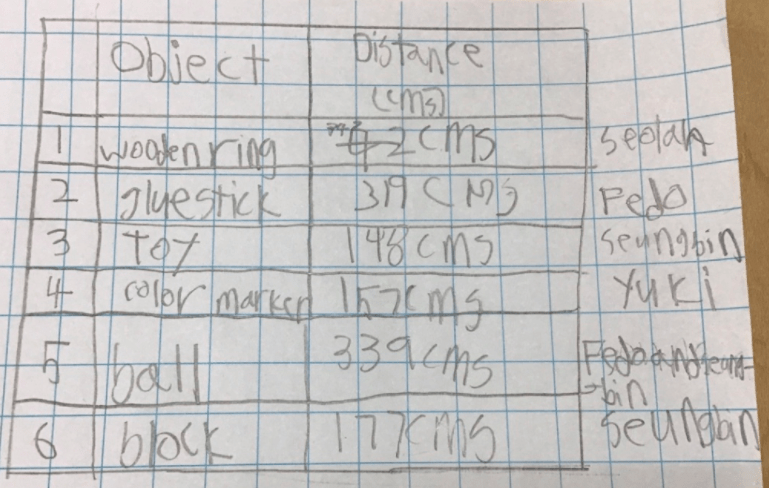
Make your own ramp with books, cardboard, or other materials you find. Roll 6 different objects down the ramp and measure how far they go.

5) Record your data on a table.

6) Make up your own story problem with the results.

We began to construct some questions that we might want to ask about the data in our table. 

Mr. Matt worked with the students to help them create questions using ‘Question Words’. 

Sample Student Questions:

we wonder what YOUR ramps might look like…

Empathy

What IS EMPATHY?

How do we develop empathy?

We read the story ‘Cleversticks’ by Bernard Ashley, illustrated by Derek Brazell.

This is a story about a little boy, Ling Sung, who hates going to school. There are too many things the other kids can do that he can’t. When he discovers everyone admires his ability to use chopsticks, Ling Sung is empowered.
The illustrations and story encourage the reader to reflect on feelings of helplessness, pride, discouragement and joy. The students retold the story using picture clues. We made a list of the characters in the story and discussed the setting (where the story takes place).
We talked about the beginning, middle and end of the story as well as the problem and the resolution (how the problem was solved). We created a ‘Story Mountain‘ to help us visualise and document our thinking.  
We used a graphic organiser to document key details from the text. 
This story encourages us to think about about how ‘Our choices affect our interactions with others.’ 
To explore this further, we discussed the different characters in the story. We wondered what message the author wanted to convey through this story.

I think the authors message is…

  • … we know that some people know some things and some people know other things. – Kavel
  • … everybody needs to be united. Friendship. Help each other. Learn from other’s strengths. – Sam
  • … do not laugh when someone can’t do something. Be kind. Be caring. – Sky
  • … letting us try things.- Hannah
  • … be helpful. – Miranda
  • … play kindly with friends. – Eunseong
  • … know different feelings and learn things. – Carlotta
  • … if you don’t know something you can keep on practicing and you will get better at it. – Elena
  • … nobody can do everything. – Ryder
  • … some people are good at writing and anyone can help to do writing. – Dohoon
  • … we also need friends. – Stella
  • … work at whatever you want. – Chanwoong

Next, the students used a thinking routine ‘I Used to Think… Now I Think…’ to document their initial ideas about the word ‘EMPATHY’.

What do you do when you feel sad or when something terrible happens? What would you do if you notice someone else feeling sad?

We listened to a story ‘The Rabbit Listened’ by Cori Doerrfeld

In this story, something terrible happens to Taylor. While he is trying to manage his feelings, his friends try to give him some solutions. One by one, the animals try to tell Taylor how to work out his feelings, and one by one they fail. Then the rabbit arrives and something wonderful happens… 

After listening to the story, the students documented their thinking, reflecting on how and why their thinking changed.

I used to think ‘EMPATHY’ was…NOW I think ‘EMPATHY’ is…

What does empathy mean to you?

Growing Patterns

Online Learning

Focus: Thinking Skills, Communication Skills

Can patterns repeat and grow? 

Here is an invitation to use loose parts to create patterns.

🌺What do you notice?

🌺What patterns do you see?

🌺What patterns can YOU create? 

This invitation encourages children to use everyday objects to describe, create and extend patterns. 

Balancing Stones

Online Learning

Focus: Self-management Skills, Thinking Skills

How high can you go?

Here is a challenge that encourages balance, focus and coordination. Gather a collection of stones and stack them as high as you can. How high is your stack of stones? 

Approaches to Learning (ATL’s)

  • develop fine-motor skills and eye-hand coordination 
  • demonstrate persistence in tasks
  • use strategies to problem-solve

Balancing

Online Learning

Focus: Thinking Skills, Research Skills, Self-management Skills

How heavy is the 🍎 apple?

  • How can we find out?
  • Can we use other materials and objects to weight the apple?  

Let’s read the story ‘BALANCING ACT’ by Ellen Stoll Walsh to explore weight and balance.

In this story, two mice 🐁🐁 make a teeter-totter. They play on their teeter-totter, balancing each other out until their friends come along to join their play. They think of different ways to include their friends, which leads to solving problems with weight and balance.

How might we make our own balancing scale?

Here is one way to create your own balancing scale. You might have other ideas to create your own scale! Follow the instructions in the video to make a balancing scale. 

Materials Needed:

  • 2 cups/small containers
  • 1 clothes hanger
  • A sharp object (to make the holes)
  • 4 pieces of twine about 60cms in length 

Steps:

  1. You may need an adults help to use a sharp object, or a hole punch to make holes in 2 small containers as shown in the instructional video. 
  2. Cut 4 pieces of twine about 60cms in length. The twine needs to be thick and strong enough to make the balance scale more durable.
  3. Tie the ends of the twine through the holes in the containers to the ends of the clothes hanger as shown in the instructional video.
  • What weighs the same?
  • How heavy or light are different objects or substances?
  • How might we weigh different materials and substances such as liquids and solids? 

Light and Heavy What things are light? What things are heavy? Let’s explore the concept of weight through this non-fiction picture book. In Light and Heavy, a girl investigates what she can and cannot lift.

Through this invitation, the children can investigate how objects have attributes which can be measured using non-standard units, which can then be used to sort and compare. 

Paper Cup Stacking

Online Learning

Focus: Research Skills, thinking Skills, Communication Skills 

Materials: a stack (20 or more) of paper (or plastic) cups

Inquiry Invitation

⚠️ What tower designs can we create using paper cups?

⚠️ How many cups can we stack without it falling over?

⚠️ How can we document our designs?

This inquiry challenge will encourage the children to:

  • observe carefully
  • test generalizations, strategies or ideas
  • draw conclusions and generalizations
  • gather information from a variety of sources (materials)
  • record observations—drawing, charting, tallying—using emergent writing skills, when possible, to annotate images
  • notice relationships and patterns
  • use mark-marking to convey meaning
  • document information and observations in a variety of ways
  • follow the directions of others
  • demonstrate persistence in tasks
  • use strategies to problem-solve

-Approaches to Learning (ATL’s)

Tangrams

Online Learning

Focus: Thinking Skills, Self-management Skills, Research Skills

What can we create with shapes?

tangram is a puzzle made up of seven shapes that can be arranged to form many different designs. Follow the instructions in the video to create 7 geometric shapes: five triangles, one square, and one parallelogram. Move the shapes around like a puzzle to create new designs.  

I wonder what your designs would resemble…

Here are a few designs to get you started!

Approaches to Learning (ATL’s)

  • understand that shapes have characteristics that can be described and compared
  • observe carefully
  • follow the directions
  • demonstrate persistence in tasks
  • use strategies to problem-solve

The Lego Bridge

Online Learning

Focus: Research Skills, Thinking Skills 

Peter Brown is another of our favourite authors. One of the stories we read often is ‘You WILL Be My Friend!‘. In this story, Lucy is searching for a friend in the forest. She approaches a pond, she needs to cross it. Can you help Lucy?

Here is a Lego Brick challenge for you!

Create a Lego Brick Bridge that Lucy can use to cross the pond.

How will you test your bridge?

Share a picture of your Lego Brick Bridge.

NOTE: This learning invitation will help children explore the concepts:

  • materials
  • weight
  • engineering and design

Approaches to Learning (ATL’s)

  • think critically
  • plan an experiment
  • observe carefully
  • test ideas
  • gather information through experimentation
  • demonstrate persistence in tasks
  • use strategies to problem-solve

Lego Boat

Online Learning

Focus: Thinking Skills, Research Skills

Following on from our experiments with Sinking and Floating

Challenge: LEGO Brick Boat

  • Make a LEGO brick boat. 
  • Put your LEGO boat to the test in a tub of water.
  • Add 1 RMB coins , a few at a time to see how many your boat can hold.
  • Post a picture of your LEGO brick boat!
  • How many coins could your LEGO brick boat carry safely?

NOTE: This learning invitation will help children think about weight, engineering and design. You can give your child a certain number of Lego bricks for an added challenge.

Felix the Engineer:

Felix LOVES Lego and was very excited to try the Lego boat challenge. He took parts of a space shuttle and modified it for his boat. After that Simon and Felix tried a lego boat. It worked great! They had a lot of fun, especially with the water 🤭. Look carefully to see how many coins his space shuttle could hold safely.

Leming worked like a scientist, planning, designing and creating a boat that could stay afloat while carrying lots of coins. Leming then tested his boat to see if it works. 

Approaches to Learning (ATL’s)

  • think critically
  • plan an experiment
  • observe carefully
  • test ideas
  • gather information through experimentation
  • demonstrate persistence in tasks
  • use strategies to problem-solve

Paper Helicopter

Online Learning

Focus: Self-management Skills, Communication Skills

Task: Make a Paper Helicopter

Follow the instructions in the video to make a paper helicopter.

This task will encourage your child to:
observe carefully
follow instructions in sequence to complete a task
develop small muscles in the hand
problem-solve
be patient
They will need to measure, draw lines, cut on a line and fold paper.

Challenge:
– Make a target on the floor using chalk, paper, or tape.
– Decide how many points each area of your target is worth.
– Play with a partner, take turns to see who scores the most points!

A Bridge

Online Learning

Skills: Thinking Skills, Research Skills

Challenge: The Coin Bride

You will need:

coins

a chopstick

Instructions:

Gather some coins and use them to build a bridge. The chopstick should be able to pass under your bridge without touching the coins! How tall, wide and strong can you make your bridge?

Take a photo or a video of your bridge, reflect on (and share):

  • How many coins did you use to make your bridge?
  • What helped you create your bridge?
  • What other materials can you use to create different types of bridges?

Here are a few different bridges around the world. Feel free to share some examples of the different bridges you create!

Sophie has created a bridge using her toys!

The Bridge Test:

Leming and his brother Leyang were wondering which material would be the most suitable to create a bridge.

They wanted to learn through ‘trial and error’, this is the work of a ‘researcher’. 

They have gathered some materials to test their theories. They have paper, plastic and wood.

The Paper Bridge.

The Wooden Bridge.

Their Conclusion:

  • “1-wood 2- paper with more strength 3- plastic 4- paper with less strength”

You might want to try your own experiments to see which materials are best suited when creating bridges!

Approaches to Learning (ATL’s)

Thinking Skills

Analysing: Observe carefully.

Generating novel ideas: Make unexpected or unusual connections between objects and/or ideas.

Considering new perspectives: Ask “what if” questions, Identify strengths and areas for improvement.

Research Skills

Formulating and planning: Ask or express through play questions that can be researched.

Data gathering and documenting (audio recording, drawing, photographing): Use all senses to observe and notice details.

The Board Game

@S created a game using stones from the ‘loose parts’ collection.

Next, she decided to make a chess board game. @S began by making a big square, including lines for playing the game.

She made triangles and circles that represent the two teams.

Then, she made poster to inform others about the ‘rules of the game’ and instructions on how to play the game.

@S “The paper around the game is because we don’t want the pieces to go outside.”

Before sharing the game, @S said “We have to test before we really played.” So she played the game with Ms. Tina and created a video to show her friends how to play the game.

The Instructions:

Step 1: Put the two circles here.

Step 2: Put the triangles here.

Step 3: Put the two black circles here.

Step 4: The people don’t want to go outside so we need this paper here.

Step 5: If he goes outside he cannot go inside.

@S played the game with Ms. Jiao.

Through her creative design, @S:

  • used discussion and play to generate new ideas and investigations.
  • interpreted visual, audio and oral communication: recognizing and creating signs, interpreting and using symbols and sounds.
  • expressed herself using words and sentences.
  • understood that mark-making carries meaning.
  • used mark-marking to convey meaning.
  • chose and completed the task independently.
  • demonstrated persistence in her task.

The Story of Paper

The children gathered around Ms. Ai to create boats using paper from the recycled box. They were curious and wanted to see how pieces of paper can be turned into something new and exciting.

Some children created musical instruments using different types of paper.

A Piano

They made maps, iPhones, games and money using paper and card.

A computer with lots of buttons.

Learning Outcomes:

  • engage with, and enjoy a variety of visual arts experiences.
  • use their imagination and experiences to inform their art making.
  • create artwork in response to a range of stimuli.

Noticing the children’s interest in paper, Ms. Tina decided to share some examples of paper art . The children then sorted out different paper to use in their creations. 

Ms. Anna Mila used a video to show the children the process of how paper is made. The children asked to watch the video repeatedly, asking insightful questions about the trees. They made great observations about the paper making process.

After we watched the video and read some books about how paper is made/recycled, we went into the atelier to make paper.

First, the children needed to rip up scraps of previously used paper.

Then, they needed to add lots of water.  

Then, they needed to blend the paper into a pulp.

Next, it was poured into a bin with water that had a screen in it. The children needed to pour the pulp into all corners, covering the whole screen as evenly as possible.  

This part of the work took great concentration and strength.

Sometimes the children noticed that they needed to add more paper scraps.

After the paper was poured, the screen needed to be lifted up carefully and then placed on a drying rack so that the pulp can dry, creating paper.

When the paper pulp on the mesh had dried, the children carefully lifted it off the drying racks. They were excited to see their own paper!

They sat around the tables with their own sheet of recycled paper and paints, excited to the create yet a new piece of art.

We wonder, what other materials and objects can we recycle?

Concepts: change, purpose, responsibility, creativity, connection, conservation, causation, changes of state, production.  

Learning Outcomes:

  • select tools, materials and processes for specific purposes.
  • understand the impact of simple actions on their immediate environment
  • understand that resources are necessary to meet the needs of living things
  • develop enthusiasm and respect for nature and Earth
  • develop care and concern for Earth and its environment

Approaches to Learning (ATL’s)

  • listen actively and respectfully to others’ ideas and listen to information.
  • ask for clarifications.
  • interpret visual, audio and oral communication: recognizing and creating signs, interpreting and using symbols and sounds.
  • express oneself using words and sentences.
  • participate in conversations.
  • be aware of own and others’ impact as a member of a learning group.
  • follow the directions of others.
  • demonstrate persistence in tasks.

The Brick House

We have been listening to the story The Three Little Pigs.

Leming approached the table that had bricks and wooden strips.

He began to create with the material. Leming noticed that each time he placed a piece of green wood across the two ends, it would fall inwards.

He decided to use bricks as a base, to hold up the falling wooden beams. He was able to solve this problem through experimentation. He explained that he was creating a house for a pig.

He gently placed the wooden beams, careful with his movements.

The last piece.

We wonder what Leming is thinking as he creates. What is his plan?

Leming explains that he has made the brick house, pointing to the props and the story we read. The pig is in the brick house and the green section is the fireplace.

We noticed how Leming has been thinking about the different houses as he built his own. He understood that the brick house had different spaces that were part of the story.

Leming is sharing his creativity through the use of props and stories.

Learning Outcomes:

  • use imagination and original ideas to create
  • explore and retell familiar stories dramatically
  • select tools, materials and processes for specific purposes

Props… continued…

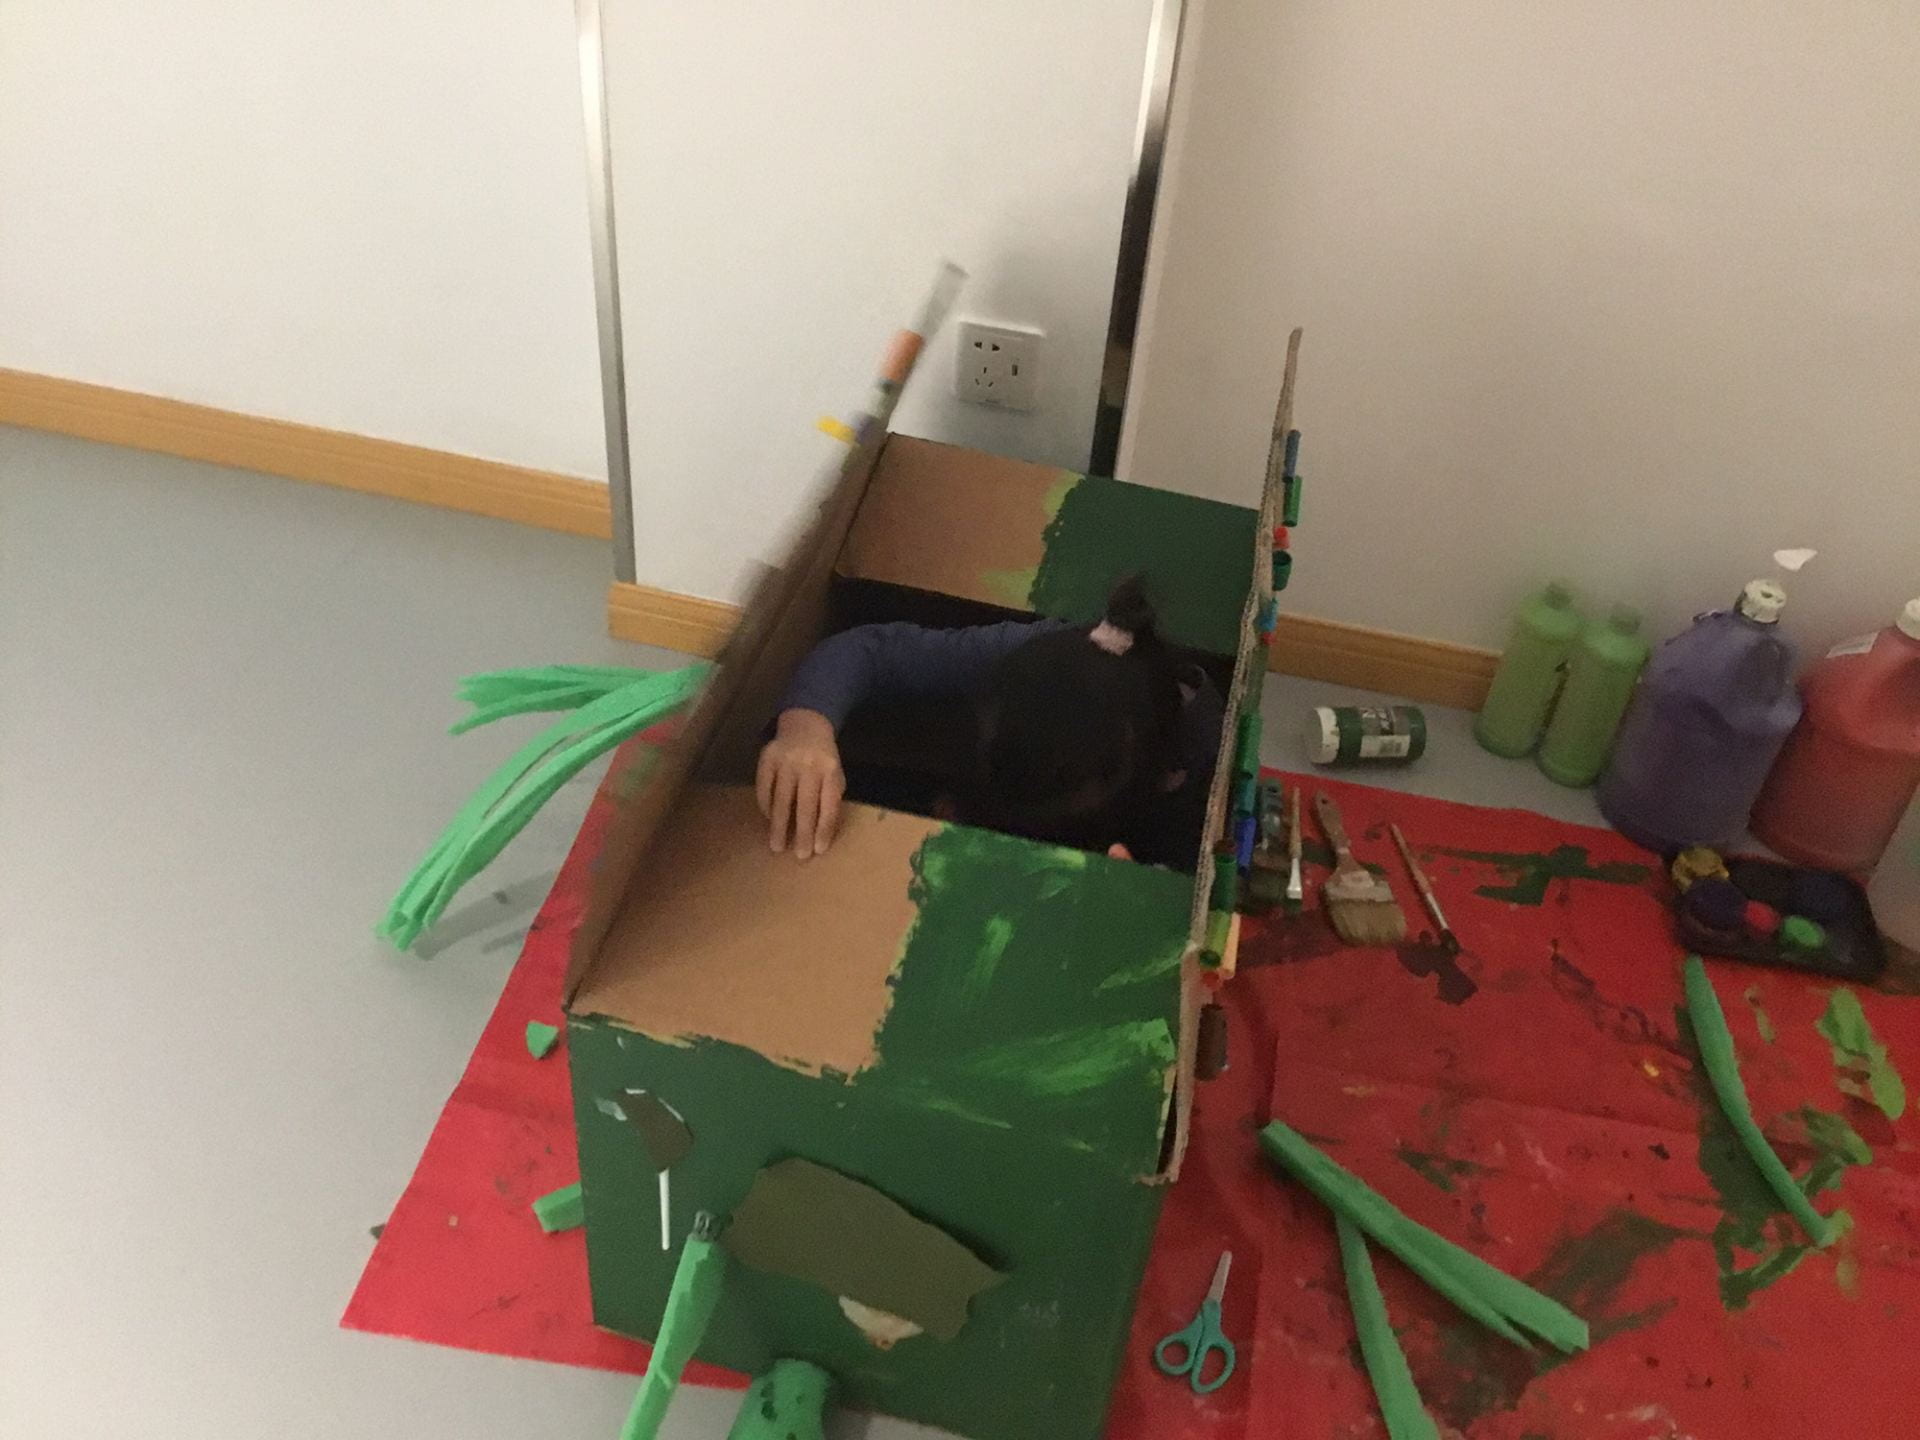
We continue to work on our project for our performance ‘The Little School of Horror‘. The children add leaves on the ‘Eating People Flower’. The children cut out different shapes of leaves and put them inside and outside of the plant.

Then, they decided to add blood on the plant because “The plant has eaten many people”. They wanted the blood to be ‘really scary’.

Next, they added sharp teeth inside the plant to make it even more scary.

Michelle got into the plant (box) and tested it to see if it was big enough for one person.

Throughout the process, the children demonstrated how they can choose and complete tasks independently, while sharing responsibility for decision-making. It was evident that they can be persist while engaging in their projects.

We are learning how to:

  • engage with, and enjoy a variety of visual arts experiences
  • select tools, materials and processes for specific purposes
  • use their imagination and experiences to inform their art making
  • create artwork in response to a range of stimuli

Stay tuned for our next steps…

How do we capture a moment?

Felix was excited as he came into school. He said that he found ‘ice’ on the grass. He said he had it in his hand and was sad that he could not bring it to class. He was invited to see if there was any more ice on the grass in the EY playground. His eyes lit up. He quickly put on her coat and ran outdoors. He came back with a piece of grass in his hand.

He looked sad.

He stated that there was ice on it ‘just now’. When asked what he thought might have happened, he explained that it has melted because the “inside is too hot”.

What if we did not have to bring it inside?

We thought about this for a moment.

What if we found a way to capture a moment? A picture?

Felix quickly chose an iPad and went back outside to document his observations. He came back with a beautiful picture of frost on the grass. He was simply beaming with pleasure that he was able to share what he experienced in the morning.

Felix “I got it! Ice.”

A Learning Journey – SEEDS!

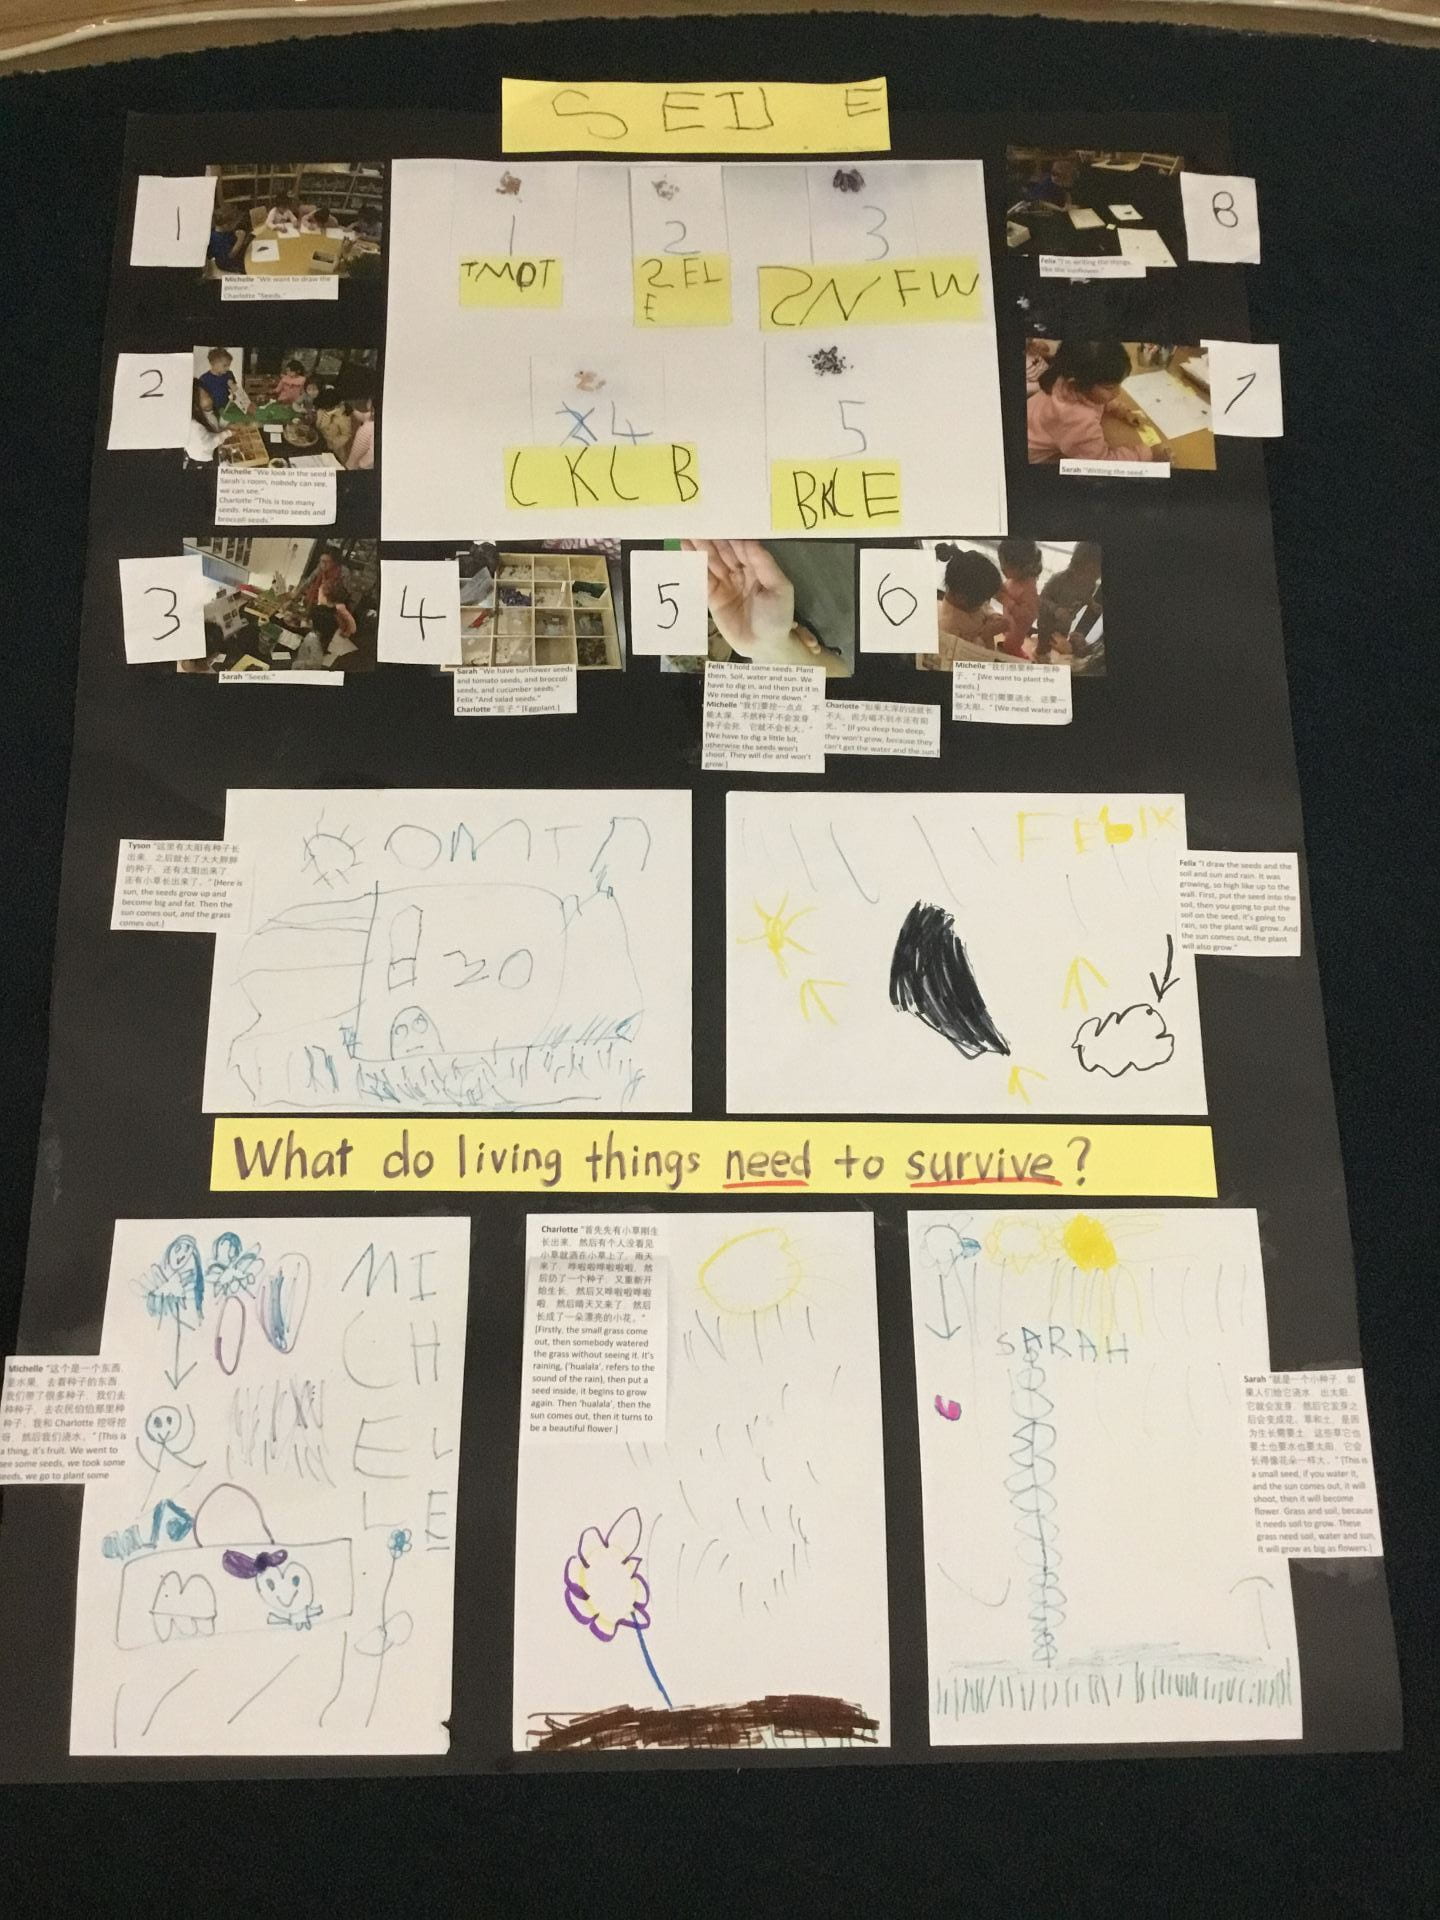
A group of children visited the garden and came up with many ideas about growing. They wanted to plant apples, flowers and bananas. They also drew pictures to explain what plants need.

  • Michelle “We want to draw the picture.”
  • Charlotte “Seeds.”

Although the children were excited to grow their own plants, they were not sure how to get started. They had many questions about growing. They went to Ms. Hannah to learn more about seeds as she is the ‘growing expert’ in the EY.

  • Michelle “We look in the seed in Sarah’s (K1B) room, nobody can see, we can see.”
  • Charlotte “This is too many seeds. Have tomato seeds and broccoli seeds.”
  • Sarah “Seeds.”

  • Sarah “We have sunflower seeds and tomato seeds, and broccoli seeds, and cucumber seeds.”
  • Felix “And salad seeds.”
  • Charlotte “茄子.” [Eggplant.]

  • Michelle “我们想要种一些种子。” [We want to plant the seeds.]
  • Sarah “我们需要浇水,还要一些太阳。” [We need water and sun.]

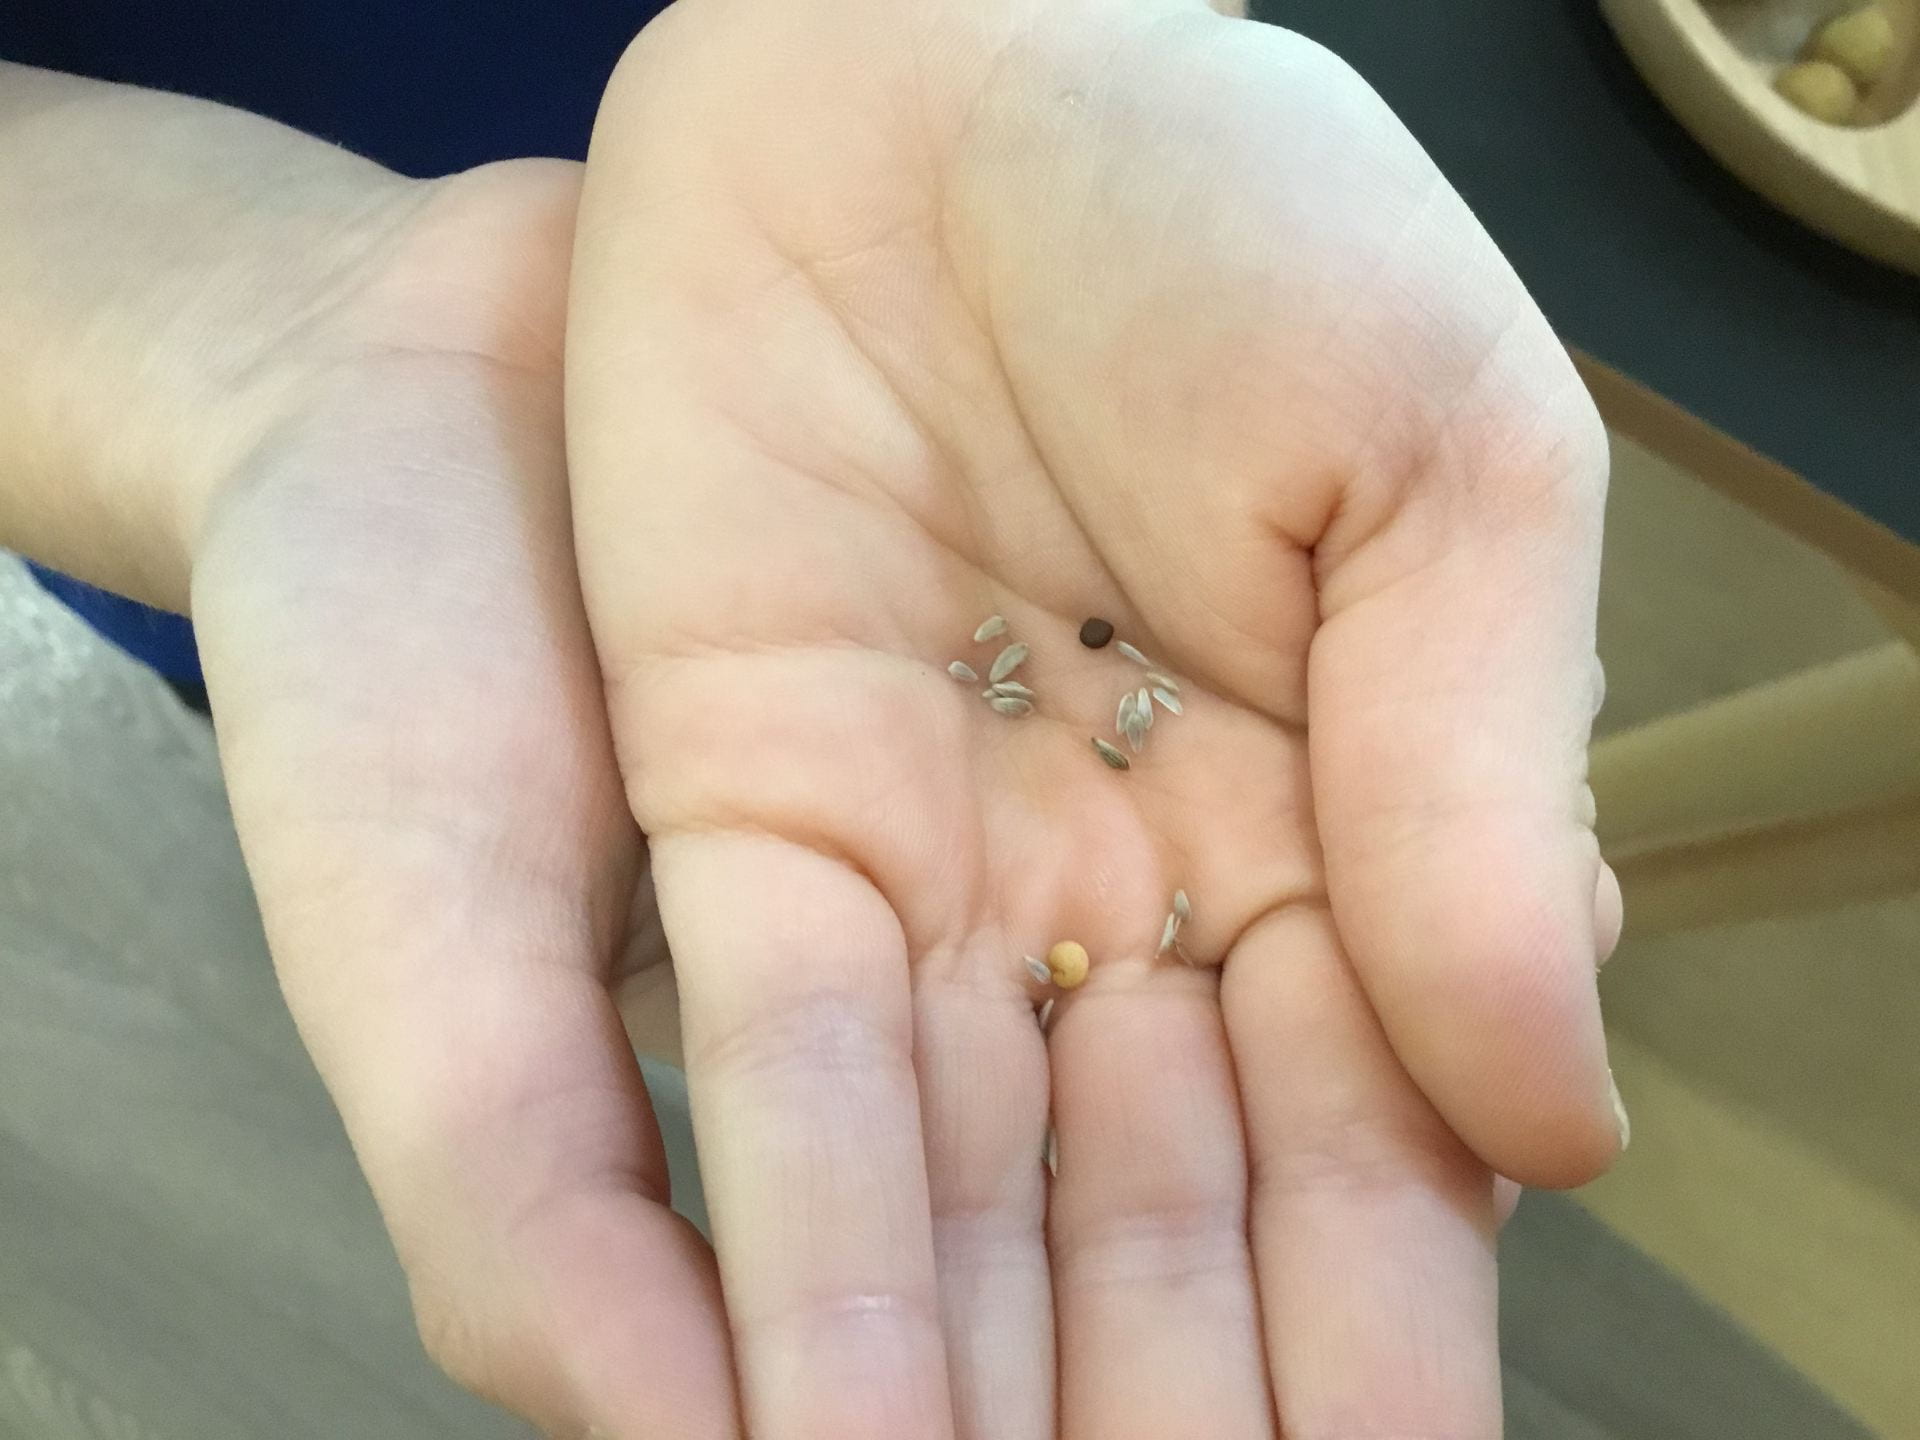
  • Felix “I hold some seeds. Plant them. Soil, water and sun. We have to dig in, and then put it in. We need dig in more down.”
  • Michelle “我们要挖一点点,不能太深,不然种子不会发芽,种子会死,它就不会长大。” [We have to dig a little bit, otherwise the seeds won’t shoot. They will die and won’t grow.]
  • Charlotte “如果太深的话就长不大,因为喝不到水还有阳光。” [If you dig too deep, they won’t grow, because they can’t get the water and the sun.]

  • Jiwon looks at the seeds, “The black seeds grow and become the food we eat? If you mix the white seeds with pink, will the pretty pink flowers bloom? White, mixed with red seeds in the delicious strawberries which will be brought up?” [translated from Korean]

The children received different seeds from Ms. Hannah. She also provided the children with lots of useful information about plant growth. When the children came back to class, some students helped document the information they gathered.

1 tomato 2 salad 3 sunflower 4 cucumber 5 broccoli


  • Felix “I’m writing the things, like the sunflower.”
  • Sarah “Writing the seed.”

Some students helped make pop-up labels which will be inserted in the garden beds to help identify the different plants.

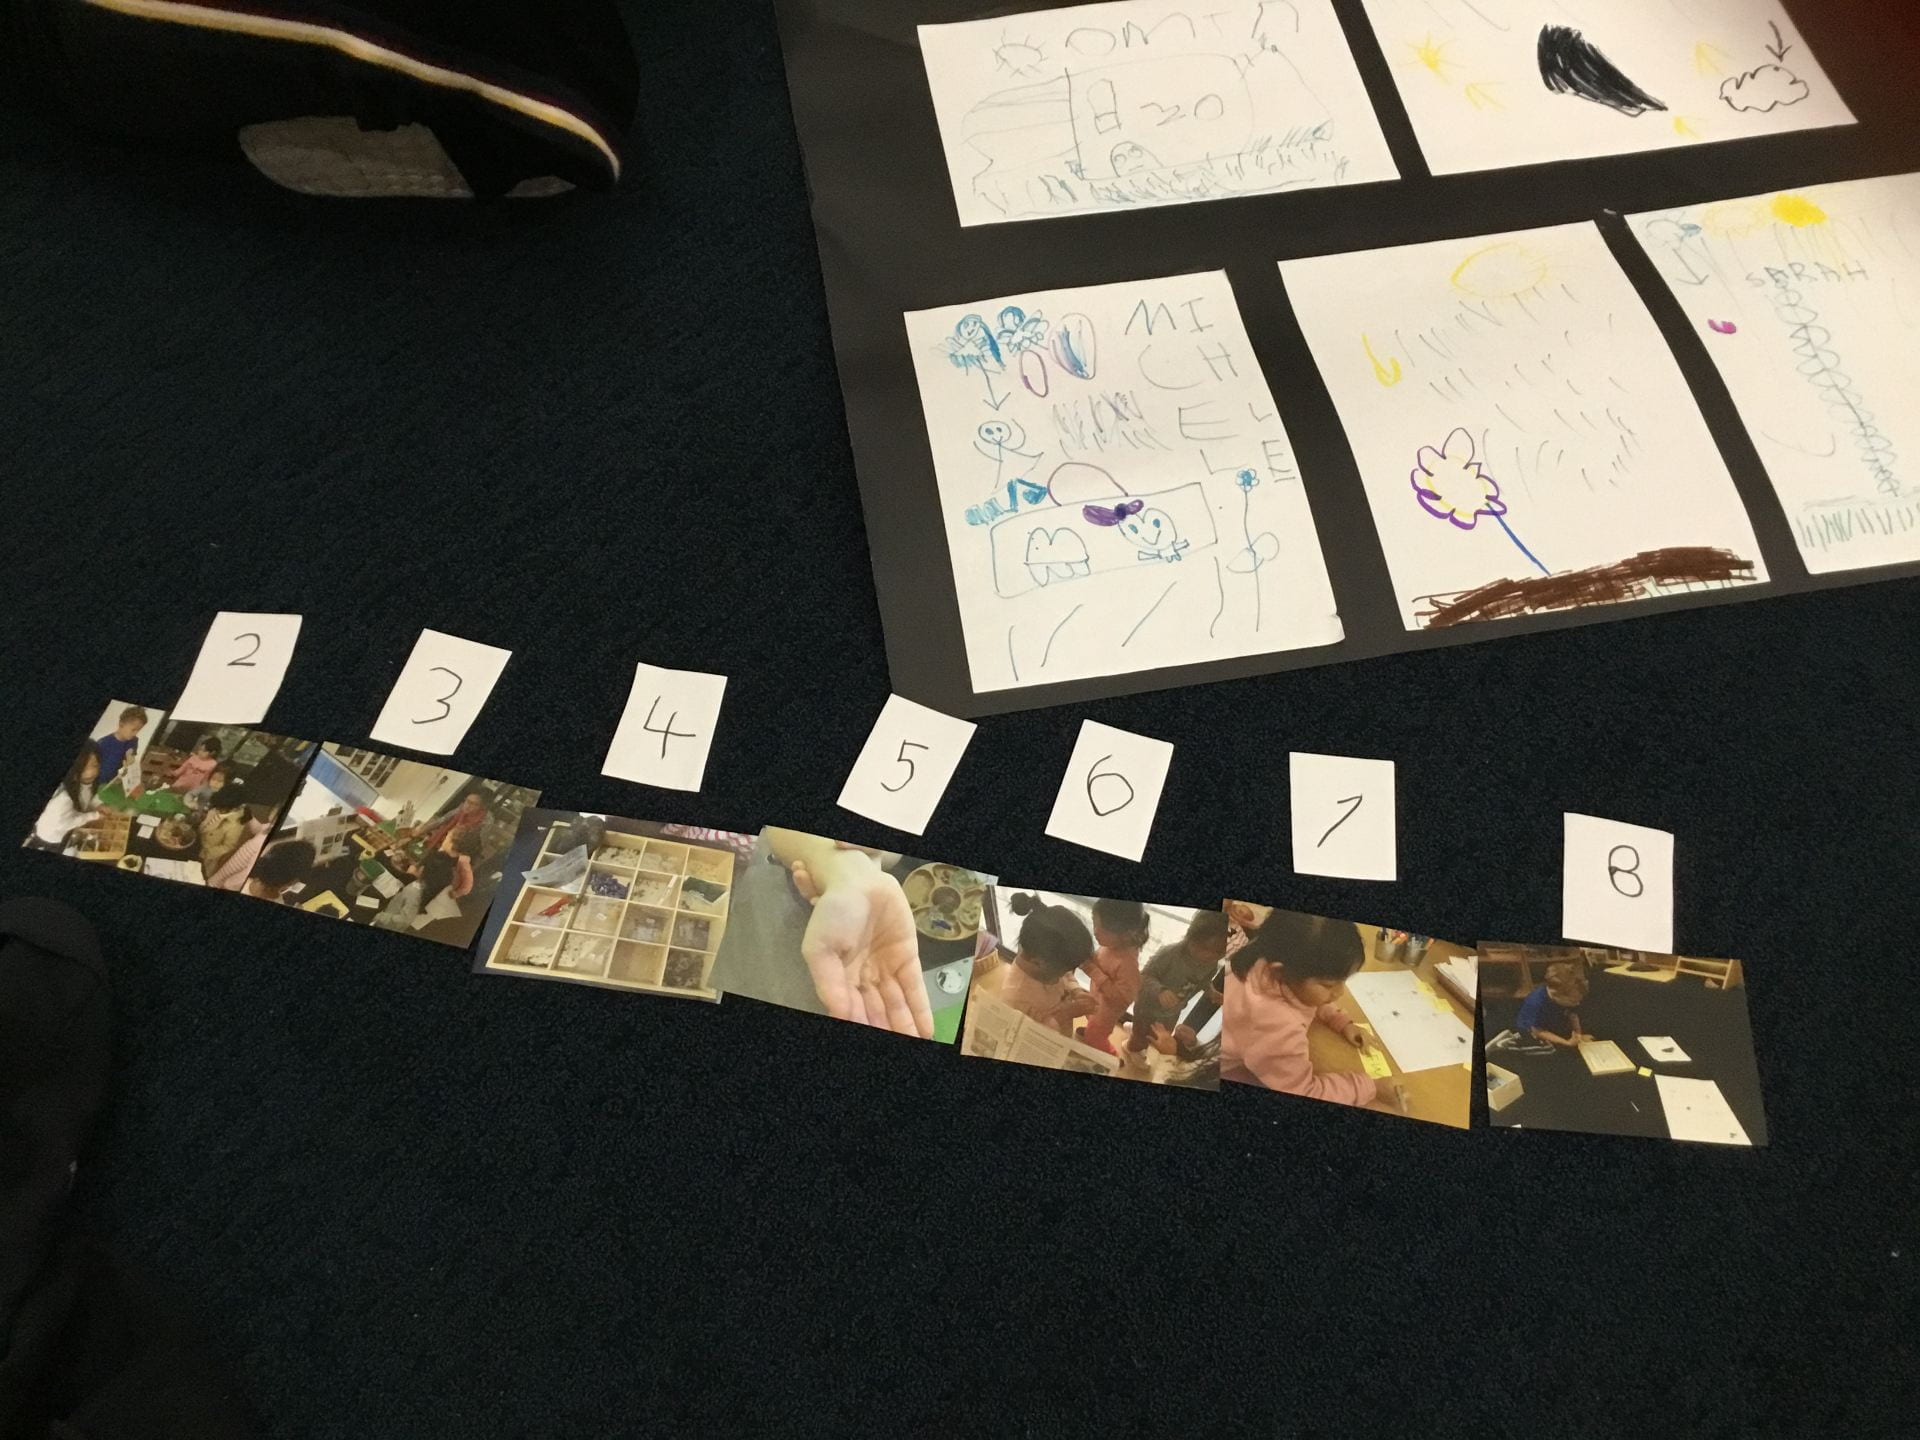
The children reflected on their learning journey and sequenced the events.

Next they shared their experiences with the whole class.

Sarah “就是一个小种子,如果人们给它浇水,出太阳,它就会发芽,然后它发芽之后会变成花。草和土,是因为生长需要土,这些草它也要土也要水也要太阳,它会长得像花朵一样大。” [This is a small seed, if you water it, and the sun comes out, it will shoot, then it will become a flower. Grass and soil, because it needs soil to grow. This grass needs soil, water and sun, it will grow as big as flowers.]

Felix “I draw the seeds and the soil and sun and rain. It was growing, so high like up to the wall. First, put the seed into the soil, then you going to put the soil on the seed, it’s going to rain, so the plant will grow. And the sun comes out, the plant will also grow.”

Charlotte “首先先有小草刚生长出来,然后有个人没看见小草就洒在小草上了,雨天来了,哗啦啦哗啦啦啦,然后扔了一个种子,又重新开始生长,然后又哗啦啦哗啦啦,然后晴天又来了,然后长成了一朵漂亮的小花。” [Firstly, the small grass come out, then somebody watered the grass without seeing it. It’s raining, ‘hualala’ (the sound of rain), then put a seed inside, it begins to grow again. Then ‘hualala’, then the sun comes out, then it turns to be a beautiful flower.]

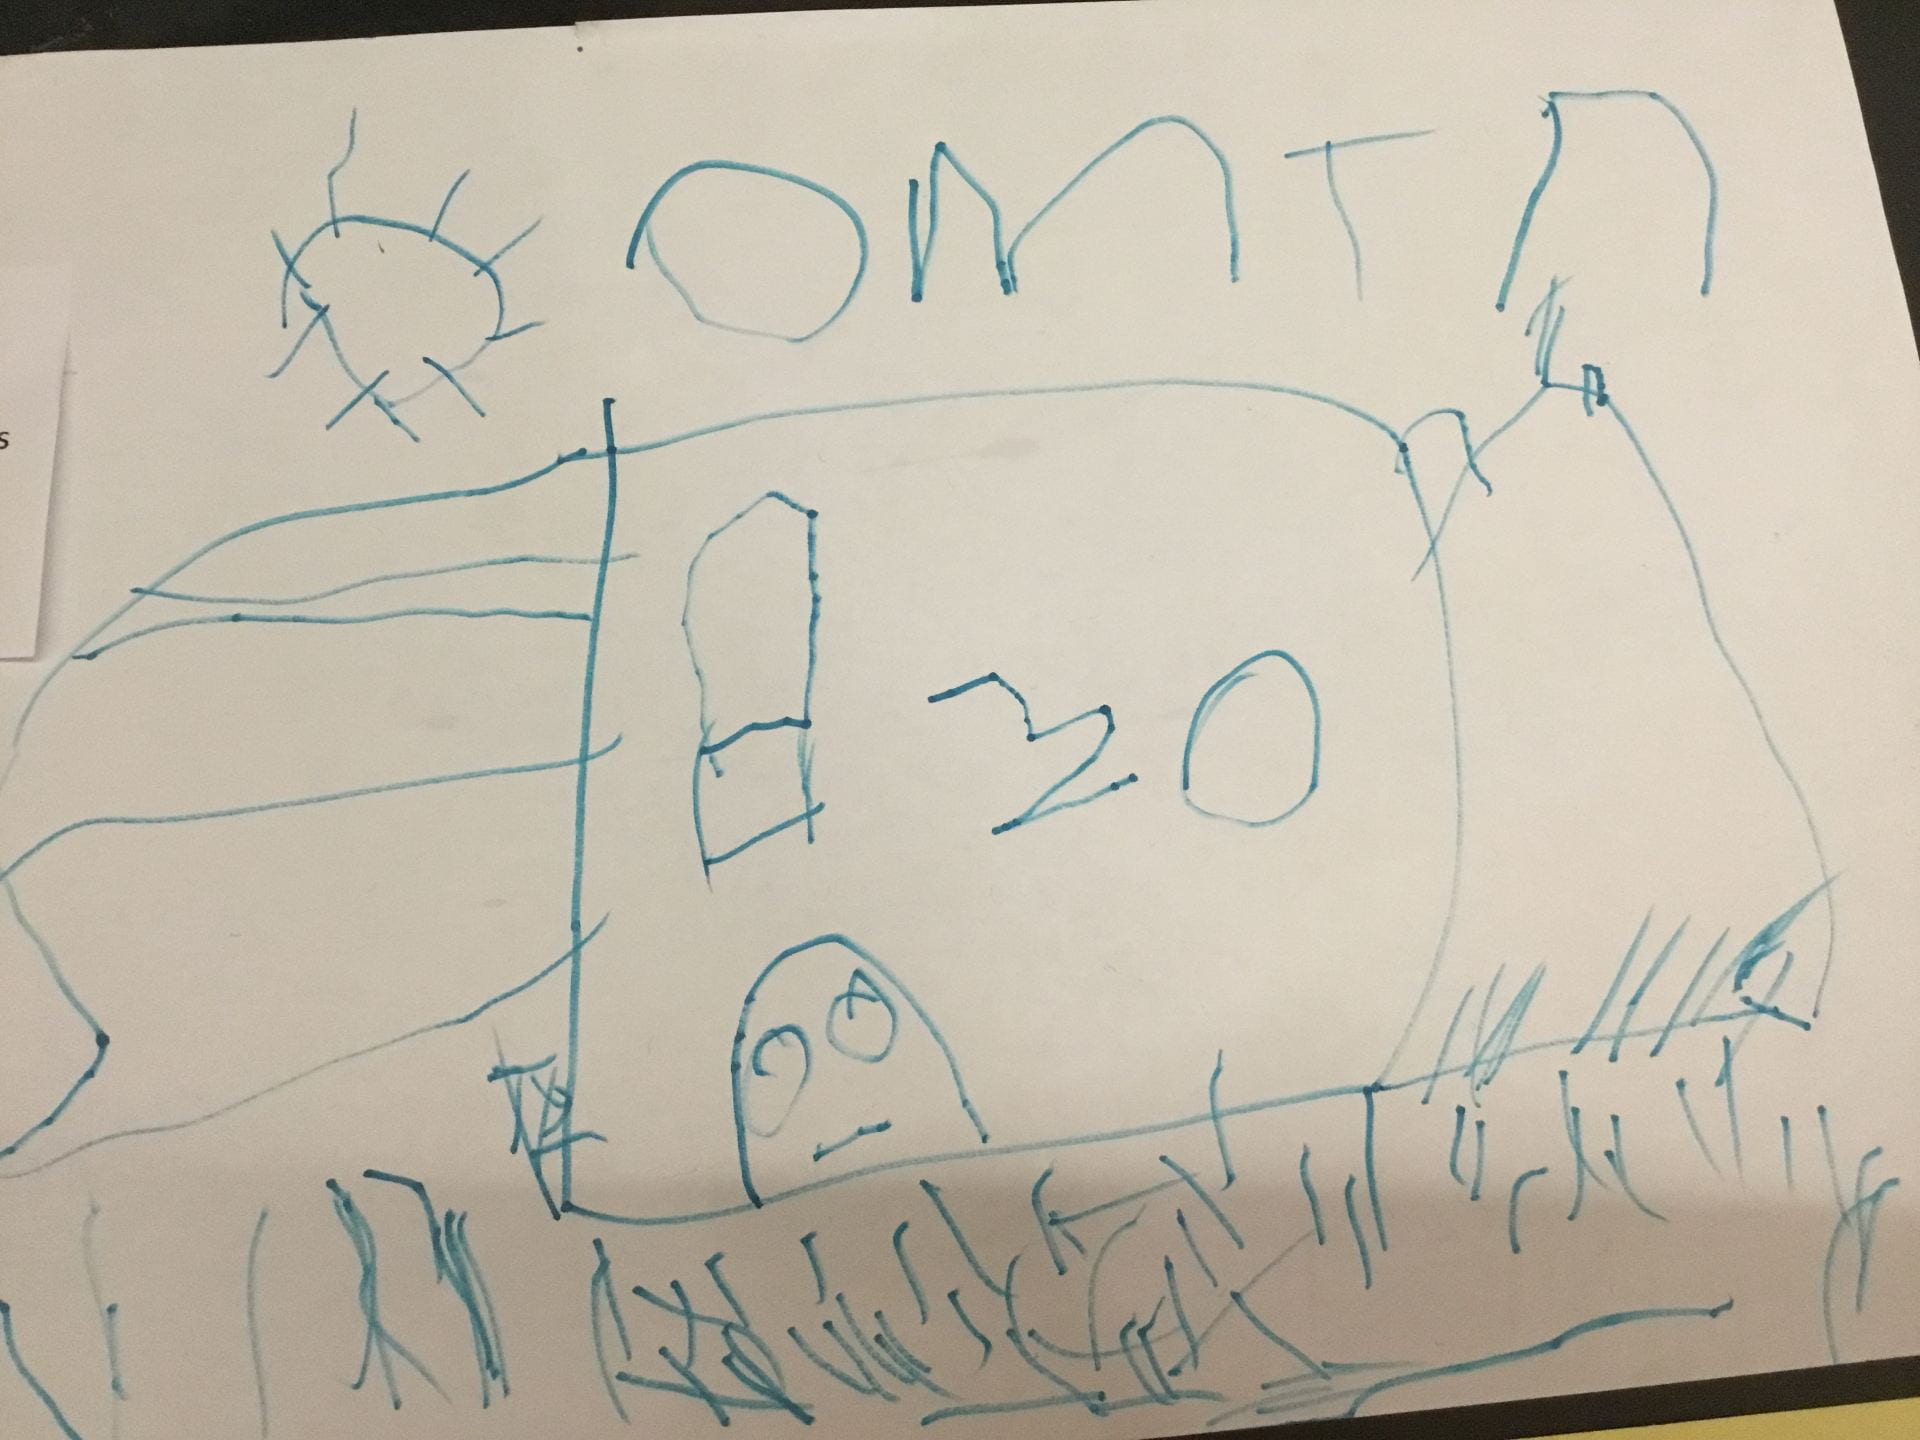
Tyson “这里有太阳有种子长出来,之后就长了大大胖胖的种子,还有太阳出来了,还有小草长出来了。” [Here is sun, the seeds grow up and become big and fat. Then the sun comes out, and the grass comes out.]

Michelle “这个是一个东西,是水果,去看种子的东西,我们带了很多种子,我们去种种子,去农民伯伯那里种种子。我和Charlotte挖呀挖呀,然后我们浇水。” [This is a thing, it’s fruit. We went to see some seeds, we took some seeds, we go to plant some seeds. We go to the farmers to plant the seeds. Charlotte and I dig, dig and dig, then we have to add water.]

We have so many ideas, we are now ready to plant our seeds!

What does it take to get a job done?

@S and @C had an important job. They were in charge of creating the pop-up labels for the garden plot. They sat together, side by side and delegated jobs to each other. Ms. Tina demonstrated the act of taping, and the children quickly took over the task.

First, @C looked for the end of the tape. It was hard to find the corner which would unravel the tape. @S waited patiently, giving @C the opportunity to try.

Once @C found the end, she gently pasted it on the edge of the table. Then pulled on the tape to let it out. @S helped her paste the end down and prepared to snip a piece of the tape.

The tape came away from the table and they both worked together to quickly fasten it on to the table once more. They moved their hands around each other, deep in thought about their next move.

One helped as the other positioned the tape on the table top.

Now it was time to snip away the piece they wanted. @S hesitated for a moment as she decided how big the piece of tape needed to be.

@C watched over as @S used both hands to keep the tape from sticking to everything! She concentrated on the task at hand.

The chopsticks were positioned over the board and sign and @S gently placed the tape over the wooden sticks.

When the task was completed, they both looked at their work with pride.

Both children showed great care and focus while they completed their task. They knew the job required skill and patience. They were persevering as they continued to work with the tape, even when it kept sticking back down and unraveling when they did not want it to.

Through this small moment, we witnessed noticed how the children had opportunities to:

  • Observe carefully.
  • Discuss the steps that need to be followed in order to complete a task.
  • Complete tasks independently.
  • Share responsibility for decision-making.
  • Demonstrate persistence in tasks.
  • Use strategies to problem-solve.

Approaches to Learning 

What does it take to get a job done? 

Persistence, cooperation, communication, thinking and problem-solving. 

The Design Projects

The community have been spending time during their breaks, creating different items using the different materials provided by the children. 

They have used wooden blocks, clay, glue and nails to create a variety of items.

Some of the projects were in the ‘construction’ stage, some of them were completed and labelled.

The children frequently visited the space to see the many projects being carried out.

They discussed the projects and decided to share their thinking and questions with the creators.

Felix “Thank you for build tree house.”

Sebastian “A car. A tool for pushing the car. Then the car put there.”
Tyson “这个是车子。谢谢。因为你们给我们做了很多东西。”[This is car. Thank you. Because you help us make a lot of things.]

The children were inspired, they wanted to create their own projects. They used the materials to make iPhones, iPads, vehicles and houses.

“这是一个美国的飞机。” [This is an America airplane.]

Felix “This is a ipad. You can measure everything how heavy it is. And it can look under the floor.”

We wonder what else we can make with the different materials we have around us.

How might you be inspired to create?

Approaches to Learning (ATL’s)

  • Observe carefully.
  • Seek information.
  • Ask for clarifications.
  • Express oneself using words and sentences.
  • Participate in conversations.
  • Negotiate ideas and knowledge with peers and teachers.
  • Choose and complete tasks independently.
  • Demonstrate persistence in tasks.
  • Use strategies to problem-solve.

Lines

The children have been using many different types of lines in their drawings, messages and paintings. Some of the lines develop into different pictures of objects, and others become letters and numbers.

Lines in maps…

Lines in messages…

Lines in letters…

We read the story ‘The Line’ by Paula Bossio. Upon seeing the cover page, Felix shouted “Ms. Tina!” He was referring to the litter ‘T’ in the title of the story.

The children began to call out and identify the different letters in the title, ‘THE LINE’ that were also in their names.

H is in Charlotte

E is in Michelle and Charlotte

L is in Leming

I is in Michelle

They circled the different letters they recognised.

Next, we read the story and made a note of all the different lines that were in the book. In this simple wordless picture book, a little girl finds a long black line. She wiggles the line, slides and spins inside circles that the line has created.

Later in the story, the line transforms into bubbles, a jungle vine to swing from, a tightrope to balance on and a big, hungry monster! We notice how the author and illustrator expressed the different emotions of the little girl in the story.

We observed the lines Felix and Yoochan have created using the ramps. They have made a road that goes to the beach.

We can draw many pictures using different lines. Here are a few different types of lines.

The children created pop-stick puppets using different lines.

@F uses lightening lines and other shapes to create pop-stick puppets. He then decides to create a puppet show using the different pop-stick characters and objects.

Approaches to Learning (ATL’s)

Communication Skills

Speaking

  • Express oneself using words and sentences.

Interpreting

  • Interpret visual, audio and oral communication: recognizing and creating signs, interpreting and using symbols and sounds.
  • Understand the ways in which images and language interact to convey ideas.

Reading, writing and mathematics

  • Understand symbols.
  • Understand that mark-making carries meaning.
  • Use mark-marking to convey meaning.
  • Document information and observations in a variety of ways.

Helpers in the Community

We had a second step ladder in the classroom. But again, we had to assemble it!

This time we decided to ask our community to support us. We placed all the pieces of wood, screws and tools in the corridor, along with the instructions. We included a ‘message’ to the community.

A week went by. Nothing happened. The step ladder was still in the box. A few days later, we saw a student working on the project. He was assembling the step ladder during his lunch break.

The next day, a few other children joined in to help. A week later, the step ladder was completed. The community helpers posted their own ‘message’.

We decided to send them another ‘message’. We thought that they may like to paint the step ladder they have assembled. The quickly joined in to help.

The step ladder was beautiful.

The children in PreK-K1C were excited to see the green, white and silver step ladder.

What other ‘messages’ can we send them?

The students began to share their ideas. Can we ask them to help us again?

  • Felix “Can you please build a tree house? We can bring trees. We can bring small trees (sticks). Put something sticky.”

  • Michelle “Could you please build a garden? Put leaves and flowers. And keep garden books. Chairs here. People can make lion in garden.”

  • Tyson “大椅子。很多木头。” [a big chair. Many pieces of wood]
  • Teacher “How will the Grade 4 students know what type of chairs we want them to make for us?”

The children used paper to draw their designs.

They collected the material the community may need to use to create the different items. Craft sticks, twine and scissors for the tree houses.

Play dough for the garden.

Pieces of wood, a hammer and nails for the chairs.

  • Felix decided to move his tree house close to the bulletin board. “They can see what my tree house looks like.”

Will the community see our messages?

We wonder what will happen next…

https://twitter.com/shemogani/status/1174867793679773696

Approaches to Learning (ATL’s) 

  • Observe carefully.
  • Use discussion and play to generate new ideas and investigations.
  • Present information in a variety of modalities.
  • Listen actively and respectfully to others’ ideas and listen to information.
  • Interpret visual, audio and oral communication: recognizing and creating signs, interpreting and using symbols and sounds.
  • Express oneself using words and sentences.
  • Participate in conversations.
  • Negotiate ideas and knowledge with peers and teachers.
  • Understand that mark-making carries meaning.
  • Use mark-marking to convey meaning.
  • Share responsibility for decision-making.

The Step Ladder

Our new campfire has tall curved shelves. They are great for storing our resources and creations. However, we realised that we cannot always reach the top of the shelves. Even the teachers were not tall enough!  

We decided to order a step ladder from IKEA. It came in a box. It was in pieces! We had to fix it ourselves.

A few of the children took up the challenge. @S stated that she knows how to do it as her grandpa and grandma always fix the furniture in the house. She knows how it’s done.

@S wanted to be in charge of the screws. @F wanted to read the pictures in the instruction manual. It was decided that he would be the person telling the team where the screws fit, and which wooden pieces were needed.

The children wanted to know the name of the tools we were using. We invited @MrZachG the Design teacher, to come over to the Early Yeas space to help us. He told us the tool was a type of wrench!

The children talked about the pictures they saw in the booklet. They noticed the sequence of steps and the need to follow them.  

@F noticed that there are different kinds of screws. He looked closely at the different pieces of wood to see where the screws needed to be inserted. This was a challenge. There were so many different pieces!

He wondered in which direction the screws needed to be turned. After many attempts, @F said…

“Because it’s harder and harder, so I know I’m right.”

Others joined in to see how they can help. The project allowed for opportunities to learn through trial and error.

Conversations revolved around size, measurement, purpose and safety. We wonder what other tools people use to create different objects…

Through this project we had opportunities to …

  • Observe carefully.
  • Seek information.
  • Ask or express through play questions that can be researched.
  • Analyse and interpret information.
  • Listen actively and respectfully to others’ ideas and listen to information.
  • Express oneself using words and sentences.
  • Negotiate ideas and knowledge with peers and teachers.
  • Understand symbols.
  • Understand that mark-making carries meaning.
  • Be respectful to others.
  • Play cooperatively in a group: sharing, taking turns, helping.
  • Choose and complete tasks independently.
  • Follow the directions of others.
  • Share responsibility for decision-making.
  • Demonstrate persistence in tasks.
  • Use strategies to problem-solve.

Approaches to Learning (ATL’s)

The Mirror Ball

The students have been curious about ‘height’. They have been building tall structures using blocks and other manipulatives and sharing their theories about height, size and length.

  • Charlotte “我们在搭小魔仙的城堡,这是忍者的家。我们想到很多的好主意,然后我们就可以搭很多的东西” [We are building a castle for the fairy. This is ninja’s home. We had many ideas so we can build many things.]

  • Si Hyun “I think Amber is like this one, same making. This is a tower. Then other ones go here to the top. And Jiwoo is making small top. And here is diamond. And then everyday get the diamond get go to house and play. And then get to school and diamond is big, big, big.”

  • Sarah “Amber和 Charlotte在玩blocks。她们需要搭东西。她们能搭得比房子还要高。还没有房子那么高。比恐龙还大。我觉得Amber和 Charlotte搭得挺好的,但是她们搭得很高,肯定会倒的,一下子轰倒了,好好玩。”[Amber and Charlotte are playing blocks. They need to build things. They can build higher than the house. No, not higher than the house yet. Bigger than the dinosaur. I think they are doing good. But the building is very high. It may fall down. It will be very funny if it falls down.]

  • Amber “这里在搭高高,然后我弄倒的时候我说了‘啊’,我觉得很好玩。”[We are trying to build higher. When it fell down, I said ‘Ah!’. I think it’s very funny.]
  • Ethan “这个是别人搭的,Amber, Charlotte在一起玩,她们搭得很高。”[Someone else built this one. Amber and Charlotte are building something very high.]

During snack time in the Piazza, a group of students noticed a structure built by the students in the K2 class. They walked over and began to talk about what they noticed. 

  • Alejandra“这是可以爬的,我们可以到天空看月亮。Amber and Charlotte are the same.从那个窗户可以看出去,用电梯,用最快的电梯,上面还可以有发光的星星,很漂亮。还有放两个这种线,三个小的,还有一个三角形就变成真的。”[This one you can climb. We can go to the sky and see the moon. Amber and Charlotte are the same. You could see from that window. We can use the fastest elevator. There are some shinny stars. Very beautiful. You can put two of that strings (referring to the blocks) and a triangle, then it becomes true.]
  • Charlotte“他们一样在搭高高,但是他们搭得太高了,他们是怎么做到的呢?然后可以搭个更大的。”[They are building something high. But it’s so high, how can they do that? We can make a bigger one.]
  • Jiwoo “I can see a big one, two small one. Big and small. Here one, one, one, one.” (referring to the blocks and the tower)
  • Jasmine “I see a tower. And I see Amber build something. Amber build a tower. She want to build high. Amber says ‘不要把它弄倒。’ [Don’t break it down] I see she build a ninja tower. One high, one high, three blocks. She has ‘三角形’[triangle]blocks.”
  • Ruby “I see Amber building blocks. Charlotte helping. I see a building somebody already built. Somebody wanted to build a giant thing to see when we have snack time. This is bigger than that one. These have two big blocks and they are the same. Three blocks.”

During a conversation, one student wondered if we can reach the ‘moon‘. Ms. Tina found a mirror ball in the storage room. We decided to suspend it from the railings in the classroom and offer the students a challenge.

Ms. Tina began by reminding the students about their questions and wonderings about tall structures.

The students were invited to show their thinking using paper before they begin to test their theories.

Here are a few…

Charlotte “我画的这个是地基,用一些blocks围成一个方块的形状,地基就可以很平稳。房子都需要地基,需要围成一个圈。我们可以做一个超高的东西,然后呢就可以用积木碰到球,很高。等我长高了我就可以够到了,等我长大我就是K1,然后就可以够到了。我们可以做一个超大的机器,把它抱住很紧,那它就不会倒。”[I was drawing the foundation. I used some blocks to make a square. Then it’s stable. All the houses need foundation. It needs to be made into a circle. Then we can make something super high. Then we can add blocks to reach the ball. It’s very high. When I grow up, I can reach them because I will be in K1 then. We can make a super big machine. It can hold the house very tight, the house won’t fall down.]

Freida “That’s a circle. Some blocks here. And the disco is hanging here. It was blocks, blocks, blocks up to the disco. Up, up, up, up to the top. I drew it.”

Sarah “如果我们想碰到灯的话,可能会很难。我们要把blocks搭得很高才能碰到。我们用梯子搭搭搭。”[If we want to reach the light, it may be very difficult. We have to build very high by using the blocks. We are using the ladder to help us build.]

Alejandra “这是一个塔。那个塔这里到最上面有电梯。上面有闪亮的东西,它可以很快到终点。”[This is a tower. This is an elevator from here to the top. This is something shinny on the top. We can reach the destination.]
“是因为我有一个好办法,用楼梯爬到上面,这样搭才不会掉,没有楼梯就不能够到最上面。从1,2,3……就是终点,最上面的终点。”[Because I had a good idea that we can use the ladder to climb to the top. It will protect us from falling down. You can’t reach to the top without the ladder. From 1,2,3……That is the destination on the top.]

Si Hyun “This is big blocks go to the top. And red, blue and yellow. The ladder. [Si Hyun used his body and expressions to show how the ladder makes the blocks more stable]

Jasmine “Me get one step, two step, three step……And I go to the blocks. Then I climb the chair and climb the puzzle and climb, climb, climb. And then I saw something. I see a ladder and I climb a ladder. NIS stretch my arms. Then I get the moon.”

Amber “This is blocks, for that one [The mirror ball]. Dinosaur is go so high. ‘Fifteen’.”

Lawrence “With the small blocks can build like this [showed with hands]. 18 blocks.”
2nd idea “The steps, 9.”
3rd idea “The ladder, 8.”
“The ladder is best idea because ladder is help building.”

Nicolas “It’s the tower in the classroom. We are building so high to get to the disco lamp. 5 kilometres high.”

Michelle “这是一个可以攀爬的游乐园,可以够到月亮。用一个梯子,然后可以用很多积木块,把它一层一层叠上去就好了。”[It’s an amusement park that you can climb. Using a ladder and many blocks. You can reach it by piling them one by one.]

Ruby “We are making a tower to make the same height as the disco. We had a little help with the ladder. It’s difficult the blocks keep falling down and then you have to go to the nurse for million times. When you climb on the top of the disco, you got hurt, you can’t climb on top because the rope is not hard enough to lift people then you will fall down then you have to go to the nurse. Building it with our hands.”

The students had many different theories. They suggested a tower of blocks could reach the mirror ball, or even a ladder. Yet another student suggested a stairway to reach the mirror ball. All these theories included references to number, quantity and size. The students recorded their ideas using pictures, symbols, numbers and oral stories. They wondered if their ideas might work. They decided to test their theories.

One student suggested the large yellow blocks. He made a connection with a previous activity we did when estimating and measuring the height of people we knew.

Another student decided that the blocks were not high enough, we needed a way to reach up high.

  • Ruby “We are making it taller.”
  • Freida “To the disco.”
  • Nicolas “It’s falling!”
  • Ruby “How about we do each next?”
  • Nicolas “I’m going to make it. Because it is too high, it’s wiggling. We can’t reach. Every time it falls down.”
  • Alejandra “We can use the ladder!”

A ladder was suggested and brought over. Everyone wanted to have a turn to climb the ladder to place the blocks.

Everyone wanted to have a turn to climb the ladder to place the blocks. We had to find a way to work together. Ms. Tina called a meeting. The students discussed safety, collaboration and decided on a way to move forward.

One student decided that the numbers on the side of her paper looked like a measuring tape. We decided to use a tape to see how tall the mirror ball was. She worked on creating her own measuring tape.

  • Amber “这样我就能把它弄得这么高,这样可以够到那里。这样我们就可以够到那样亮亮的东西。我们就可以知道它是多高。65.我需要把它放在上面就可以知道多高了。”[I do this because then I can make it very high. We can reach there to get the shiny thing. We know it’s 65 high. We need put things on then we know how high it is.]

The students finally reached the mirror ball with blocks. They reflected on how they worked together and placed their ‘people blocks’ on the rungs of the ladder.

Later we read the story ‘Papa, Please Get the Moon for Me by Eric Carle. The students made many connections between the story and the process they went through to ‘get to the moon’.

SLO’s

  • Use non-standard units of measurement to solve problems in real-life situations involving height
  • read, write, say, count, model and order numbers to 10
  • understand that number names relate to a specific quantity
  • estimate quantities to 10

Student-Led Conferences

‘The learning belongs to the students, not the teacher. We are supporting our students to take ownership of their learning and to be able to think and talk about their learning with knowledge and confidence. When students know how they learn best and are able to reflect on their learning, they are able to advocate for themselves.’ (Parent Survival Guide to Student-Led Conferences, NIS)

The PreK-K1 Student-Led Conference is a special day in the school calendar. Throughout the year, the students have decided what learning stories they would include in their ‘treasure box’, that showcase their growth, learning and general development.

It is a special day for the teachers, as they watch the students take ownership over their learning. In order to do this with purpose and confidence, they first practiced this task with a friend.

https://twitter.com/NISPreKK1/status/1111151903830765568

The students are provided with a guide to help them navigate through the day’s activities. 


The Treasure Box – Portfolio

At this station, students shared their portfolio boxes with their parents. These boxes are a treasure chest of learning. Students can go through the items they have treasured through the year, while reflecting on their experiences.

The Name Game

At this Literacy centre, the students followed a guide to build, write and create their name using blocks, paper, card and writing tools. 

Estimation Station

At this centre, the students completed an estimation and measurement activity. 

https://twitter.com/NISPreKK1/status/1107931145692299264

The Weave

The students have been working on a weaving project in the classroom. At this centre the students were invited to complete the weave with their families. 

https://twitter.com/NISPreKK1/status/1111782766679490561

Musical Centre

The students have been excited to share a special song in Mandarin. This centre invited families to join in as the students sang along to the song. 

https://twitter.com/NISPreKK1/status/1118133101647974400

SLO’s

  • share their learning with peers and parents in a reflective process (SLCs)
  • communicate in different ways

Expressing Ourselves – Games

We have been exploring how we can express ourselves in different ways. During a regular PE lesson, Ms. Angie gave the students a variety of resources and invited them to create their own games, as a way to express themselves.

The Circus Game

by Nicolas, Felix, Freida and Alejandra

  • Nicolas “This is a circus and they are watching how we did the circus. And then I said who wants to help to be somebody like that? Then they trained, Felix and then catching them and catching and then looping. The cones are so nobody breaks it. This is the mat (red square) so they can go inside. We taught the teacher how to do it. The people when they go inside we had it to do more things. I thought of a circus because of other people stop and maybe sit down. Because maybe they will watch us. In a circus, I was in the Shanghai circus, first we go to Angela and then we go to a shop, get some candy and go to the circus. And they were doing acrobatics. One of them slided down with the head down. I know how to do it. When they are really new to it. And the other one, he was balancing for 6 minutes. Two pieces of golden. They like to train and show the people what they do. I know a circus song.
  • Alejandra “Making a game like a show where people can look it. You need to start again and again. Because I need to do so many things on stage, starting, standing, so many things to do.”
  • Felix “You throw it and then you get it in your hand. The hoop. I like it because that (the game) was so big.
  • Freida “We played the circus. So amazing. We built it better. Just dance and dance.”


The House Game

By Jasmine Sarah and Michelle

  • Jasmine “We playing in the games. I in outside with my sister playing this. We do lots of games like this. Same one. Because we want this is short, very ok.”  “我们的家。就是我们可以一起玩,我们可以洗脸刷牙,可以吃饭,还可以睡觉。这里是我们变身的地方。它的名字叫place。是因为是我们创造的东西。是蜘蛛网的地方玩过,我和姐姐一起玩过这个游戏。” [This is our home. We can play together. We can wash our face and brush our teeth, also we can eat and sleep. Here is the place we can play ‘changing’ game. The name of the game is ‘place’. I played it with my sister in the spiderweb.]
  • Michelle “我们会跑来跑去。我在和妈妈还有爸爸在客厅玩过这个游戏, Jasmine, Sarah 去过我家,玩过家家的游戏,我们玩过。我们可以一起唱歌。” [We run here and there, I play this game with mummy and daddy at our home. Jasmine and Sarah went to my home before to play the house game. And we sang together.]
  • Sarah “我们在做家。我们在搭得非常漂亮。我们刷牙。这个地方是我们刷牙的,这个地方是我们睡觉的,这个地方是吃东西的,还有喝茶的。Jasmine和我就变成梅西了,Michelle 和我变成Elsa了,Elsa是我最喜欢的了。” [We are making a home. It’s very beautiful. We brush our teeth here, we sleep here and we eat here. Jasmine and I change into Meixi, Michelle and I change into Elsa. Elsa is my favourite.]


The Skittle Game

by Si Hyun, Jiwoo and Ethan

  • Jiwoo “We here. Hitting this (skittles).”
  • Si Hyun “Ball go skittle, knock, fall down. Finished. Jiwoo and Ethan and me play.”
  • Ethan “我们在玩保龄球,一个球滚过去,你怎么打保龄球就怎么打保龄球。我在句容家楼上玩过,我哥哥弹钢琴的时候我和阿婆一起玩这个游戏。” [We are playing bowling, one ball rolls there. It’s the same as how you play the bowling game. I played this game with my grandma in my home when my brother was playing the piano in JuRong.]


Skip and Roll Game

by Amber, Charlotte and Lawrence

  • Charlotte “我们在这里做翻跳弓。是跳过去,跳过去再跳过去然后踢到一个东西,踢到一个柱子然后再转回来,再回到原地,很好玩。还有我们三个一起做了翻跳弓,我们三个就跳跳跳……..” [We are playing ‘jump and roll’. You jump, jump and jump then you kick one thing and come back to the beginning. It’s interesting. We three make it and jump and jump and jump……]
  • Lawrence “The jump, because Charlotte and Amber and me say jump, then jump over this (skittles). Jump in the numbers and this (skittle) is fall down. Amber is first, then Charlotte and then me. Because I like this game, because I play all time my home with mummy and my sister.”
  • Amber “我的游戏叫‘太空翻’,我最喜欢玩太空翻。从这里跳到那里,再翻一个跟头,再翻跟头。我把它弄倒,然后再跳跳跳。是Lawrence想到的。我喜欢玩这个游戏。[My game is called ‘Space Somersault’. It’s my favourite game. You jump here to there and turn, a somersault, then another somersault. I break it down and jump, jump, jump. Lawrence thought about this game first. I like to play this game.”


The Skito Game

by Jooeon and Seungbin

  • Jooeon “Knock down bowling pins using ring.” [in Korean]

https://twitter.com/NISPreKK1/status/1101003791611060225

What games can you create to express yourself?

When students have AGENCY they…

  • are actively engaged in various stages of learning, including: thinking about, planning, modifying and creating
  • are actively involved in discussion, questioning and by being self-directed in their creating (as opposed to passive receiving)
  • apply their understanding of concepts through the construction of their projects/play
  • make connections to the real world by taking past experiences into their play worlds
  • have an active voice and stake in the classroom/community
  • face challenges and are given the freedom to independently overcome these or fail through trial and error or experimentation
  • are risk-takers
  • express their theories of the world and these are honoured in the environment
  • reect on their actions and self-regulate.  (IBO, 2017)
1 2